Thursday, February 28, 2019

Lepin 15009 Not Lego Petshop Set Review - Part One

Welcome back!  It's been over 2 years since I bought the Lepin 15009 Pet Shop, and I just finally got around to building half of it.  Let's take a quick look.

There's two buildings in this 2032 piece set.  Big enough to fill up this blue bin.  For this post I will concentrate on the Pet Shop.  The adjoining Townhouse will be reviewed in a separate post.

As I'm putting this together, I notice that the layout is very efficient and would make a good template for my future custom modular buildings.  I like the foldable staircase going to the second floor and the adjoining store front.

Having said that, I do find that there's a lot of wasted space in the back.  It would have been better if the Lego designer had increased the depth of the modular by 2 or 3 studs.

 Currently, there's enough room in the Pet Shop for 2 kennels, a fish tank and a bird stand.

There's also a little table and cash register.  I've got all these Friends style pets that I can finally use now in the pet shop.  If I expand the footprint of the building, I can add more kennels and use up some more of the animal figures.

Second floor of the pet shop under construction.  Don't mind the mess.

 While the second floor is adequately furnished, I wasn't particularly enamored with the furniture.  I decided to completely remove the fireplace and the moved the provided coffee maker to the stairwell wall.  I also replaced the chair that came with the pet shop with a sofa instead.  The dog minifigure is originally from the main floor kennel but he got adopted by the girl minifigure.  Sorry, but she doesn't come with the set.

Second floor updated.

 Second floor rear view.

 Pulling away the front facade gives a better view of the second floor flat.

 I need to start changing all my modular buildings so that walls can be pulled away for viewing.  It definitely makes picture taking easier.

The third floor consists of a bed and and a lamp (not shown).  I changed the bed from green to pink, just to use up some pink brinks.   The open concept wastes a lot of space.

 I don't particularly like the three windows on the third floor.

 Third floor exterior.


 If I had to change this model, it would be to increase the footprint of each level of the building.  The third floor would benefit from the addition of a bathroom if there were more floor space available.


 Just a few more pics.

There are four minifigures that come with the pet shop set.  There's one minifig face that looks different than the rest.  I'm not sure if it's a one-off misprint problem or if this is consistent on all the Lepin pet shop sets.

I've now decided that I will definitely start tearing the building down to rebuild it and make it larger on all levels.   Time to get to work, soon you soon!

Sunday, February 10, 2019

Not Lego Xingbao Home Furnishings - The Gym XB1401-D Set Review


Hey, welcome back!  Time for another not Lego set review.  This one is the Xingbao brand Home Furnishings series XB-1401D, the Gym.  I acquired this set a while back, but I was thinking about making a gym out of one of my modulars, and one set wouldn't be enough, so I bought another one.

A reminder that Xingbao makes their own Lego like sets but these are not cloned or bootlegs of Lego sets, so if you are a Lego fan and want to buy this set, you won't feel guilty about it.  My reviews of the some of the other Xingbao Home Furnishings series can be found here.


There are six bags of parts but not I'm not sure what the actual part count is.  There's lots of accessories as we will see later.


 Instructions to build the gym come via a two-sided instruction sheet.

So, since I bought my first Gym set and this new one, it looks like Xingbao has changed the mini-figure style.  The first one was like the Lego style and the new one has different arms and legs.  The legs on the new set already came pre-attached to the torso for the new figure, so I just had to assemble the ball joints for the arms and insert them into the torso.  Be careful though, these parts are really small.  The hands they use remind me of the ones used by Sluban brand minifigures.


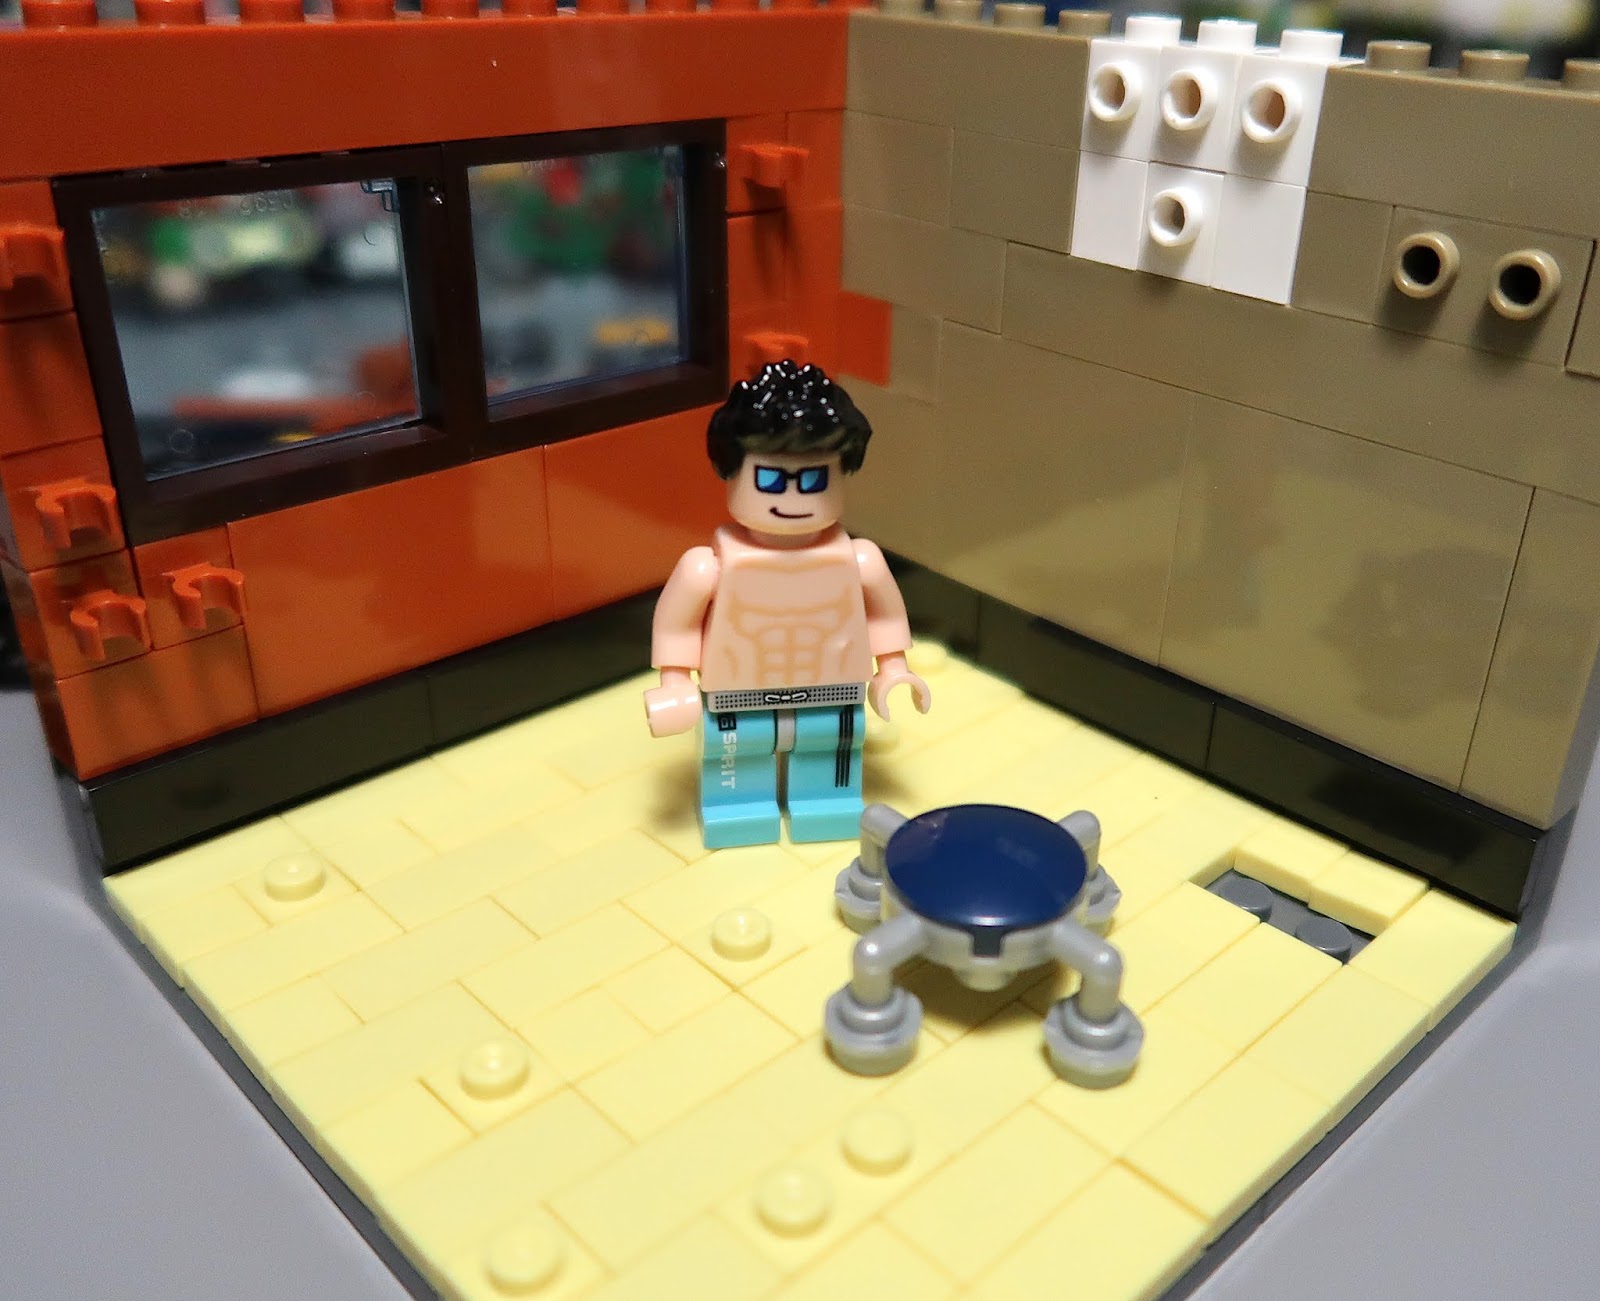
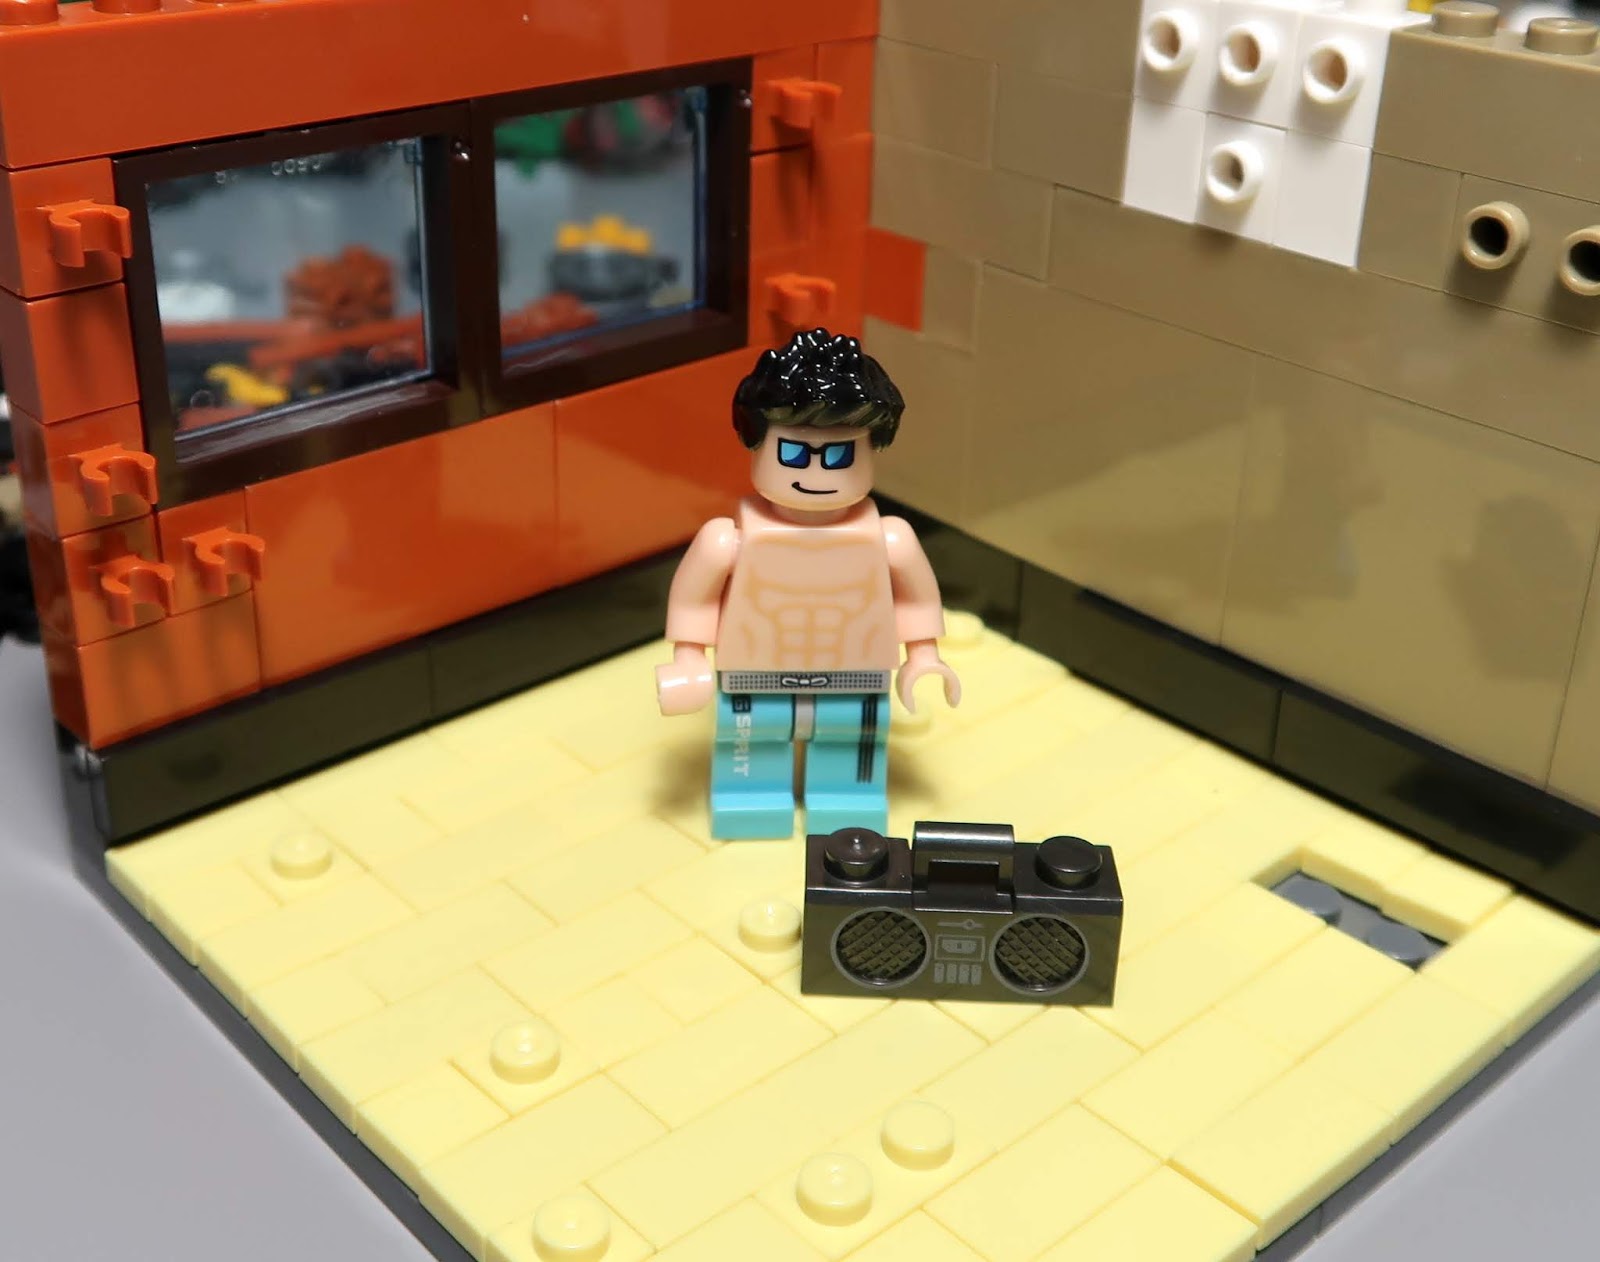
So here's the gym room almost assembled.   It has a yellow tiled floor and two walls, one in dark orange and another in tan colour.  It makes a nice contrast.  There's also two windows with glass, that came packed separately in their own bag to prevent scratches.

What I really like about this set is the amount of accessories you get like this first example of  realistic looking gym mats.

Here's a cool little stool.  In case you were wondering, the first generation of the Xingbao Gym mini figure is shown here.

 A punching bag!   No gloves are included in the set though, boo.

Gotta have some tunes while one is working out, so here's a cool ghetto blaster (do they still call them that?).

 Got a hoop but no ball either, damn.

 The two bros are really flexing it with these dumbbells.  With the two figures side by side, you can see some differences in their track pants.  The older one has a black piping down his left leg, but both have the Spirit logo on their legs.

 I'm not sure if this is supposed to be a storage locker or what, but it's tall!

Nice little treadmill.  After I took the picture, I realized I used the wrong parts on the treadmill.  There are two printed pieces that make up the information console on the treadmill.  I swapped in the right pieces in subsequent pictures.

 This workout bench looks like it will do the job.  The headrest will move up and down.

A small table and mug is another cool accessory.

 Finally, The larger weights are finished in a metallic silver.  The weight stand comes in a metallic pewter finish.  Nice!

 Here's the extra parts that were leftover after building the gym.  The sticks were supposed to go on the window wall, but I added some of the surplus technic washers to make extra dumb bells.

Here are some bonus pictures of the latest minifigure showing off his flexibility.

You can pretty much extend his arms all the way out perpendicular to his body.

 Or you can bend his arms upwards.

Even walk like an egyptian, lol.


Both figures come with back printing.

This is how the complete Xingbao Gym set looks like, minus the extra minifigure of course.

 And this is how it looks like when you put two of the gym sets together.

 In the near future, I hope to build a new modular building that can incorporate all of the gym accessories into a single place, but make it look a little more cohesive and spaced out.  I've already got some extra gym worthy minifigures on order.


I really had fun with this build and can definitely recommend the set.  Hope you enjoyed the pictures and as always, feel free to leave your comments and questions in the box below.   See you next time!

Brand:  Xingbao
Series:  Home Furnishings
Set number: XB1401D
Number of pieces:  Unknown
Number of minifigures: One
Rating: 5 out of 5 for all the accessories and play value.

Wednesday, January 30, 2019

Lepin 15039 Not Lego Roller Coaster Set Review - Part Two

Hey there!  Sorry it took so long to post my build of the Lepin Roller Coaster 15039.  I bought the set from Shenzhen China (see more about that here) during my vacation to Hong Kong.  After the trip I got sick for a couple of weeks and then I got busy with other things and then just took my time on the build.  

Anyways, here's the pics. Warning!  This is a massive picture dump, so I hope you have some decent internet speed.

Here's the goods, lots of parts bags and the huge raggedy manual.

The sticker sheet looks pretty good, although I haven't applied any of them yet.

Just a glance at the manual, the instructions are probably lifted directly from the Lego version.

Good assortment of minifigs.  The yellow and blue ones have Lepin logo on their back.


The popcorn vendor.

No wonder it took so long to build the roller coaster, there's only a small crew working on it.


This black piece wouldn't fit into the studs, but luckily I had another piece to replace it with.


The gears are really problematic on this set.  Especially the ones in the middle of the pic, and there's three sets of them.   They don't turn very well at all.

Same two guys now working on the other side of the roller coaster.


Almost all done with the signage.

A sudden realization, that this thing is huge.  It's pretty much occupying my whole build table.   Not sure where I'm going to put it after I'm done building it.

A couple of track pieces need to be hoisted in using the Tower crane.

Unfortunately, one of the workers took a tumble, but Emergency services responded right away.  Let's hope he makes a full recovery.


This set comes with a ticket booth and a concession stand.   After building it the first time, I decided to remove the booths.  I mean who eats ice cream and stuff right before you get onto the roller coaster?


Almost done!   Just need to attach the last few pieces of track and hook up the chain.

Big opening day crowds.

Go see the clown to get your tickets.


I moved the height check to the coaster entrance.  It was originally near the steps leading up to the waiting platform.  I figured by that time you had already bought your tickets for the ride that it would suck if you failed to meet the height requirements.  In my build, you would check your height before buying the tickets, to avoid being disappointed.   In the above pic, the roller coaster staff (dressed up as a unicorn), would check to make sure you were tall enough to go on the ride.  If you pass, she opens the gate to let you in.   The brown refuse bin is for patrons to toss out all their food and drink before getting on the roller coaster.


Woo!   Actually my Lepin coaster cars don't glide so easily on the track.

Here's a couple of roller coaster employees showing up for work.

All employees have to wear costumes.  Here are a couple of them in panda bear outfits.  The waiting girl is not impressed.


Heard some strange sounds coming from the gears, maintenance crew going to check it out now.


Another staff member shows up to help with the crowds.  Walkie-talkies let staff give each other help and status.   I put in some yellow barriers to direct patrons back out after riding the roller coaster.  The old way let too many people sneak back in for free.


 There you have it, my Lepin roller coaster build.   I had to rebuild parts of the roller coaster a couple of times because some parts would fall off, especially the gears under the platform where to get on and off.  Some pillars would not stay together so I used longer technic pins through the centers.

At this point I can manually crank the driveshaft and it will drive the chain to move the coaster cars up the track, just not smoothly.  The wheels at the top turn and help to move the cars along, but I think they are the major source of friction on the drivetrain.  In future, I might replace the gears, but for now the Lepin Roller Coaster still makes a nice display model. 

Thanks for spending the time to look at all the pics!  If you have any questions or comments please leave them below.

Set:  Lepin Roller Coaster
Model:  15039
Lego set: 10261 copy
Number of pieces: 4619
Number of minifigures: 11 (construction workers, mascot staff and and extra patrons not included)

My rating score:  3 out of 5 - some parts needed replacing, doesn't function like the real Lego set.  Displays ok though.