Saturday, March 14, 2020

Sembo 601065-601068 Not Lego Japanese Shops Set Review

Sembo Japanese Shops


Hey what's up everyone!  Welcome back to Its Not Lego, where I show you my latest haul of alternate and knock-off brick sets.  A couple of months ago, I saw these little Japanese shops on Aliexpress and had to get them.  Well this week, they finally arrived and I've had a blast building them.


There are four different Japanese shops in the series, made by Sembo.  


Each set comes with a double sided instruction sheet, stickers and 4 bags of parts.  They also come with 2 minifigures, one male and one female.

Here's something interesting, you have to assemble this guy's feet below the knee joint separately.  This was the only minifigure in the entire series that I had to do this for.

All of the minifigures are nicely detailed with back and arm printing.

Each set gets an individually wrapped fabric banner and a sticker sheet.   At the time of these pictures, I still hadn't applied any of the stickers yet.

Here's another oddity, this 5 stud tile piece.

 Here's the artwork for for the four sembo shops.  Clockwise from top left, there is a takoyaki shop, a sushi stand, a shaved ice shop, and a ramen stand. Let's now take a closer look at each set.

Sembo 601065 Takoyaki shop


The box art indicates that the takoyaki set is set 601065 and has about 177 pieces.

 Here's the assembled set without stickers.  The takoyaki set comes with an two fabric banners.  On one side there is a lantern and on the other is a free standing sign.  There are 24 takoyakis being made, four sauce bottles and two gray mugs.  There's also a yellow bowl, which the minifigure is not balancing on her head, it just looks that way in the picture.  Each banner has convenient holes cut-out of them.  You then attach the shop banner via small bricks.

 Here's set 601065 from the back.  Each shop is mounted on a gray 16x10 stud plate, however not every shop uses that much space. The shopkeeper has to stand on a platform to oversee his wares.


The minifigs.


The sticker sheet  for the takoyaki shop.

Sembo 601066 Sushi shop


Next up is the sushi shop.  Box art says it's set 601066 with 178 pieces.

The sushi shop doesn't get a roof but does have four different signs, none of which I stickered.  This sushi chef must not be very good at his craft because instead of using a sharp knife, he's got a giant cleaver.

This shop only has room for three customers, which isn't unusual in Japan because there shops are sooo small there.  Luckily there are three stools so you get to sit down at this shop.  Some sushi shops in Japan make you stand up while eating, true fact!

Around the back of the sushi shop we see that the shopkeeper also has to stand on a platform.  And here I thought that the Japanese people were taller.


The minifigs.


The sushi shop stickers.

Sembo 601067 Shaved Ice shop


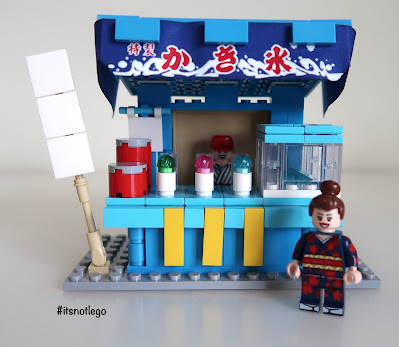
The shaved ice shop is Sembo set 601067 with 168 pieces.

This bright blue shop really stands out next to the other shops. The blue banner wraps all the way around the roof. On the counter there's a giant ice machine and three servings of shaved ice.  I don't know what the two red urns are supposed to be.

The back is fully enclosed, but luckily the roof hinges upward so you can put the minifigure inside the shop. Although you can't see it, the shopkeeper stands on a platform.


The minifigs.


The sticker sheet for the shaved ice shop.

Sembo 601068 Ramen shop


The last set is the ramen shop, set number 601068 and 169 pieces.


This ramen shop has a red lantern and free standing sign.  Two stools and two bowls.  Bonus accessory is is bicycle which is used to deliver the ramen.

 Around back we see thatramen seller has to get a lift.


The sticker sheet for the Ramen shop.

Street View


 I took one of my 32x32 stud baseplates and put all four shops on it to give it a Japanese street feel.  I also added some extra minifigures to make the scene look a bit more lively.

Final thoughts


They are all very unique looking and the build quality is great.  I would have preferred printed pieces instead of all the stickers.


The minifigures were excellent, each printed nicely in their kimonos, which I'm pretty sure hasn't been done in any Lego minifigures.  If you know of any, please let me know.

What bothered me about each of these sets is that they are too tall.  I didn't like the fact that each shopkeeper had to stand on a platform.  The counter heights were way too high, like over the minifigures head in some cases.

 I encountered this same problem in the Sembo french fries stand set.   The Sembo designer needs to make these stands and shops more in line with minifigure heights.   But that's just me, I guess. What do you think of these sets?  Do you think they look ok?  Let me know!

So I got my sets off Aliexpress for about $10 USD each or a bit lower if you buy all four sets. 
Thanks for looking and see you next time!  Bye!
Monday, September 30, 2019

Sembo 107006 Wandering Earth Cargo Truck Set Review


Hey, how's it going?  Thanks for dropping by to Its Not Lego!   Earlier in the year I watched the Netflix epic Chinese Sci-fi movie called the Wandering Earth.  


In the movie, they depicted some awesome looking transport and cargo trucks.
It wasn't long afterwards that you could find different version of the trucks as Lego style building sets on Aliexpress.  All of them are made by the Sembo brand of bricks.  I thought they really looked cool but I wasn't on planning on buying them because my brick building tends to lean towards City and Modular block sets.

But then, during this year's Aliexpress 8-28 sale, I couldn't pass up buying a set.  This Aliexpress store had all of the Wandering Earth truck sets on sale, so I decided to buy the 1446 pieces Sembo 107006 Cargo truck.  I got the set about 3 weeks later and just finished building it.   Here's my pictures from the build.

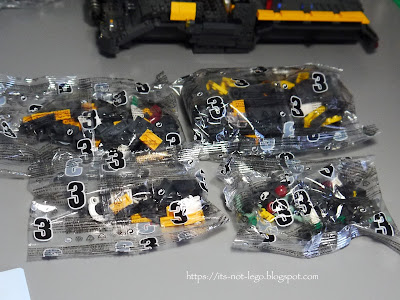
Inside my package, there was a large cellophane bag, that contained 5 smaller bags, an instruction book and a sticker sheet.  Each of the subsequent bags contained more numbered parts bags that were all matched the steps in the instruction manual.   I took pictures of the cargo truck after completing each of the steps.


The instruction manual.

 Lots of stickers.

Step #1

 All the parts for step one will let you build the minifigs and the cargo truck chassis.

There are four Lego style minifigures that come with the cargo truck.  You get one guy in a blue jumpsuit and three more figures in red space suits.  You can choose to pose your figures with either their hairpiece or helmet.

The minifigs all have backprinting.  The girl minifig has two different faces.

The truck chassis and front bumper.  Weird how Sembo starts building part of the wheel arch in step one and then continues in step two.  They could have just excluded it in step one and started to build it in step two.

A closer look at the front of the truck.  My ladder kept popping off during the build.

Chassis rear.

 I flipped the chassis over so you could see the underside.

Step #2

Step two will complete the wheel arches and start building the cargo truck cabin.

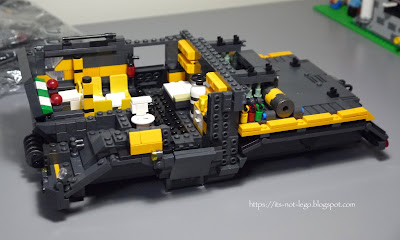
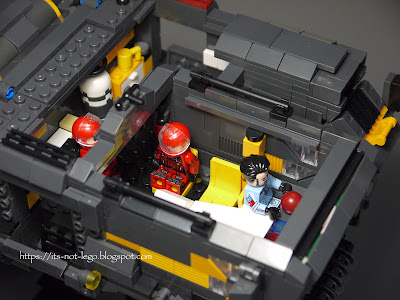
Some interior features include a bed, a cabinet with drawers and an air tank.  The lower part of the doors are hinged and extend down and outwards.

Details on the rear of the truck.

Side profile.

 Looking from back to front.

Step #3

 Step three adds more details to the cabin interior including the cockpit and extra seating.

Front windscreen and some walls go up.

Yup, this set even includes a toilet.

The instrument panel and long sloping console.

Not sure if this is supposed to be the power plant for the cargo truck.  The storage unit doors don't open because they sit too low.

Right side profile shot.

 Left side profile shot.

Step #4

 The cargo truck really starts to take shape on step four.  It includes the construction of the power plant and remaining exterior walls.

I got tired of the ladder popping off so I elevated the truck to make it easier to add parts.

Storage tank and rear struts added.

The completed interior.

There are door openings on both sides of the cargo truck.

Front view.  Looks kind of like a spaceship!

The downward facing vents look really cool.

 Another look at the front of the truck.

Step #5

The truck's giant wheels are installed and the roof panels are added in this final step.

Giant tires.

There are wheel covers that go over the red rims, but I decided to leave them off because I think the red rims look really good just the way they are.

Ok, let's get this truck on solid ground.

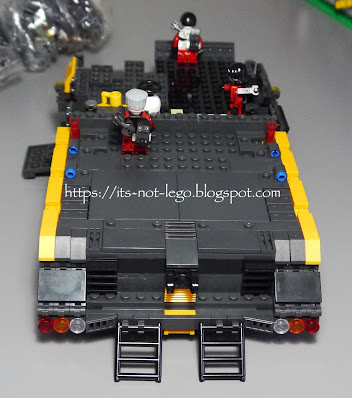
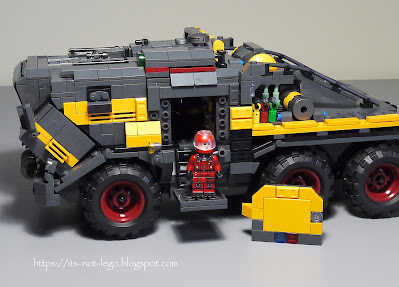
Here's the completed right side of the cargo truck with entry ramp deployed.

This is my favourite view of the cargo truck.

Left side view.

Rear view.

Profile view.

Left side door panel removed to allow easier egress.

Right side door panel removed.

Final Thoughts


I really enjoyed building this cargo truck.  I think it has a very unique look and looks amazing, especially the angled powerplant.  The truck is extremely sturdy and the brick clutch is excellent.  The six beefy wheels makes the truck roll very smoothly.

Things I didn't like was the interior and that included the toilet, and bed.  I mean the toilet doesn't even have it's own compartment or room, it just sits there out in the open.  Talk about total lack of privacy.  I also think the bed and cabinet are completely unnecessary.

Finally, I thought there could have been more thought placed into the design of the exterior doors to allow proper access to the truck.  I would prefer that the doors are hinged on both top and bottom to allow easier access.