The Lepin Green Grocer 15008 is my sixth bootleg Lego modular building. It is a knock-off of Lego's Green Grocer modular set 10185. I wish I could say that the building process was as smooth as the previous five buildings, which include the Cafe Corner, Fire Brigade, Town Hall, Parisian Cafe and the Detective's Office.
However, as soon as I opened my large package of brick parts, I knew something was wrong. The Green Grocer base plate is supposed to consist of two pieces of 16x32 thin green tile, however I only received one tile with my building set. I raised a dispute right away with the seller on Aliexpress.
Fortunately, I happened to have an extra 32x32 thick baseplate in my brick parts stash, so I was able to start building my Lepin Green Grocer without much delay. Here's my visual record of building the Lepin Green Grocer modular. As with my previous posts, I will take pictures of the progress after each 10 steps or so. I will be using the Lepin instruction manual for reference.
You are visiting http://its-not-lego.blogspot.com.
Step 10
When you get a Lepin modular, you get a big package of brick parts. The big package is made up of smaller bags containing similar sized parts. Each parts bag may or may not contain a number. Usually there are 40 or 50 bags of parts that make up a modular building. Before opening any parts bag, I will typically sort my parts bags in numerical order to see if I'm missing anything. In this particular instance, I noticed one of the bags containing sand green 1x8 bricks had been ripped opened. Also I received a duplicate bag of 1x6 gray bricks. So at this point, I'm unsure if my Green Grocer will have all the parts, but I figure I will address any deficiencies when I get to it. For this Lepin Green Grocer set there is supposed to be 2462 pieces.
Having replaced the missing base plate with my own, here's the Green Grocer floor for the first level all tiled in at step 10. I like the tan and light yellow floor tile. I should point out that the Lepin modulars use a thicker base plate than Lego does. Since I don't have any of the original Lego modulars to integrate with, I've been using the Lepin supplied thicker base plates instead of reverting to the thinner baseplates. I was lucky that I bought the thicker green 32x32 baseplate about a month earlier with plans to replace the two base plates of the Lepin Cafe Corner with just one. Now, I will just keep the Cafe Corner the way it is as use this new baseplate for the Green Grocer instead.
Step 20.
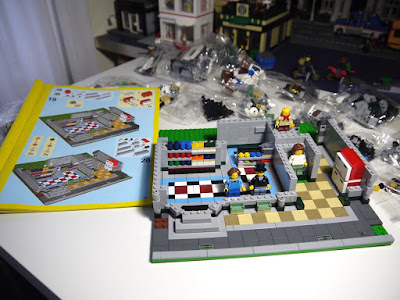
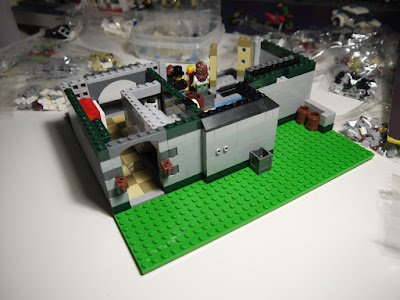
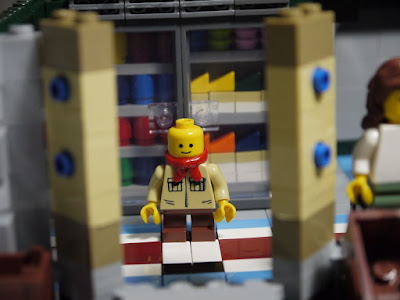
Moving along to step 20, I've put together the first four minifigures. There's a lady who looks after the store, a young boy scout, another lady and a man with top hat. Sorry guy, but the top hat has to go.
The first floor walls are in place and some of the merchandise for the store shelves has been put on display. There's a large bank of mailboxes and the stair well to the second floor is starting to take shape.
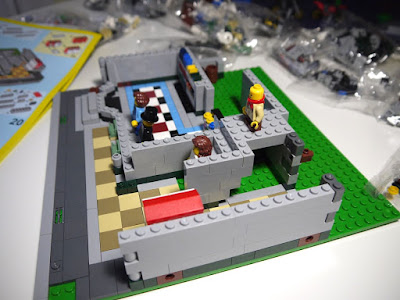
A quick rotation of the base and we can see the rear of the Green Grocer's first floor.
Some pictures of the side view.
Step 30

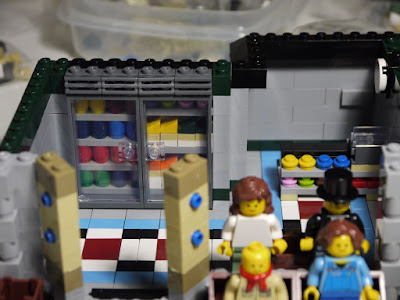
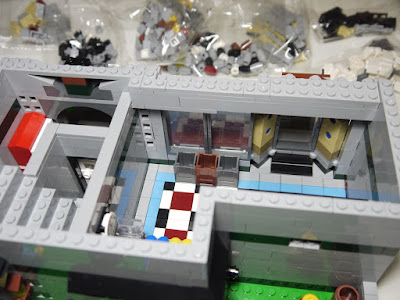
I would say the first floor of the Green Grocer is at about 70% completion. I didn't put any of the fruits or vegetables into their bins yet, but at this early stage, I just end up losing them because the pieces are so small. See those two holes in the archway? I make them disappear later in step 40.
I like the cooler at the back of the shop. In fact I liked it so much, I made a copy of it for my Hsanhe Seven Eleven modular upgrade.
Here's the side view of how things look after step 30. Still needs doors and windows to be installed.
Another view from overhead. We got the door into the staircase put in.
Here's the back side of the first floor, step 30. Some light fixtures have been added here.
And I couldn't find the little guys cap yet, hopefully it will show up soon.
*** http://its-not-lego.blogspot.com ***
Step 40
Doors and windows have now been put into place on the first floor.
Here's a closer look.
Here's how things look around back. I moved my dumpster here from the Lepin Parisian Restaurant set. It was taking up too much room at the back of that set.
When it came time to complete my staircase, I found that I was missing all of the 2x4 gray bricks. Instead I think they gave me an extra bag of 1x6 bricks by mistake. Luckily the 2x4 grays are a common brick for me, so I managed to continue the first floor without any further problems.
More storage bins that I need to fill up later.
Despite numerous tries, I could not get the stupid sextant part of the light fixture to stay in place with the holes in the archway. They kept falling out so in my frustration, I decided to dispense with them altogether. So what you see in the picture is how the light fixtures look like now.
Step 47
Here's the completed first floor staircase with finishing tiles.
The blue and white canopy has been installed above the front windows. Street lamp and fire hydrant have been added too.
The lady minifigure gets a baby carriage, but sadly no baby minifigure. I really was hoping for one. I still haven't found the red baseball cap for the young boy minifigure. Hopefully it will show up, when I build the second floor of the Lepin Green Grocer.
Here's a summary of my Lepin Green Grocer changes. There will be more changes later as I continue the build.
- replaced missing 16x32 base plate with larger 32x32 thick baseplate
- replaced missing 2x4 gray blocks for staircase
- did not install light fixture details on either side of front archway
- added dumpster from Parisian Restaurant set
You are visiting http://its-not-lego.blogspot.com
That's it for now, hope you have enjoyed the pictures of the Lepin Green Grocer modular this far. I will post the second floor build pictures soon.
