Monday, February 21, 2022

A year in review, all the alt Lego I bought in 2021

Hey brick fans, thanks for dropping by to Its-Not-Lego.blogspot.com!

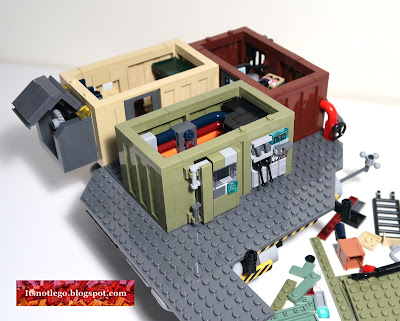
Now that we are fully into 2022, I thought it would be fun to review all of the alternative Lego sets and minifigures I bought during 2021.  In addition to the lists below, I also bought a lot of loose bricks and accessories to make my own custom modular buildings, but they are too many to list here.  

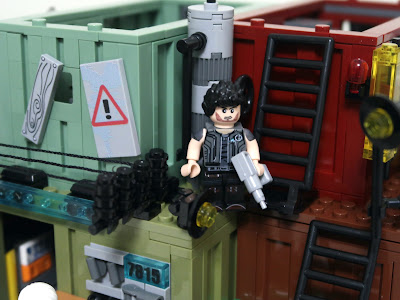
I've broken down my buys into three major themes: Modular buildings, Sci-fi/Star Wars, and City themed sets and vehicles.  I curtailed my spending of minifigures this year, but still bought some Star Wars Clone troopers and Mandalorian figures. 

I also calculated how much I spent on alt Lego in 2021. On average it was about $150 CDN per month.  How does that compare with what you spend on a monthly basis?  Please feel free to let me know in the comments below!


Modular buildings I bought in 2021

Panda 10201 Bookshop

Happy Build YC20006 Photo Shop

Happy Build YC20008 Music Shop

Sembo 601143 Coffee Shop

Modular MOC C4903 Flower Shop

Modular MOC C4226 by Kristel 

Juhang 86012 Garden Street

JieStar 89100 Jazz Cafe


Sci-fi themed sets I bought in 2021

MOC 20383 Blade Runner Spinner (x2)

MOC 56363 Rey's Speeder

MOC 53017 AAT

MOC C6937 Rebel Landspeeder

MOC C5518 Probe Droid

King 19046 Republic Gunship

Pantasy 81101 Spirit Cage Incarnation

MOC 35960 AT-RT

MOC 42421 Demolition Man car by RollingBricks


City sets I bought in 2021

Wange 3625 Fire Truck

Xingbao XB3027 Offroad Vehicle

Qunlong QL0319 Train (x2)

Gudi 9222 Fire Truck

Sembo 601095 Hong Kong Streets

Winner 5027 Truck

MOC C5333 Garbage Truck by Mochimaster

Qihui 5804 Technic Offroad truck

Happy Build YC-QC009 Food Trucks

Bela 10871 Camper

Bela 10992 Arctic Exploration Team

Bela 10997 Arctic Mobile base 

Decool 22034 Mini Vehicles


Minifigure sets I bought in 2021

Bela/Leri 11389 People Playground

WM6095 Bad Batch minifigures

WM6092/WM6085 Mandalorian minifigures

KT1034/KT1035 minifigures


How much I spent in 2021

I spent a total of $1815 CDN this past year, up from $1265 CDN that I spent in 2020 which is about a 30% increase over the previous year.  I have been tracking my yearly expenditures of alt Lego since 2013 and I spent the most ever in 2021.

Total spent: $1814.85 CDN averaging about $151.23 per month

Month with the least spending: Nov - $0.00

Month with most spending: Mar - $443.39


What's ahead for 2022?

During the month of January 2022, I will have only spent less than $5 on alt Lego. For the remainder of the year, I foresee that will be spending a lot less on alt Lego. 

 Firstly, there haven't been many new sets that have piqued my interest at a price point that I'm comfortable with.  Since the pandemic and supply chain issues, there has been a dramatic price increase in alt Lego over the past few months.  Before, I could find many modular buildings selling for under $100 CDN, but these days the average price seems to be around $140 to $150 each.  I suppose that reflects the joint cooperation between the designers and alt Lego brands.  

Another reason I'm cutting back is due to the fact I have run out of room.  All of my modular buildings, spaceships and city vehicles take up a lot of space and I don't have any more room to grow.  I will probably have to start deconstructing some of my existing sets.  

I plan to focus more on building MOCs or enhancing sets I already own in the coming year.  As a result I will probably be posting less about new sets on Its-Not-Lego.blogspot.com and posting more pictures of my MOC builds on BricksandFigs.blogspot.com.  Please be sure to check it out if you get a chance!

How about you? Are you spending more on alt Lego these days or cutting back like me?  I'm curious to know!

Anyways, bye for now!


Tuesday, January 25, 2022

Not Lego GM Ultralite MOC-42421 (designed by Rolling Bricks)

Hey All!  I found this interesting little model on Aliexpress a few weeks ago. Thanks to Reddit user th3st0rmtr00p3r for helping me identify this vehicle as the GM Ultralite featured in the movie Demolition Man.  This not Lego vehicle was designed by Rollingbricks, whose instructions can be found on Rebrickable as MOC-42421.

I'd say that this car is about the same size as Speed Champion models based on the tire size.


The car is six studs wide but the windshield is only 4 studs wide.  The front appearance looks like one of those self driving electric vehicles.


Very interesting concept to have this wrap around back panel that hides the rear wheels.

If I could, I'd replace the red light with a trans-red piece for the taillights.

One of the cool features of this model is the swing up gull wing doors on both sides.


Interesting blue light on the roof, is it some kind of Lidar?

I kind of wish the door design used clear windows instead of these black and trans-black bricks.


According to the designer, this vehicle can fit two minifigures inside it.


The instructions from Aliexpress for this model were on 2 sheets of paper which looked like it had been photocopied.  The model number on the instructions is M1721.


I tried searching for Speed Champions but could only find one store on Aliexpress that has this model, so it will probably disappear soon.

Anyways, that's my blog post for this week!  Enjoy and see you soon!


Tuesday, January 11, 2022

Pantasy 81101 Spirit(Ling) Cage Incarnation Build Pics


Hi and welcome back to It's Not Lego, my blog where I review the latest not Lego branded brick sets.  In this blog post, I'll be giving you a detailed look at the steps I followed to build the Pantasy 81101 Spirit (Ling) Cage: Incarnation set.  

Use discount code ITSNOTLEGO at checkout


To see the completed set pictures, please part one of this post here.


The build consists of seven steps, although it's really only six steps because the last step just assembles the minifigures that are included.

Step 1.

Step 1 is comprised of 5 bags of parts.  As per the instruction manual, Step 1 builds the platform on which the rest of the structure sits and all the "plumbing" underneath it.

Opening all the bags, the majority of the parts are dark gray coloured.  We also find the Pantasy brick separator in step 1.  Want to guess how many pieces there are?

The platform is assembled by connecting several technic pieces together.


Here's the platform flipped over so that we can attach the cloud layer to the underside.  Nice conduit detailing around the perimeter of the base.


Printed tiles around the bottom.


These are the leftover pieces from step 1.  There's enough parts to assemble another cylindrical tank.

Step 2.

Step 2 uses seven bags of parts to construct two container homes.


Parts separated by colour, sort of.


Interior of the first container dwelling. Looks to be a workbench with tools, worklight and shelving.


On the other side is a bunk bed with a secret cabinet to hide beverages.  I remember this was shown in the anime, although I forget which episode.


Some sort of machinery with opening lid gets attached to the side of the beige coloured container dwelling.


With the remaining wall panel and door added, it can be seated to the base.


In the brown container, there is another bunk bed with a desk and a small cooktop with large metal pipes behind it.  More printed pieces, a computer monitor and a family photo on the bed.

Placing the next container onto the platform.  I like the red pipe extension with wheel crank.

Here are the leftover/extra parts from step 2.  The baseplates will serve as the roof pieces in the next step.  A random hotdog appears in this step, lol.

Step 3.


Five bags of brick pieces for step 3 builds the olive green container.


Parts unpacked.

Some cool conduits run into some of kind of power unit.

A heavy metal door and controls for the power unit are located on the outside. As this container is exclusively used to manage power, there's no bunk beds inside this one.

The baseplate pieces from step 2 are combined together to form the single roof that covers the three container units.

There's only a narrow alleyway to access the other two container units.

Viewing the containers from a different angle.

Here are the extra brick pieces after completing step 3.   Also show are extra embellishments for this level.  There's another control station, a ladder to the second floor, a telescope and perimeter barricades.  The first level is now complete, time to move on to the second level.

Step 4.


Step 4 adds two additional container units to the structure using 6 bags of parts.  Step 4 will also finish detailing the second level with accessories.

We see some cool printed pieces after dumping out the parts.

A unit for storage of tools and other items.  Here's where the missing 1x1 round tile was supposed to go.


The sand green container with bedding and supplies.

After placing the two new containers, the next step was adding in all the boxes, piping, wiring and signage that make up the second floor details.


More leftover pieces after step 4.

Step 5.


Six part bags for step 5.  The final container unit to build, this one in sand blue.

Mostly gray and sand blue pieces. 

The last container dwelling houses another 2 occupants based on the bunk bed.

Some exterior details.


A crane for lifting heavy objects to the different levels.


Leftover parts from Step 5.

Step 6.


Step 6 sees only 1 bag of parts.

These parts make up the overhead girders.


This part of the instructions was really useful as it helped me to precisely adjust the technic connector to the correct position.

Assembling the girders.

Parts leftover from step 6.

Step 7.


The last step saves the minifigures for last.

This set comes with six minifigures, but they can't be considered as Lego compatible because the torsos and arms are a different design.  One might be able to swap out the heads and hair with Lego compatible versions.

I found a screenshot of the minifigures.  Lowborn or dust people don't have names, only numbers, hence the only two highborn characters are Mark and Ran Bing.


Mark.

4277.

4068.

4079

0609

Ran Bing

I think I counted about 90 extra pieces leftover.


That's it!  Hope you enjoyed all the pics!   Bye!