Hey brick fans, welcome back to my blog!
Today we will review all the steps it took to build the mega sized structure which is the JMBricklayer Steampunk/Dino themed Marble Run set. In case you missed the unboxing of the building block set, you can find it here.
Recap
Here's a quick recap of the set. It has been under development for about 2 years and JMBricklayer launched the set as a
kickstarter campaign on June 21, 2024. It reached and surpassed it's funding goals in
record 9 hours, showing that there is a huge interest in this unique set!
Brand: JMBricklayer
Set and Number: Steampunk Marble Run Dinosaur Factory 70003
Theme: Fantastic Idea
Piece Count: 5391+ pieces
Age Rating: 14+
Numbered Bags: Yes
Stickers: No
Printed Parts: No
Minifigures: No
Lighting Effect: No
Motorised: Yes - 2 motors included
Powered: Yes - 6 AA Battery pack included
The construction of this gigantic set is broken down into 7 stages. As I mentioned in my previous unboxing post, the Marble Run set is subpackaged into three boxes, of which Box A contains parts bags labelled 1 thru 4, Box B contains bags 5 thru 7 and the third box contains the track and motors.
***
Warning: This is going to be a very long blog post, so feel free to take a break and come back anytime!
***
Stage 1 of 7
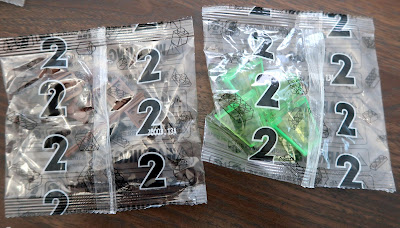
So of course we will start in Box A, bag 1. Bag 1 is broken down into 14 smaller parts bags.
For those who are wondering, the smaller bags are prefixed by 70003 with the numbers as follows: 1, 2, 3, 3A, 4, 4A, 5, 6, 7, 8, 9, 10, 11, and a bag that has no number. I'm guessing that maybe they needed to add more parts after the initial packaging, hence the odd numbering system.
The parts will correspond to stage 1 of the instructions as pictured above and all of this will be assembled on to the large 48x48 stud baseplate that is provided in the set.
If you need to preview the build and watch the JMBricklayer tutorial, you can find it
here complete with the instruction manuals available fr download.
Before we begin, you want to make sure we have a large workspace because the footprint of this set is enormous and you will need to have access to all the parts from the various bags.
BTW, a red brick separator tool can be found in the very first parts bag labelled as 70003.1. It's a useful tool that might come in handy later.
You can't just put the parts down on the baseplate willy nilly, you must follow the specific location of each part as designated in the instructions, because a mistake here, will impact the rest of the build. See the red dots on the page above.
It would be impossible to document every step in pictures, but I will point out some of the highlights as we go. We start by building the dinosaur platform (pages 4 thru 10), a nuclear reactor (pages 11 thru 14), a chemical tank (pages 15 and 16) and then we install the 9V battery pack (pages 23 and 24) and one of the motors (pages 30 and 31).

Remember that you need to supply your own fresh AA batteries, 6 of them, since they are not provided with the set.
A medieval looking nuclear reactor?
Ok, someone please tell me why there is a monkey inside the chemical tank?
It's not steampunk, if there's not a lot of steam! Lots of piping and handles which I totally forgot to attach back to the dino platform.
We placed the red flames randomly because it was hard to figure out the placement. Since they look to be decorative, I didn't worry about impacting any future steps, and if they get in the way, I can always remove them later. Did you notice the two frying pans on the flames? In hindsight I should have left the flames off altogether as you won't really notice them after the entire marble run structure is built around them.
Here's the how the Marble Run set looks after completing stage 1. I tested the functionality of the battery pack and motor here to turn the first set of gears. Luckily no issues with their operation. Ok, time to move on to stage 2.
Stage 2 of 7
There are a total of 20 smaller bags for Stage 2 and they are prefixed 70003 and numbered as follows: 12, 12A, 13, 13A, 13A, 14, 15, 16, 17, 18, 19, 20, 21, 22, 23, 24, 25, 26, 27, 28.

Yes, I got two bags marked 13A but the contents of each bag was different! Check it out!
In stage 2, we will be constructing the following features:
Steampunk Chemical Tanks (pages 36 and 78)
Dinosaur Steps (pages 35, 37 thru 43, 76, 79 thru 83)
Dinosaur Pit (pages 67 thru 71)
Motor #2 installation (page 62)
The first dynamic feature is the marble run is the moving dinosaur steps. There is essentially a ger driven camshaft underneath the dinosaur steps that makes them go up and down. There are two sets of these steps.
I tested the first step using the motor and it was ok, but I had difficulties on the second set of steps because they were jamming. I don't know if I got the placement of the cams wrong but it seemed that the 4 stud long technic pin used was interfering with the proper operation. I substituted it with a 3 stud long technic pin from my space parts, and then it worked ok after that.
Here's a pic I took with the Dinosaur pit and second motor installed, but before the second set of Dinosaur steps. Under the dinosaur pit is a two way diverter that will be later used to move marbles in different directions when the they are dropped into the pit.

And here the second set of chemical tanks and dinosaur steps are installed. The second motor is responsible for driving both sets of dinosaur steps, which are now working properly at the end of stage 2.
Next to the Dino pit, there is a large gear with chain drive that slips once in awhile, but I tried to get the tension as tight as possible. Not a showstopper at this point, hopefully not an issue later.
Stage 3 of 7
Here are all the parts bags for stage 3 with 14 bags in total and numbered sequentially from 70003.29 thru 70003.42 with no numbering anomalies.
There are two main components built in stage 3, the mechanical dinosaur and the base for the corkscrew elevator.
The mechanical dinosaur has to functions. The dino body is a diverter, so any marbles dropping into the top will be randomly redirected. The dino head moves up and down (driven by the big gear with the chain we mentioned in stage 2). The mouth of the dinosaur has a flame that will knock marbles into the dino pit when the head moves up or down. Hey, who let that guy in? Security, we have an intruder!!!
For the last component of stage 3, we build the technic base and frame for the corkscrew elevator (which will be built in a future stage).
Stage 4 of 7
In stage 4 we have a total of 16 bags of parts numbered 70003.43 thru 70003.58.
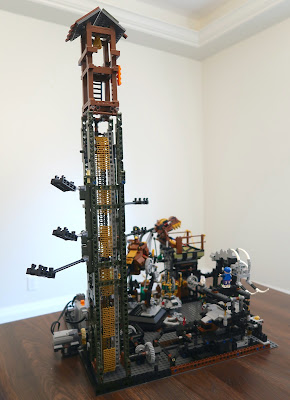
Stage 4 sees the construction of a vertical marble lift elevator (not the corkscrew, that one comes later).
There's a special warning in the instruction guide about it being a difficult assembly, but I don't recall having much issue with putting this part together.
After installing it to the baseplate, make sure to test that the tracks are moving properly through the technic frame by attaching it to the motor driven gears.
At the very top of the vertical lift sits a bell tower and again it looks like we have yet another intruder.
Ok, so I think I will end this part of the post here. We have just finished the instructions from the Manual A with the corresponding parts bags 1 thru 4.
Time to take a break and pick this up in part 2 of the blog post where will be review Manual B and assemble the Marble Run using bags 5 thru 7.
Thanks for staying with me for this long, hope you found the review of the JMBricklayer Steampunk/Dinosaur Marble Run helpful.
Don't forget to check out the
JMBricklayer website and visit their
Facebook and
Instagram pages to participate in their promotions and monthly contests where you can win free sets and get exclusive discount codes up to 60% off. For the non sale sets, you can use my special discount code itsnotlego15% to save an extra 15% off.
Bye for now!


