Showing posts with label funwhole brand. Show all posts

Sunday, January 29, 2023

The newest Funwhole set is the Ruined Temple of the Jungle F9010. Set Review coming soon!


I just built the Funwhole Ruined Temple of the Jungle and it looks amazing!  This set has 1242 pieces and includes a lighting kit.  Brand new to Funwhole are the three minifigures in the set.   Ok, that's all I can tell you right now.   

But you can shop their store right now and save 10% using my code ITSNOTLEGO.

Latest pre-order update: https://altbrickdeals.blogspot.com/2023/02/amazon-promo-for-funwhole-f9010-ruined.html

Monday, January 16, 2023

Lego Compatible Funwhole F9006 Steampunk Ore Train Building Block Set Review

Happy 2023 brick fans, hope you all had a great holiday season! Today, I'm sharing my review of the new Funwhole Steampunk Ore Train, which Funwhole kindly provided to me for this review.


Here are the details of today's set review:

  • Brand: Funwhole
  • Set number: F9006
  • Theme: Steampunk/Train
  • Number of Pieces: 1056 pieces
  • Stickers: Yes
  • Minifigures: No
  • Extra parts: Yes
  • Deformed or missing parts: No
  • Brick clutch and finish: Excellent
  • Age Rating: 8+
  • Size: 18.35 inches long and 5.48 inches high
  • Lighting: Yes!

Where to get the set


The Funwhole steampunk train building set can be found on their website here.
👉👉 Use my special discount code ITSNOTLEGO to save an extra 10% off your purchases from their website.

It can also available on Funwhole's dedicated Amazon store here.

Unboxing


Let's take a look at the boxed set.


The large Funwhole train set comes in their recognizable black box.  The artwork/photo on the box is stunning.  Inside it is jammed pack with goodies.  First off is the comprehensive instruction booklet, a separately packaged sticker sheet, several numbered parts bags and a mysterious black bag.


Opening up the black bag, we find the special lighting kit that comes included with the set.  There are 6 pouches of specially sealed lighting kit components.  

I think that Funwhole makes lighting kits a standard feature of their building block sets which they allude to in their slogan, creating "Whole Fun, Day and Night".  This is a nice feature that Lego sets don't come with.  

If you wanted to light up a Lego set, you would have to buy a third party light kit at extra cost.  Here, the lighting kit is already included in the very affordable price of the set.

The first 4 pouches numbered 1 thru 4 contain the LED lights, wires, connectors and specialized plates to mount the lighting to the train.  If you are unfamiliar with lighting kits, it is highly recommended that you review the section about lighting in the manual before you begin.

In the final two pouches of the lighting kit, we find a battery pack that uses 3 triple A batteries (not provided) and a tool kit providing a brick separator and a set of metal tweezers.  

In terms of powering the lighting, you have the option to use the supplied battery pack or plug the provided USB plug into a USB power source.  The tweezers are really useful in handling the fine wires in the light kit and I'm glad that Funwhole thought of this.

Funwhole uses the same lighting system as Briksmax.  For a detailed primer of how the lighting kits work, please check out my blog post here.

Moving on to the parts for the train set ...


The parts bags are numbered as 1, 2 or 3, each bag corresponding to a section in the accompanying manual.  We find that there are 5 bags for section 1, 5 bags for section 2, and 6 bags for section 3.

Building the Train - Section 1

Ok, let's get building!  I found the brick parts to be very high quality and nearly indistinguishable from Lego bricks.  No scratches or scuff marks on the Funwhole bricks unlike some of the other lesser known brick brands.  

The parts fit very well with just the right amount of clutch.  The manual is easy to follow and the steps clearly laid out.

Now, to add the lighting!  Remember to always test the lighting just in case there is an  unlikely component failure, it's rare but it does happen.  If any problems, contact Funwhole and they will send you replacement parts for defective or missing pieces.


Time to add the lighting!  In the above pic I have threaded the wire for the lighting under the axles and have tested them using the provided battery pack.  Even though you might not use it, it's a good idea to test that the battery pack works as well.  

FYI, you might notice that the battery pack is different than the one that comes with the set.  That's because I couldn't find any triple A batteries in the house, but I did have a double A battery pack from my other Funwhole sets, so I used that one instead with no issues.

The train axles are installed through technic bricks and do not use turnable trucks like other train sets I've built.  

Oh, you should know that this train is not internally powered so it doesn't come with a motor to drive the wheels.  Nor does the set come with any train tracks, even though it is Lego track compatible.  I already have train tracks from my other sets, but you may be disappointed if this is your first Lego style train set.

Building the Train - Section 2


Moving on to section 2 now.  Time to finishing building the engine.


Here's one gripe of mine.  I had a hard time trying to attach the roof to the cabin.  I ended up putting some of my own tile pieces around the top of the cabin to make it easier to remove and attach the roof.  I think Funwhole could have done a better job on the design here.

Speaking about the cabin, save for the interior light, there are no features inside of it.

Here are all the lighting details on the steam engine.  Don't forget that the under carriage is also lit up.

There are a few spare parts leftover after completing section 2 of the Steampunk train.  While this building set doesn't come with any minifigures, you do get an orange cat which you can place on your train.


Building the Train - Section 3


The last part of the Steampunk train is this fantasy hybrid passenger car and colourful ore on top.  The interior is empty.

Although the passenger car is small, there are three access doors.

The bottom and top of the car has lighting, as well as the interior and rear coach lights.


I found it was easier to attach the lighting wires from the passenger car to the expansion board on the steam engine first before joining it using the technic pin.


The different coloured transparent bricks gives it a nice lighting effect!

The finished model!


So although the Funwhole Steampunk train came with stickers, I didn't put them on my model.  I think it looks ok with or without them.

Day time.

Night time.

Summary


I think that the Funwhole Steampunk Ore train set represents great value if you are a fan of steam trains or just building great Lego style sets such as this one.  The piece count to price ratio is very good and the added light kit really does make it a nice display model.  And it looks great in my not Lego city.

There were no missing or defective parts and everything fit really well.  The lighting installation was not an issue for me, but I think that some of the younger builders might need a bit of help from an adult.


If you are wondering if this train is scaled to display with minifigures, here's a picture of the train with some of my own minifigures.  Let me know what you think.  

I feel that the Funwhole steampunk train is larger than other my other Lego compatible trains, but it does run OK on my train tracks.  I'm not sure if you can integrate power functions and motors into this set to make it run on it's own, as I don't have any experience in that particular arena.

I'm not a fan of stickers for the most part, but probably Funwhole wanted to keep the price point down and using printed parts would increase the cost of the train.  That's probably also why they chose not to include any train tracks with the set, although I think that three or four pieces of track wouldn't really make much difference.

Finally, I have one question, is this a Steampunk train or just a regular steam train with a couple of gears on it?   It's definitely a fantasy steam engine with the colourful ore on top of the passenger cabin, but I don't feel you can really call this a Steampunk train.   Having said that, I'm going to give the Funwhole Steampunk Ore Train a solid 4.50 out of 5.  


Here's my reviews of some other Funwhole building block sets:


Don't forget to save an extra 10% on all your Funwhole purchases using my code ITSNOTLEGO.

Thanks for looking and see you next time, bye!

Wednesday, November 9, 2022

Lego Compatible Funwhole Lakeside Lodge FH9004 Building Set Review

Welcome back to It's Not Lego, my little space on the web that looks at all of the latest building block sets and brands coming out of China.

Today, we'll be doing a review of the Funwhole Lakeside Lodge, set number is FH9004 with 1969 pieces and it even includes a light kit standard with the building.

Now available on Amazon. Or you can purchase it directly from the Funwhole website.   Find my special code at the bottom of this blog post to get an extra 10% off their website pricing.

The Lakeside Lodge is reminiscent of a fishing lodge that sits on the water's edge. It has a main floor that consists of a cozy living room and well equipped kitchen.  There is a nice loft space on the second floor that accomodates a bedroom complete with fireplace.  


Funwhole is a relatively new building block brand that is making a mark in the Lego space. According to their website, they've been around since 2014 but only recently started to market building sets, focusing on unique design and innovation.  Unlike other brick brands, all of the Funwhole kits come with lighting included in the price of the set.

This is my second Funwhole set, the first being the rustic Wood Cabin set FH9001, which I had a lot of fun building.  You can find my review of it here.  I did an in-depth review of their lighting kit on the Wood Cabin set, so I won't be reviewing the lighting in this post.  Just know that the lighting kit in the Lakeside Lodge works the same way.

I want to point out that there are a lot of brick brands out there right now, but it all comes down to their customer service and whether they stand behind their product. I had some issues with my kit and Funwhole customer service came through with flying colours more than once! (We will discuss in detail later).


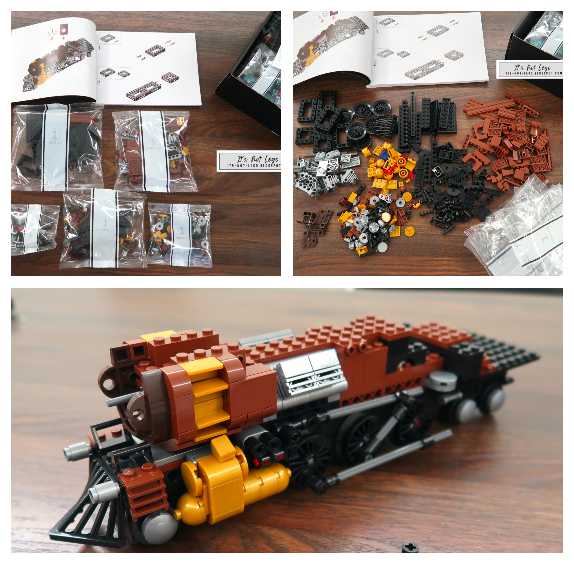
It's so great that Funwhole shipped me the Lakeside Lodge building set in the original box.  The presentation and the pictures on the box are really nice.


Also included is a very thick and detailed instruction manual, and a small sticker sheet.   


Additionally, there are four resealable envelopes that contain all the lighting components to make the Lakeside Lodge extra special.  

The large instruction manual makes it easy to follow the steps, but I will say however, it's sometimes difficult to ascertain the right colour of the pieces because there are different colours of browns, tans and greens in this set.  In that case, I usually take a stab at it and hope for the best.

The Lakeside Lodge has a standard 32x32 stud footprint but instead of one single baseplate the foundation is composed of 4 16x16 plates.  Although not required, I constructed a MILS base underneath to make the flooring more rigid and easier to handle.  This is something that I've started doing to all of my modular buildings, so it's not due to any deficiency of this set in particular.

To build the set, there are six major steps and there are six bags of parts pertaining to each step.  Within each of the large numbered bags, there were several smaller bags of parts.

As I started to build, I noticed that there was something odd about the bags of parts I had received in step 1.  There was a duplication of some bags and missing others which prevented me from continuing the build.  

I took pictures of the bags I had and contacted Funwhole customer service through an Instagram DM.  They were very quick to respond and we figured out which bags were missing from the set.

Here's a complete breakdown of the component bags by section that Funwhole sent to me.  I was missing bags 1.1-3 and 1.1-4.  Funwhole immediately shipped out the missing parts to me, and I received them right after the chinese Golden Week holiday.

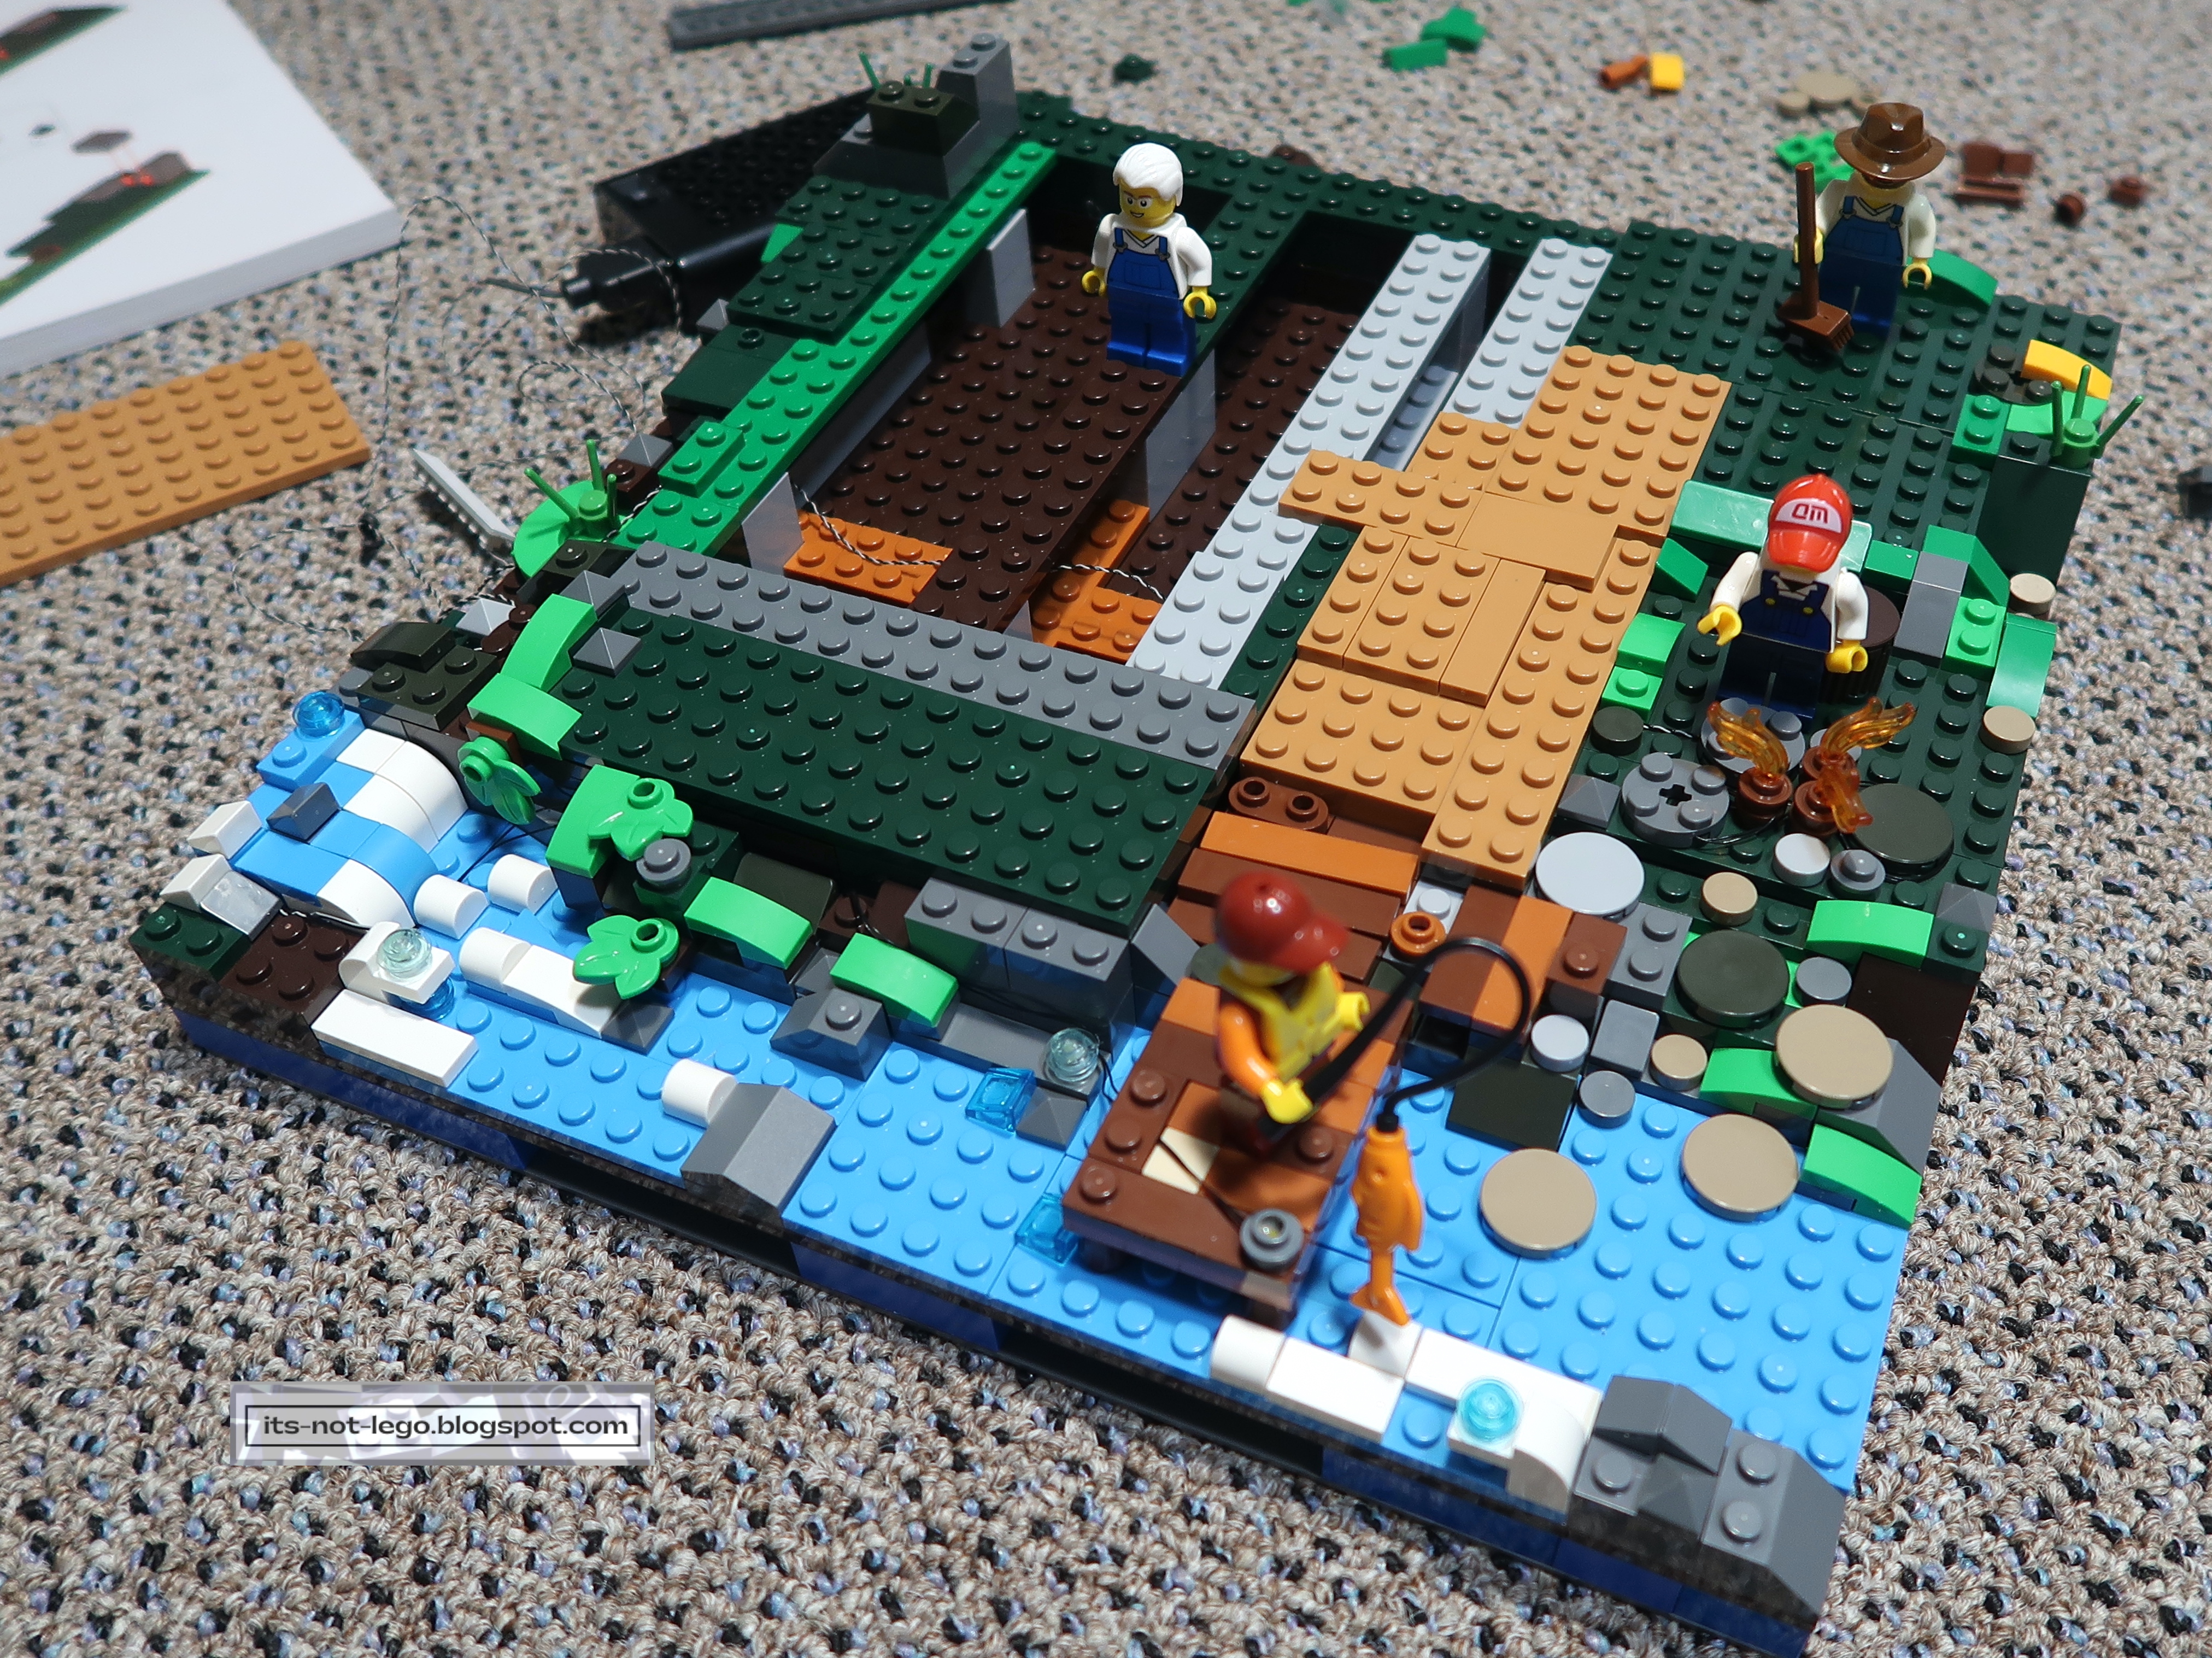
With the missing bricks in hand, I started making progress again.  As you can see from the above picture, the Lakeside Lodge set is a building that is located next to the water's edge.  I added some of my own minifigures just for fun.  As a reminder, there are six steps to the construction and this completes section 1.  Time to move on to section 2.


And then just as I thought everything was smooth sailing, this happened.  It looks like one of the parts bag had a bad accident and several of the pieces inside suffered some damage.

I let Funwhole know and within a week and a half, I had replacement bricks sent to me, quickly and painlessly.  Needless to say, I was really pleased with Funwhole's communication and promptness.


With the completion of section 2, the main structure of the Lakeside Lodge is apparent.

The interior consists of two rooms, the kitchen and the living room.  The kitchen features two cooktops, a fan hood, a coffee maker, a sink and loads of cupboards.


 The living room sports  couch with side table, TV and grandfather clock.  Behind the couch one finds a rack with hat, jacket and boots.  There's a small foyer which leads to the front door of the lodge.


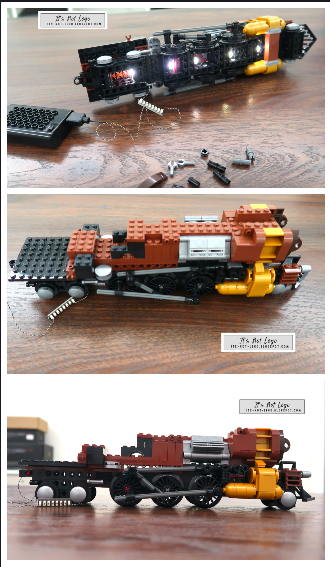
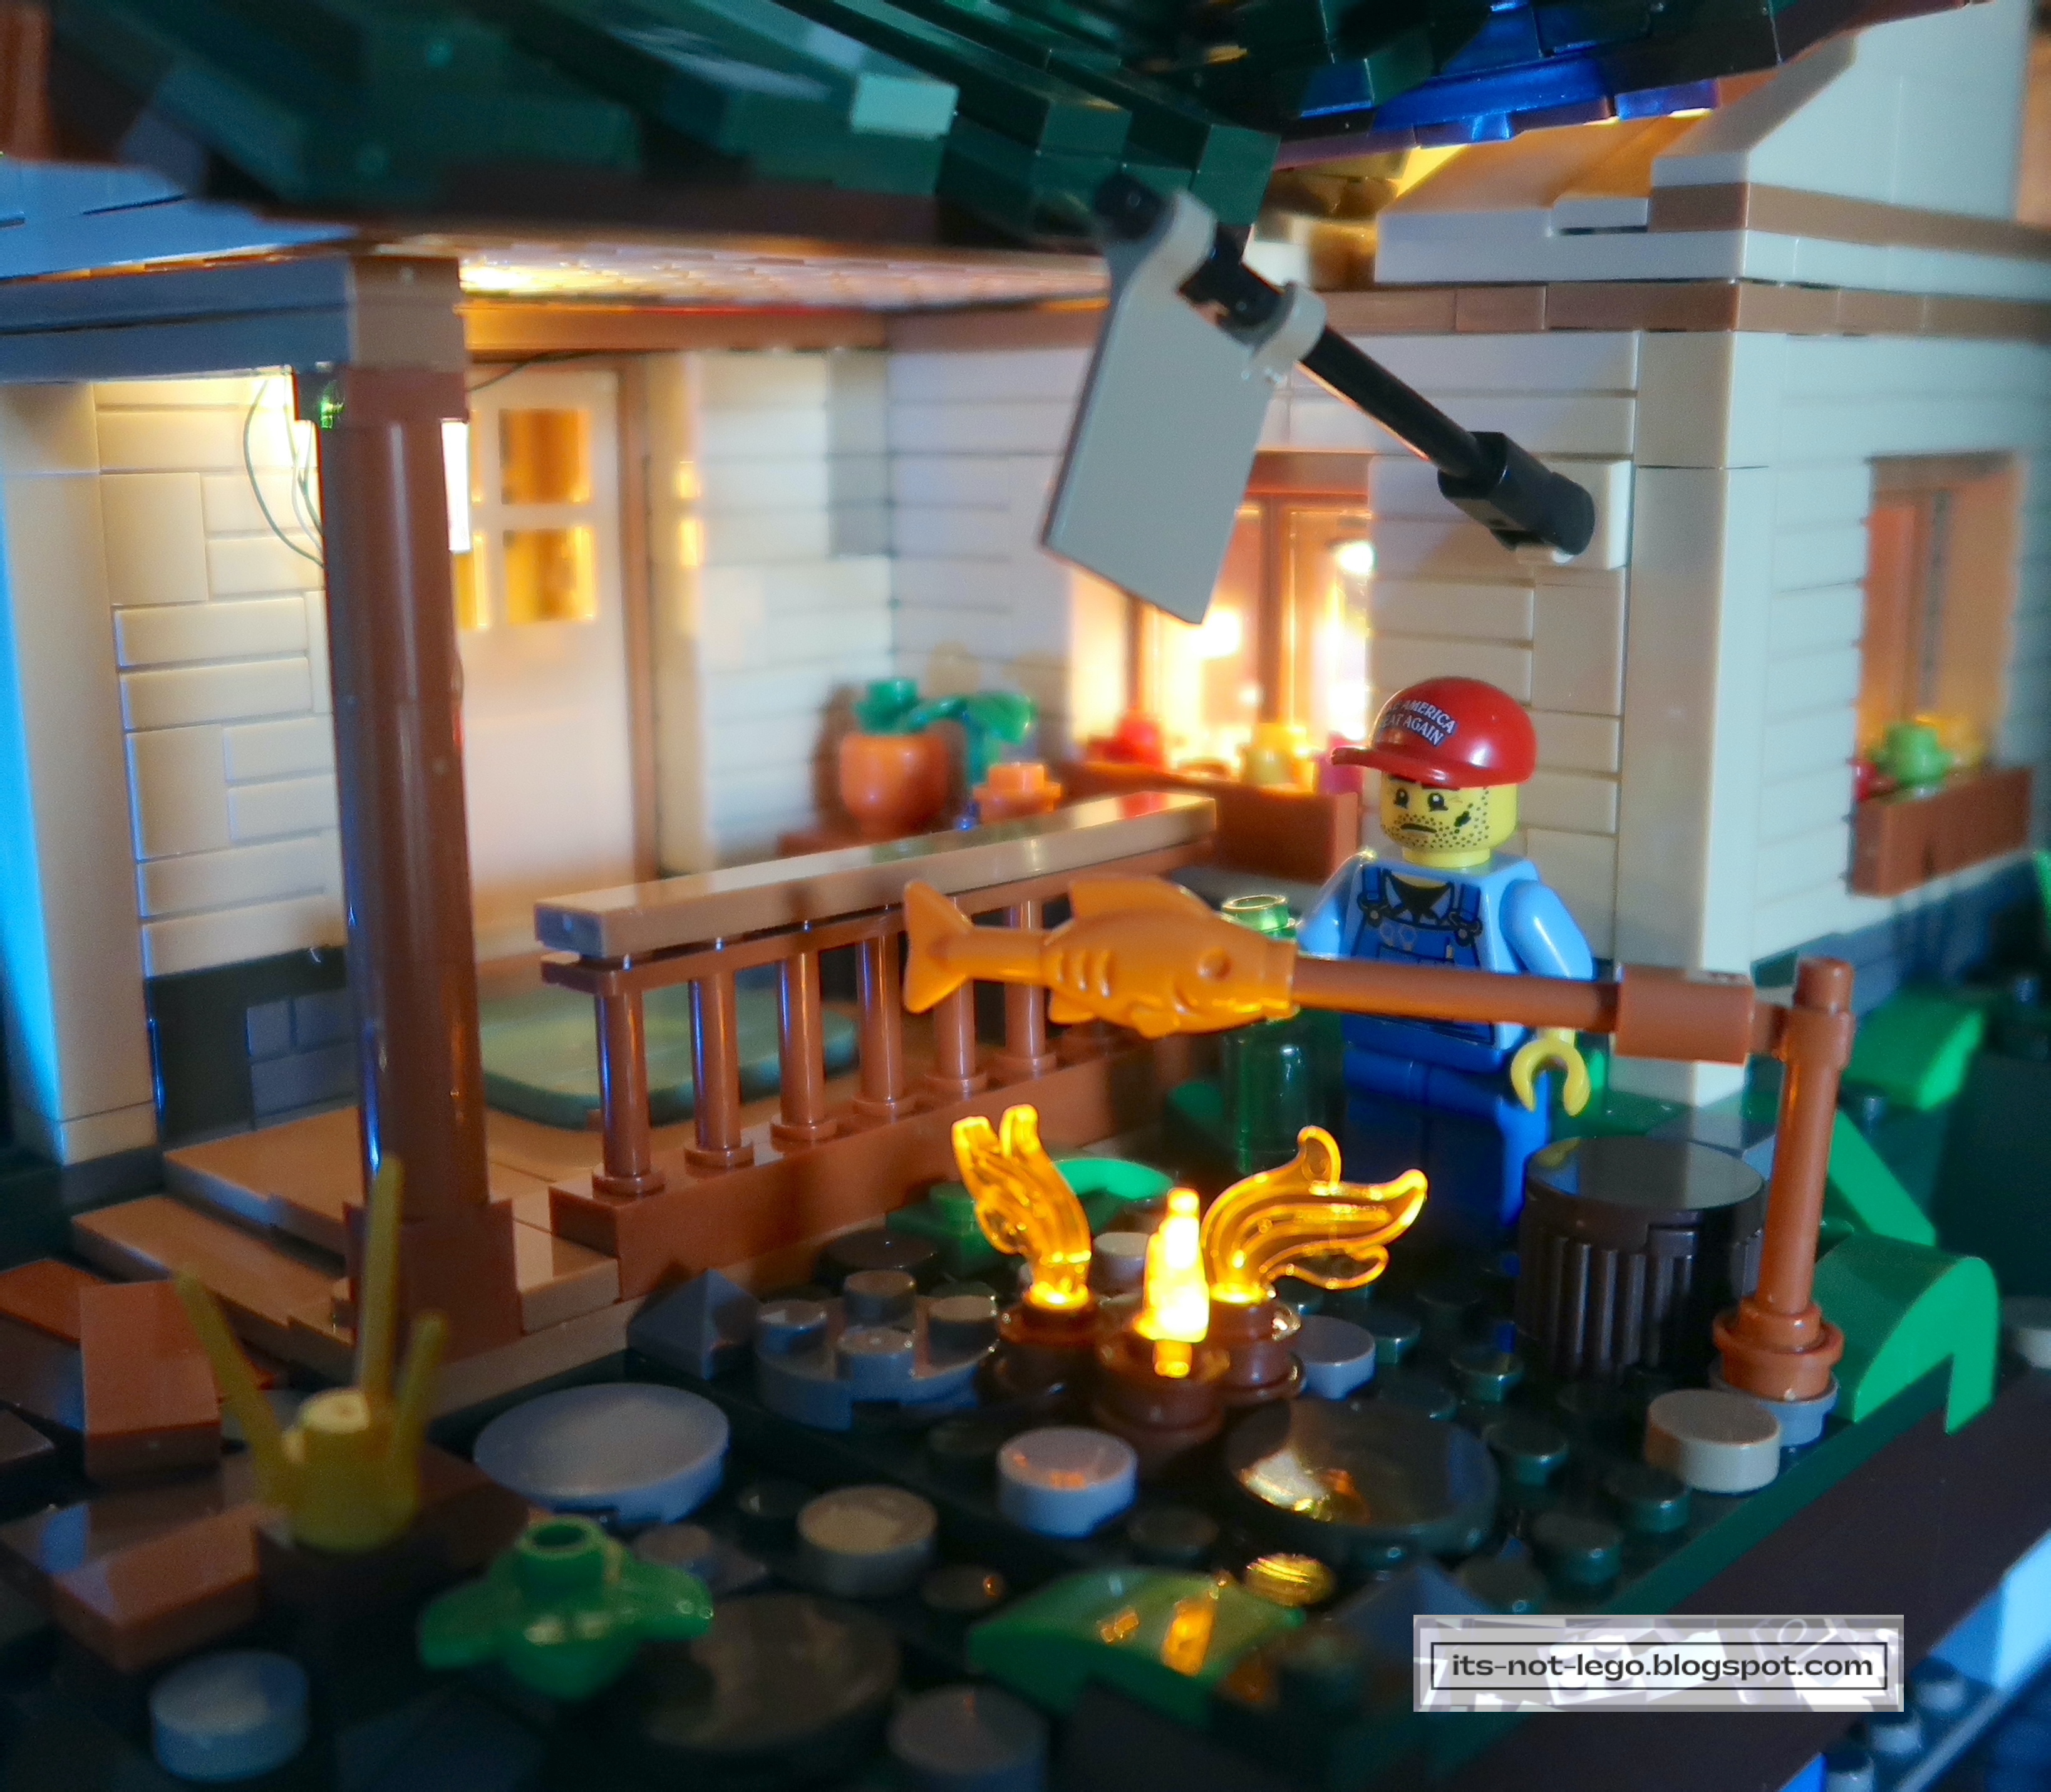
Before we move on to the second floor, now's a good time to test the lighting on the main floor.  There's some accent lights in the water and one on the fishing dock.
There's several more lights inside and outside of the lodge as well.

Funwhole provides a battery pack and all of the lights and wiring, you just need to supply two double AA batteries to power the lights.


Jumping ahead to section 3, we have now completed the second floor bedroom.  In addition to the single bed, there is a side table, a bookshelf and a chair and desk with lamp.  The red light brick in the middle of the room will serve as a fireplace in an upcoming step.


Here's how the Lakeside Lodge is shaping up before we move on to section 4.


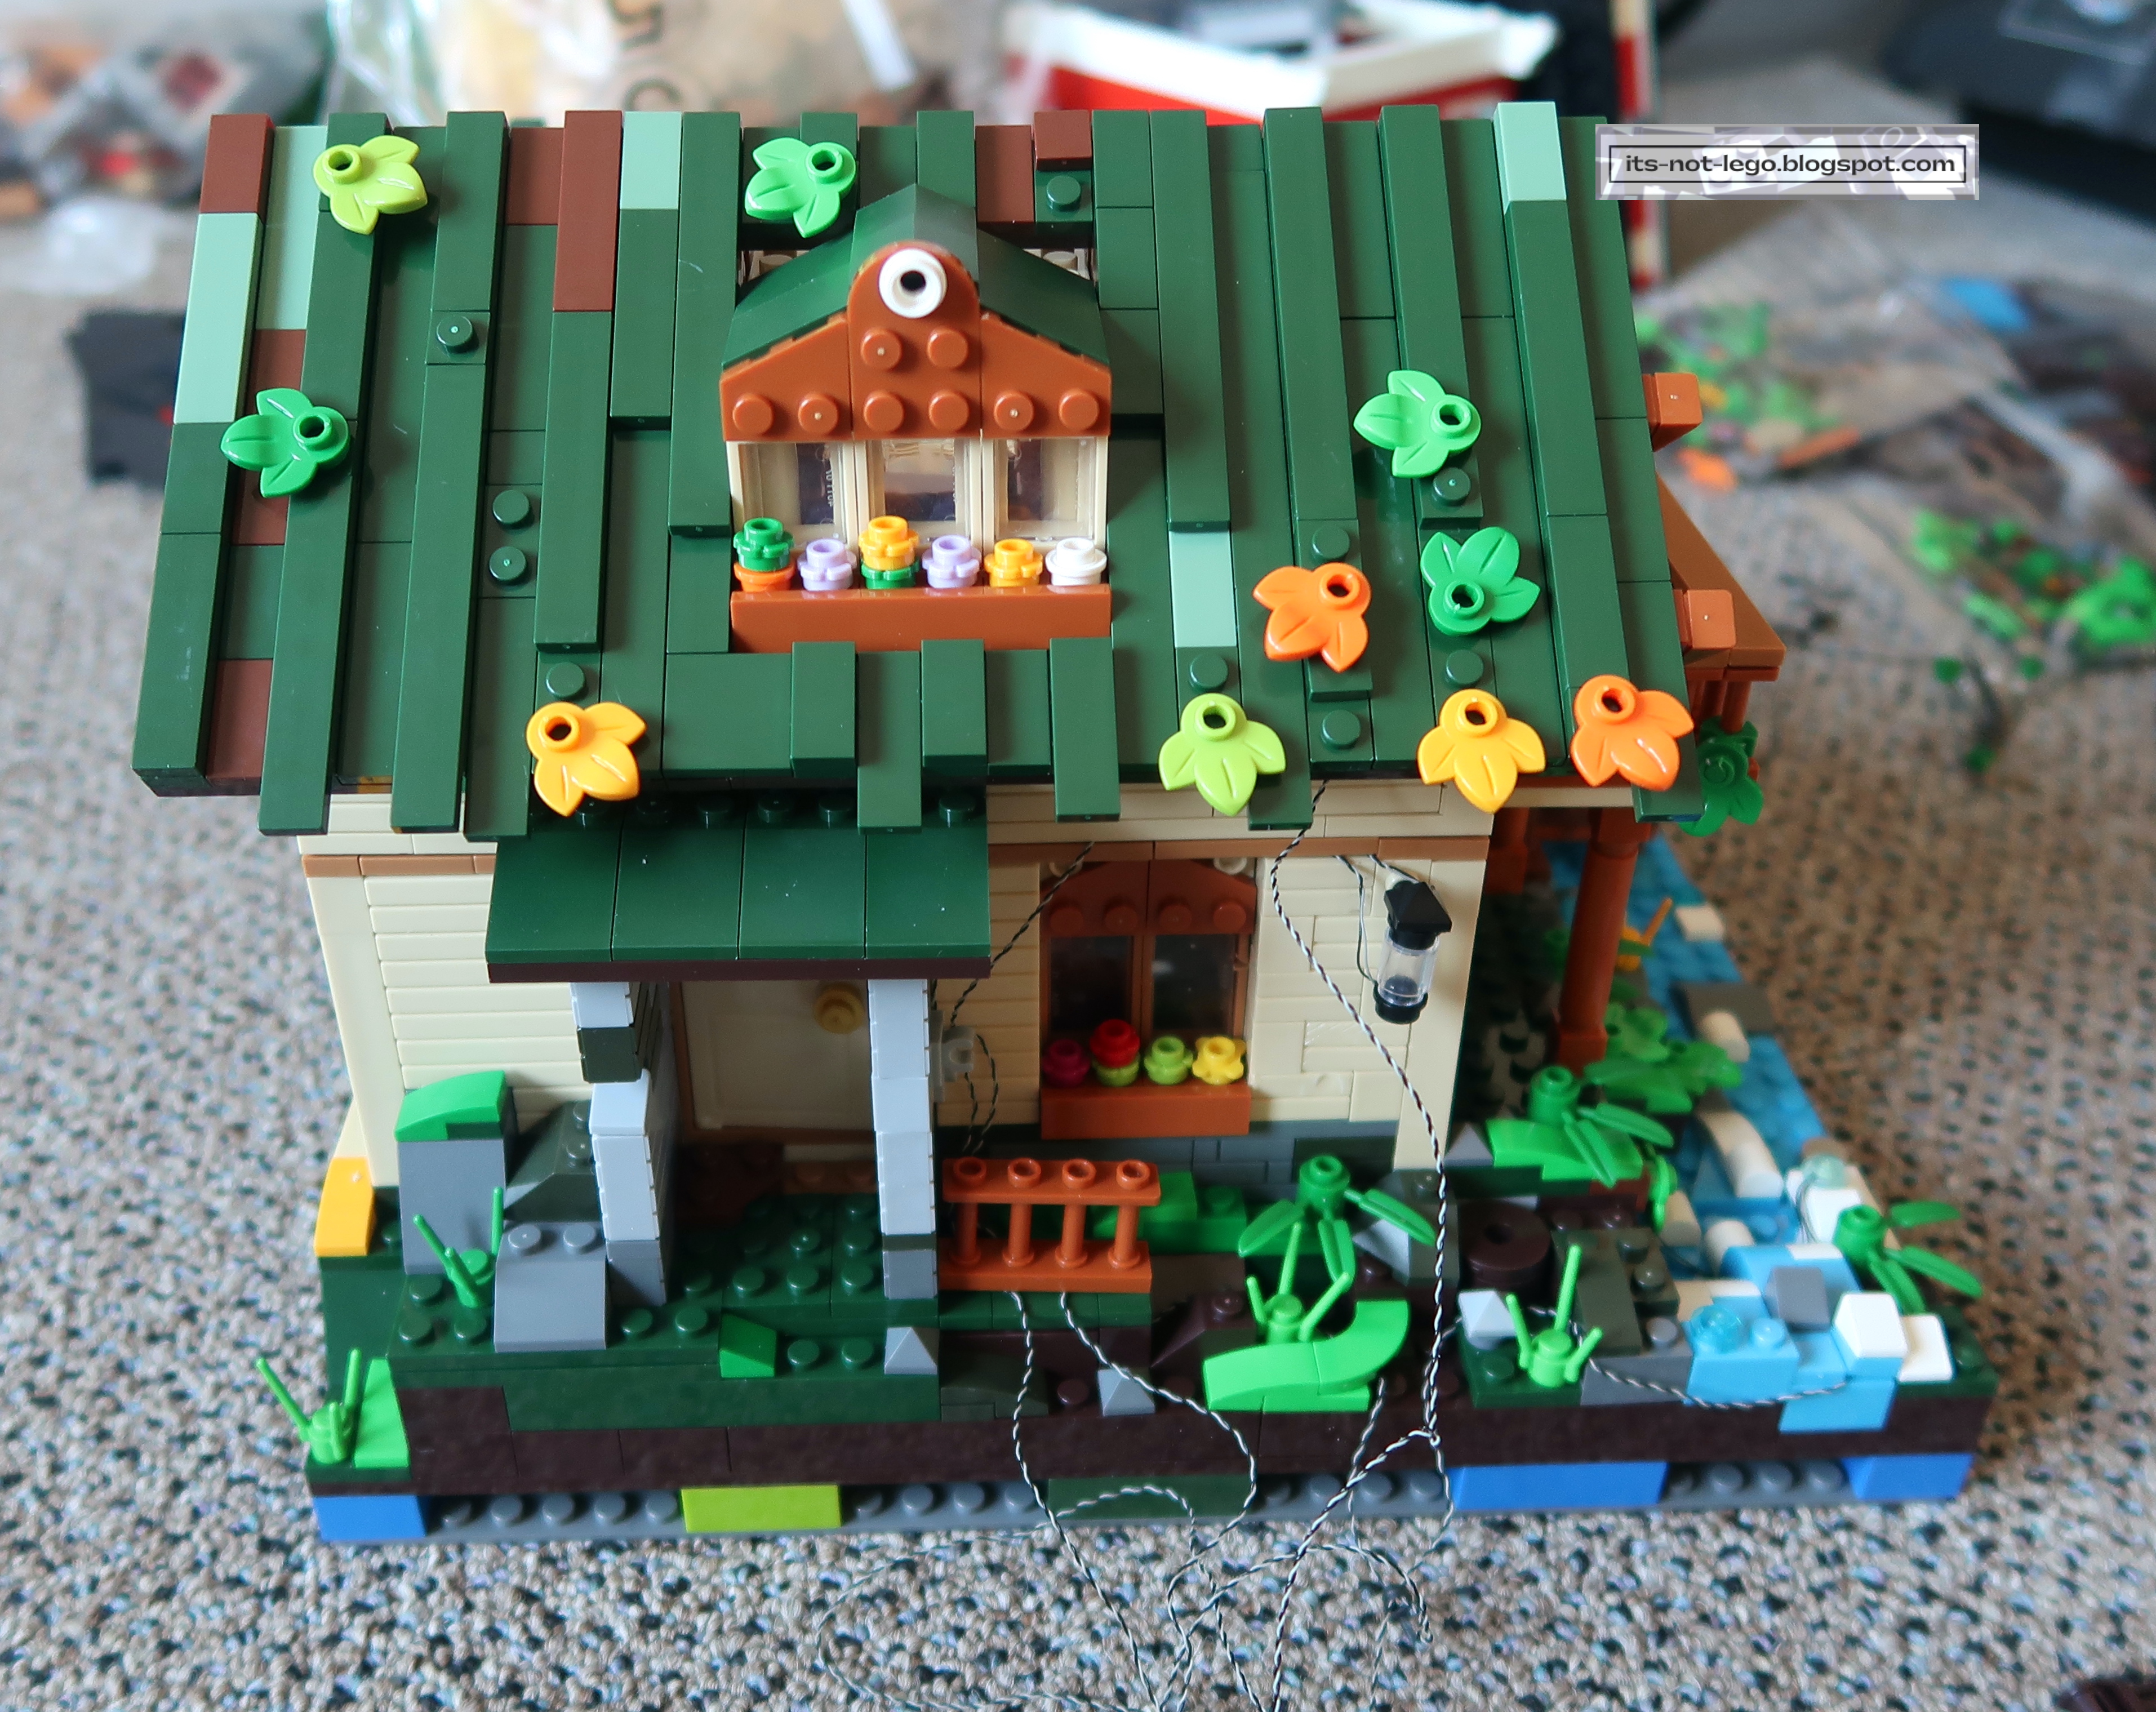
Section 4 sees the completion of one side of the rooftop and dormer window.

A tree with colourful leaves rises from the ground.


Section 5 builds some more of the side roof panels.


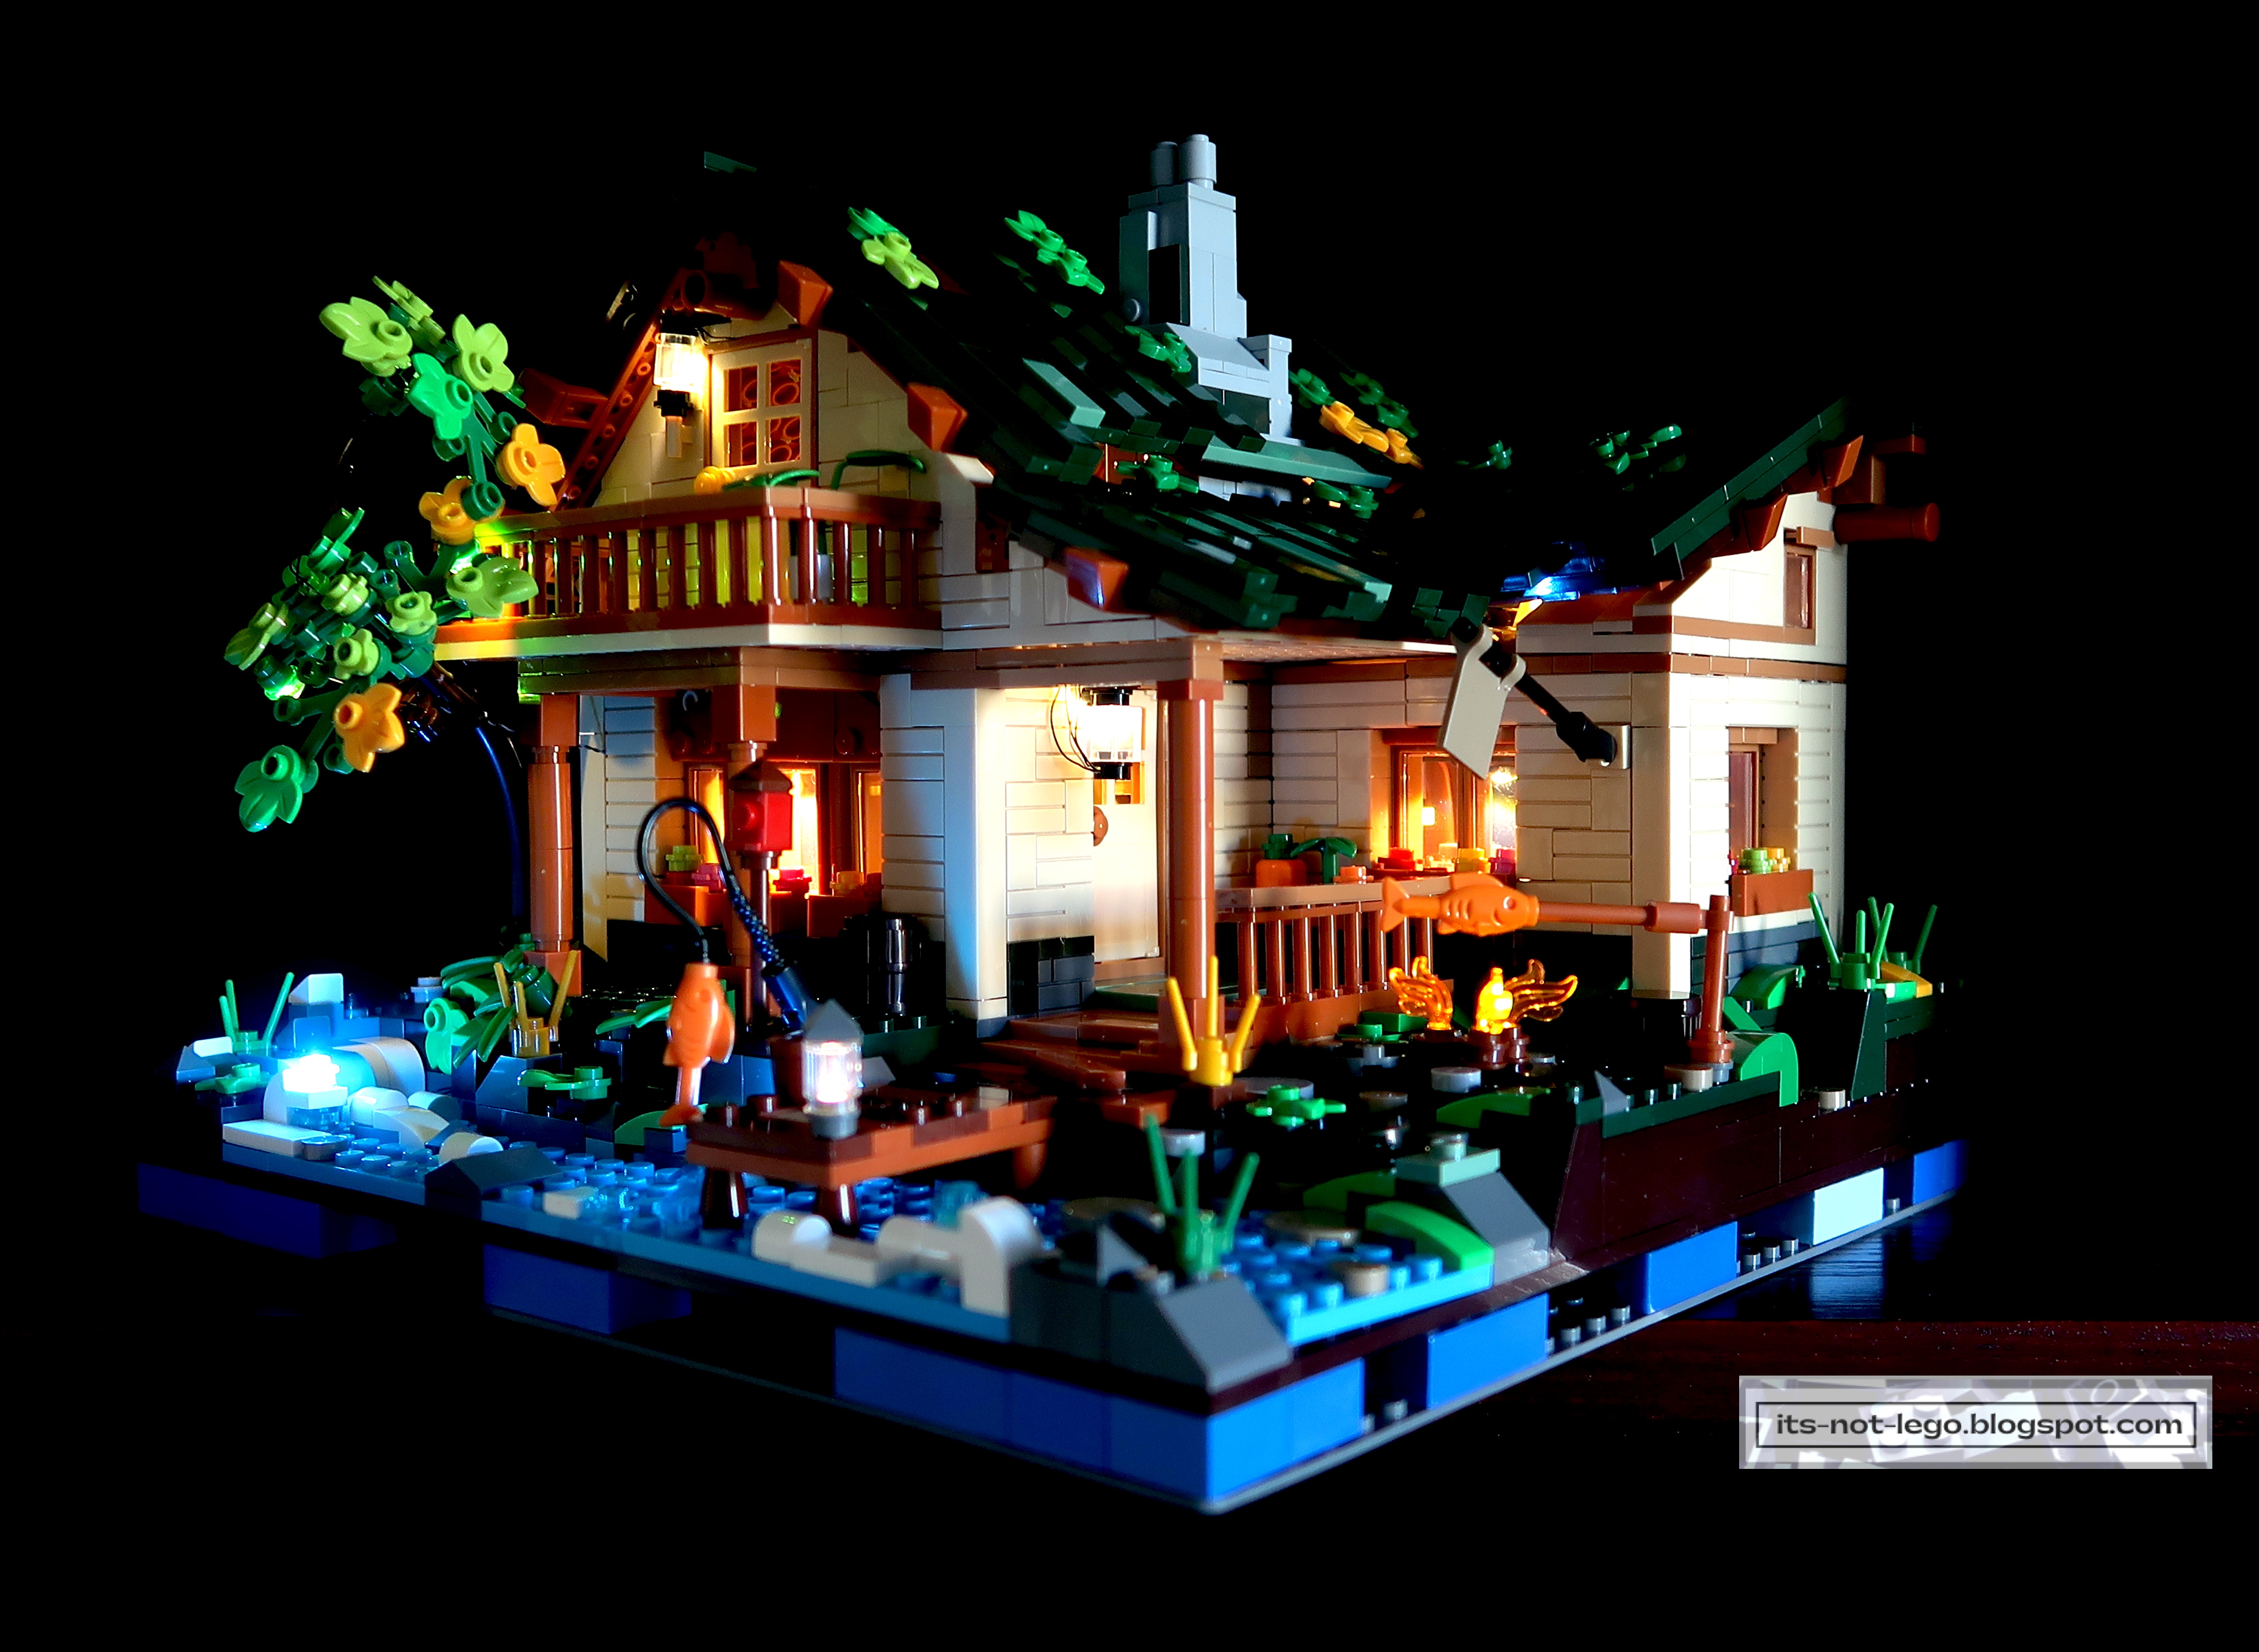
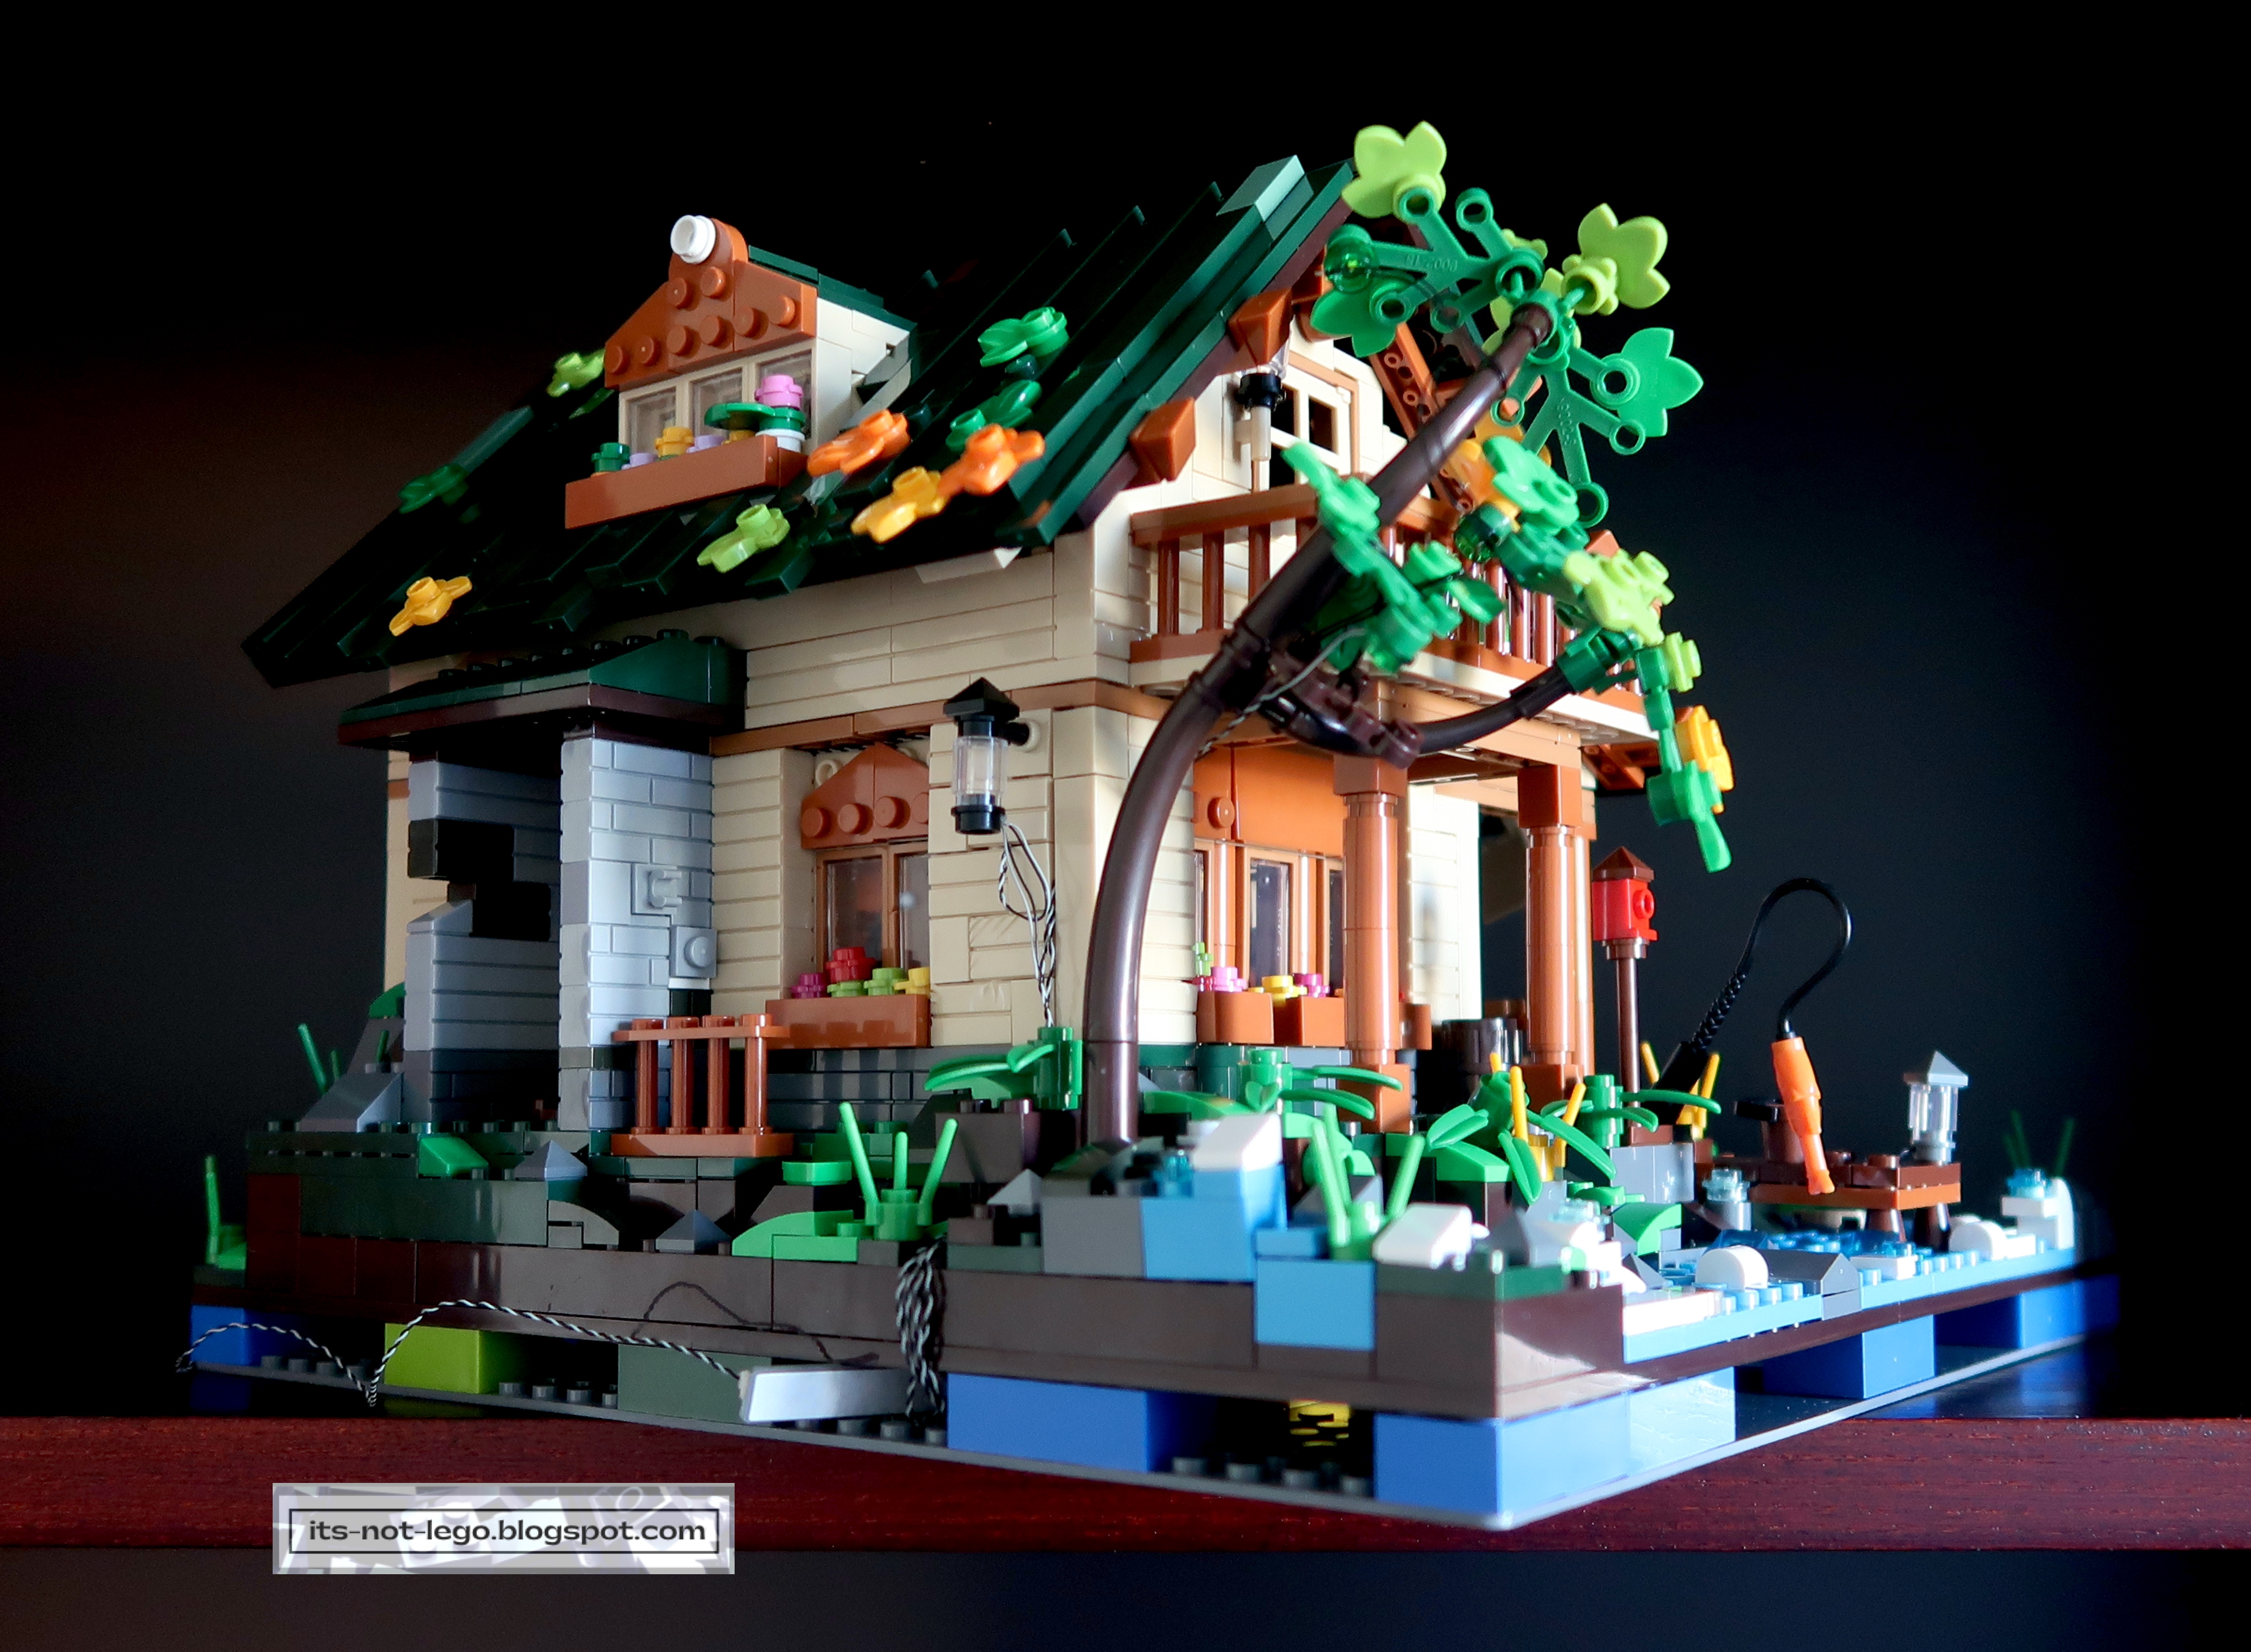
Section 6 finishes off the roof and chimney.  And with that, the Lakeside Lodge is finished!   Time to take it all in.


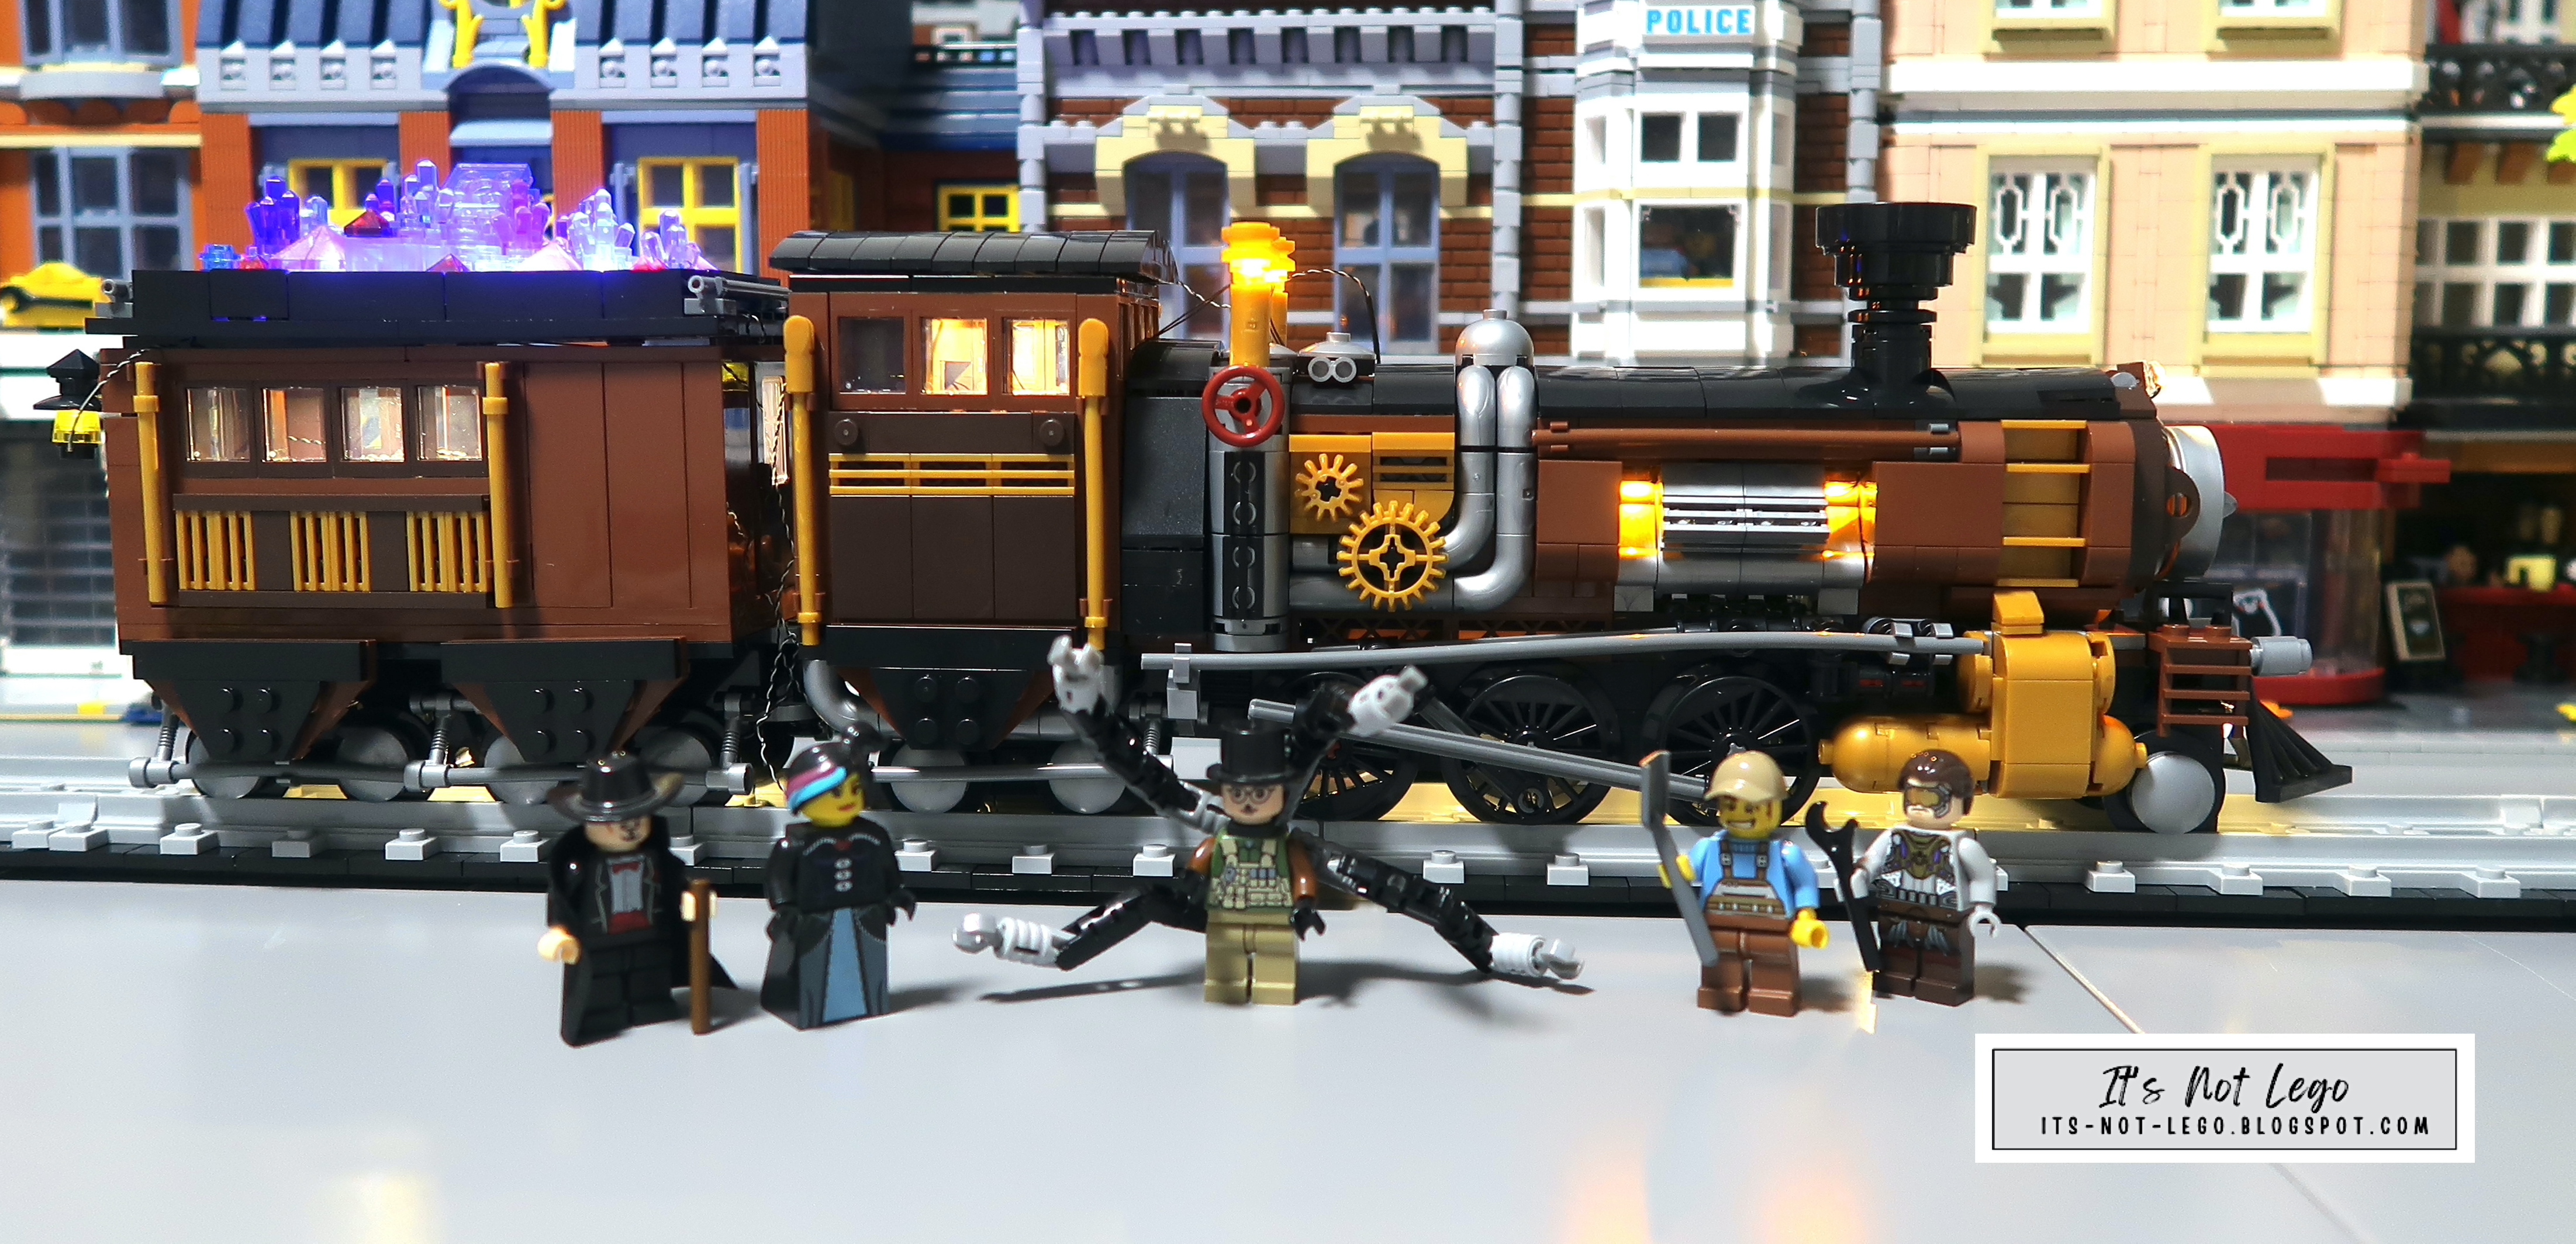
I gotta say that this set really pops with the lighting.  Some bonus shots follow.


The Funwhole Lakeside Lodge does not come with any minifigures, but it sure brings life to the set if you add your own.

So in summary, the Funwhole Lakeside lodge is 1969 pieces and rated for ages 8 and above as per the box and manual information.  The set bundles in a great lighting kit that if purchased separately would probably cost at least $30 to $40 more. 

Funwhole uses the same lighting system as Briksmax.  For a detailed primer of how the lighting kits work, please check out my blog post here.

It comes with a sticker sheet (which I didn't use) and a really thick instruction manual.  Although there wasn't any page numbers, there were a total of 555 steps spread out over 6 sections.  Bonus tools include a brick separator and tweezers to pick up those small pieces.

I had some really bad luck in that my set was missing parts and also had deformed parts. But Funwhole made it right with their excellent communication and super quick replacement of the affected parts.

Want to add the Funwhole Lakeside Lodge FH9004 to your brick collection?  You can find it on Amazon. Or you can purchase it directly from the Funwhole website.

Because I've partnered with Funwhole, they are offering a further 10% off your purchase price by using code ITSNOTLEGO at checkout.   How great it that?

 Thanks for visiting and see you next time!  Bye!