[Update] FunWhole changed their name to Lumibricks recently, so I have changed all links and references in this blog post to Lumibricks now]
Hey all, time for another not Lego set review, and this time I'm doing a deep dive into the Lumibricks FH-9001 Wood Cabin building set, a very uniquely designed set.
Intro/Overview
My review will cover all aspects of the set including lighting, brick quality, ease of build and overall set design. I'll point out the hits and misses of the set and at the end, I'll assign my subjective rating out of 5 stars.
is now
A huge thanks to Lumibricks for providing me with the set to review. With that said, all opinions are my own.
Where to Buy
If are looking for Lumibricks Wood cabin set, you can find it on the Lumibricks website and also from the Lumibricks store on Amazon.
About the Set
In an earlier post, I reviewed the boxed set and the contents therein. It was so nice of Lumibricks to include the box when they sent the sent out to me. In that post, I looked at the number of pieces, the stickers and did a detailed breakdown of each of the bags and also looked at the lighting kit which is also included in the set.
About the included Lighting
So I think the Wood Cabin set is a really good value because it already comes with the lighting kit which in normal cases, costs an extra $20 to $30 if you were to purchase from a specialty retailer like Lightailing.com.
Of note, the lighting provided in the kit does seem to be sourced by Lightailing.com and the components are identical to the Briksmax parts I've used in lighting my Detective's Office modular building and more recently, lighting the custom Blade Runner Spinner.
While the quality of the lighting is very good, on the rare occasion, sometimes faulty components can be missed, so it's always a good idea to test all of the lighting before installing it into your building set.
As a reminder here is what all the lighting specific components look like for the Lumibricks wood cabin. You can see that some of the lighting is packaged according to the section of the build specified in the manual, so that there's no confusion.
Lumibricks conveniently provides a switched battery pack that you can plug the USB adapter to.
Please note that you have to provide your own set of AA batteries, you'll need three of them to power the lighting throughout the house.
Most of the lights will plug into the provided 8 port expansion board.
Go ahead and connect them to make sure that they all work properly.
Lumibricks uses the same lighting system as Briksmax. For a detailed primer of how the lighting kits work, please check out my blog post
here.
Something new that Lumibricks introduces is the contact points so that the upper floor of the Wood cabin doesn't need the lighting to be plugged into the expansion board. Instead, there are two types of special bricks that contact each other and provide the current to turn on the second floor lighting. Pretty ingenious. Ok, let's get into it!
The wood cabin manual is broken down into seven sections. I'll briefly look at each sections.
Build Section 1
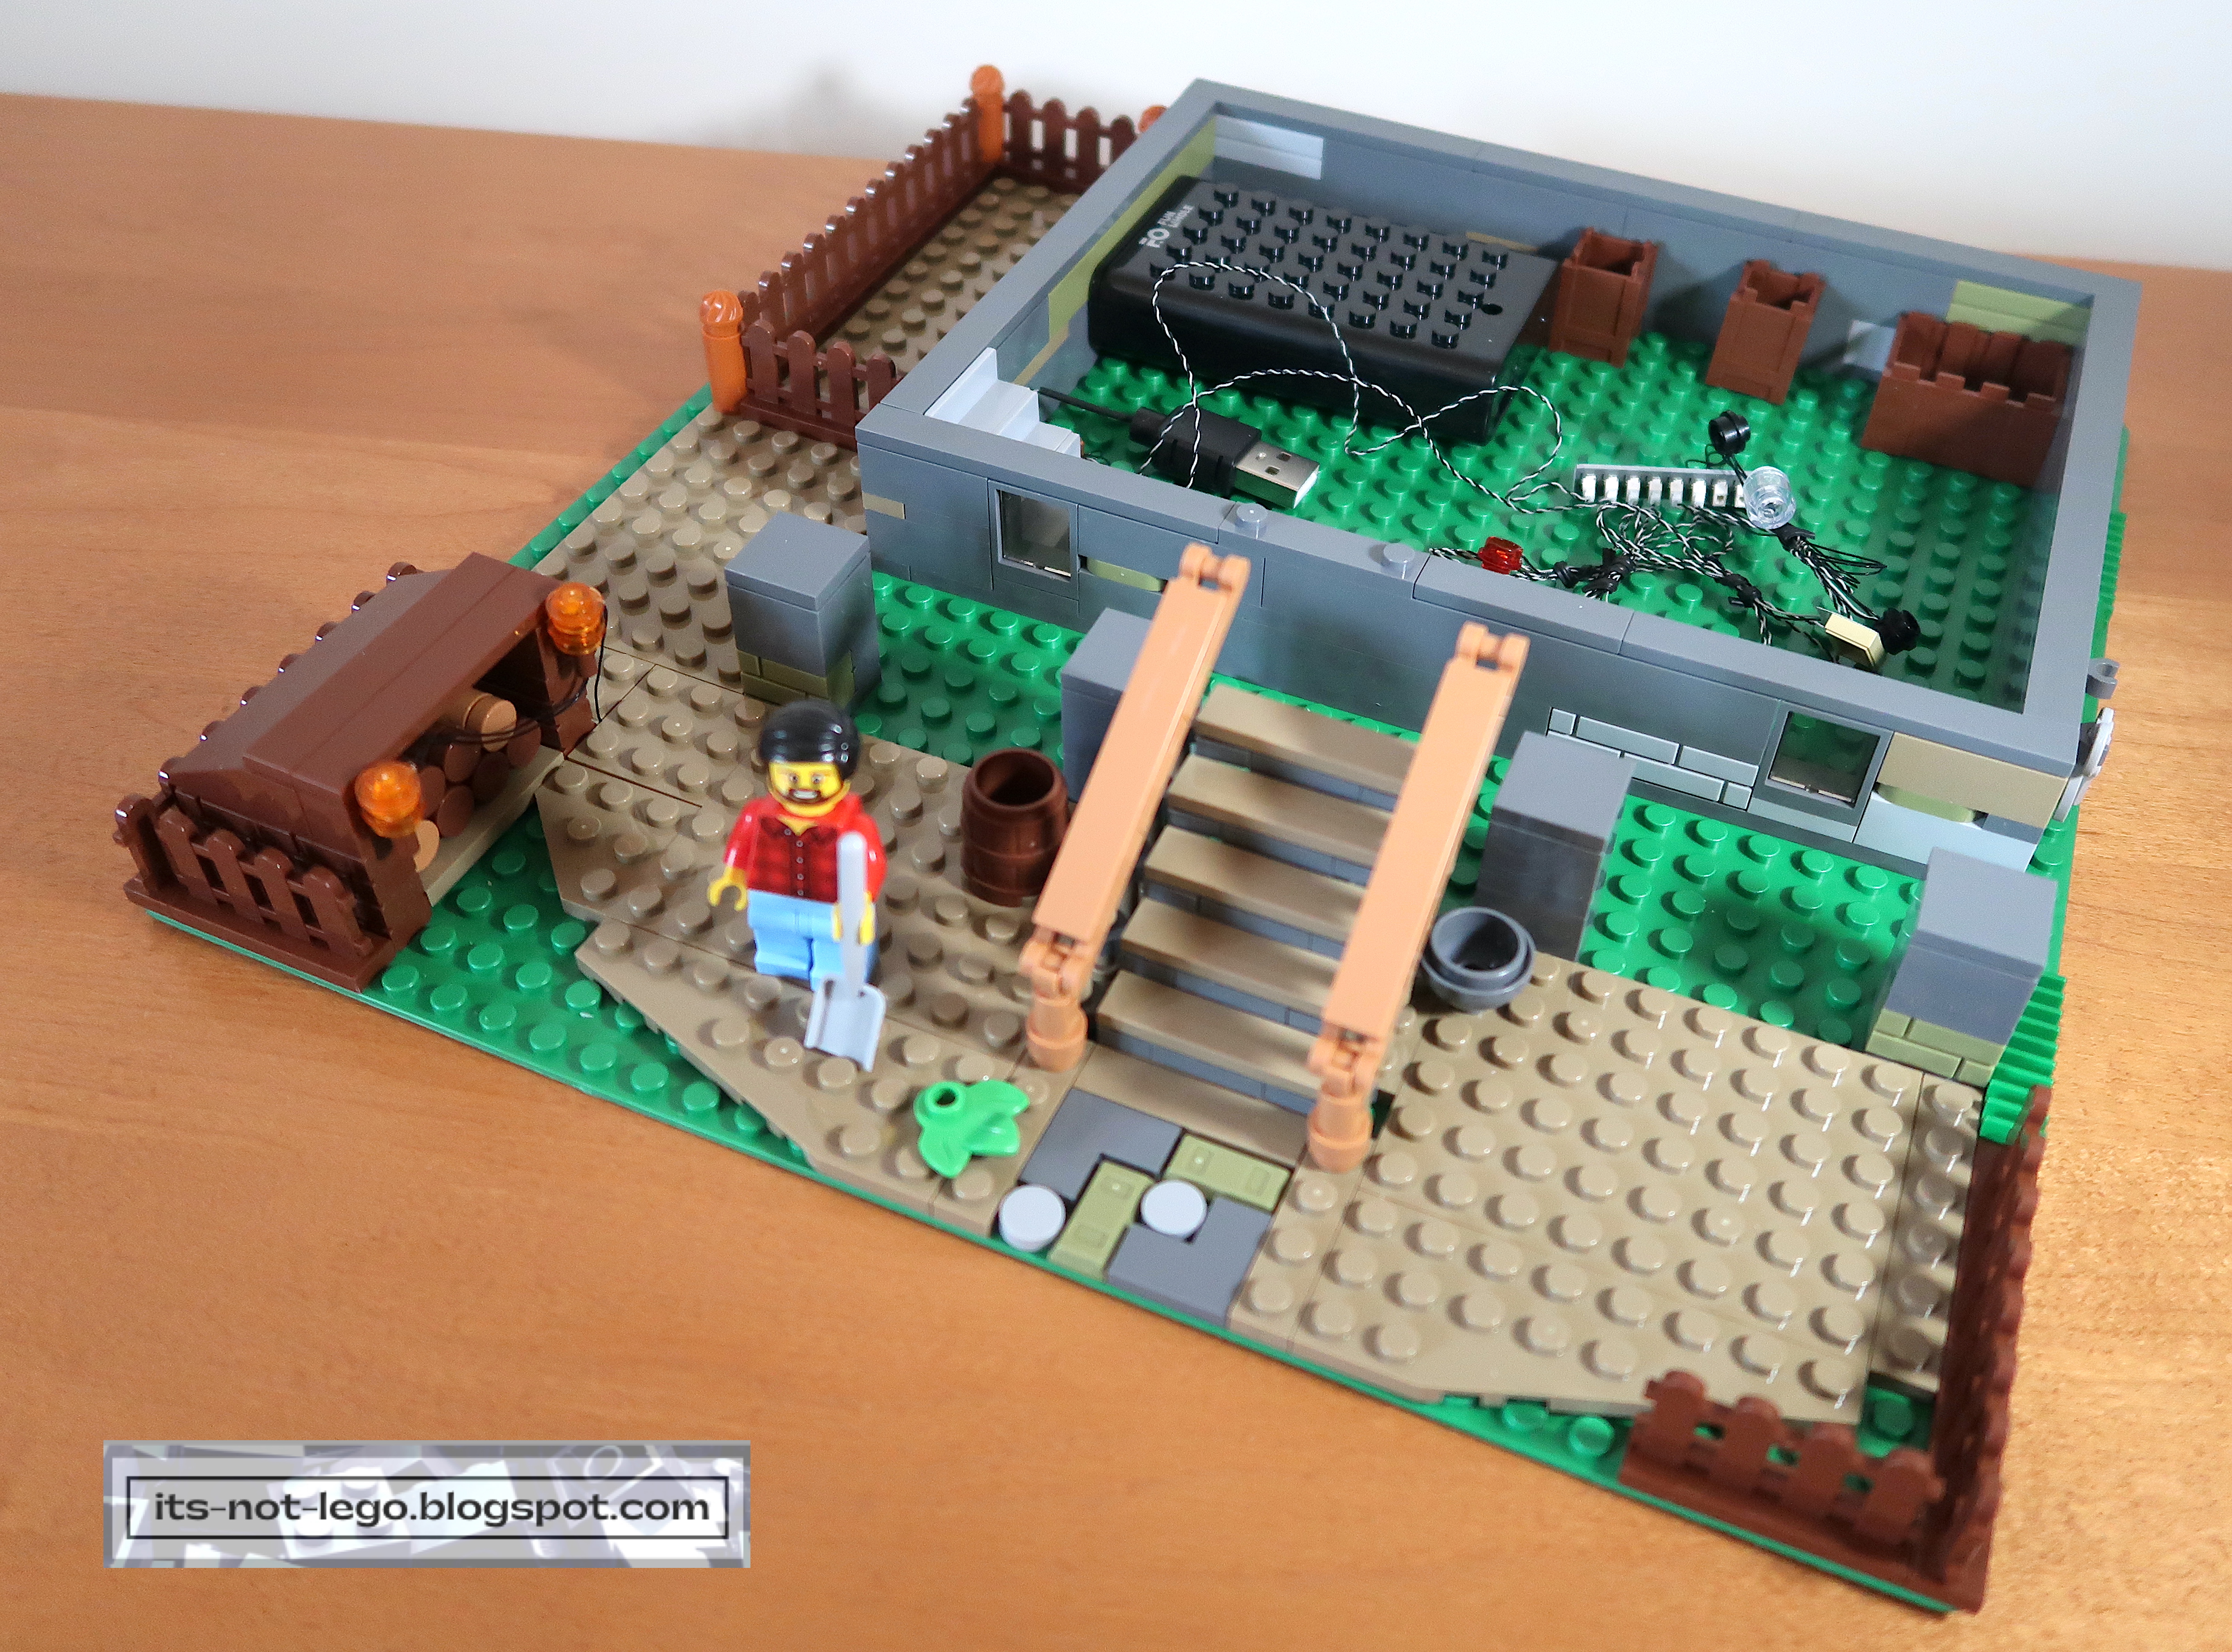
In section 1, most of the building process revolves around making the foundation for the wood cabin. It sits on a standard 32x32 stud baseplate. The foundation occupied about 60% of the baseplate with the remainder used for landscaping. There's a lot of foliage and landscaping pieces but I chose not to add the until completing the final steps of the wood cabin, in case parts fell off during construction.
There is a crawl space/cellar under the wood cabin floor where several crates sit. The crawlspace can be accessed a set of stairs from the main floor. It's a good place to put the battery pack and wires for lighting. Around the perimeter, are some wooden fences, one which encloses a storage shed for logs used by the wood burning fireplace (more on that later).
During this phase, the front steps are installed, as are the pillars for the yet to be built front porch. Some of the lighting components are introduced such as a light in the cellar and two more lights that flank the log shed.
Oh, before I forget, you might see one or more mini figures pictured during my build. They are from my own collection and please be aware that the Lumibricks Wood Cabin does not come with any mini figures, although in my opinion, the set should have included some.
Build Section 2
Section 2 of the manual focuses on the wood cabin floor. Here you will find the access door to the crawl space. There are predominately nougat coloured floor boards throughout the main floor as well as the front porch.
Here are some of the initial
interior furnishings introduced in section 2. Some storage cabinets, tables, and a record player. The makings of a nice bathroom are also at hand.
At this point, I want to say that the quality and finish of the bricks is excellent and clutch too. You really cannot differentiate these bricks from Lego bricks.
Build Section 3
The first exterior wall is constructed and put into place.
Wow, is this a nicely detailed kitchen or what? Do kind of wish it had room for a refrigerator though. The bathroom gets some privacy walls and a sliding door.
That love seat looks a bit small. A larger sofa might be more welcoming. For now we will just chill and listen to some music. This completes section 3.
Build Section 4
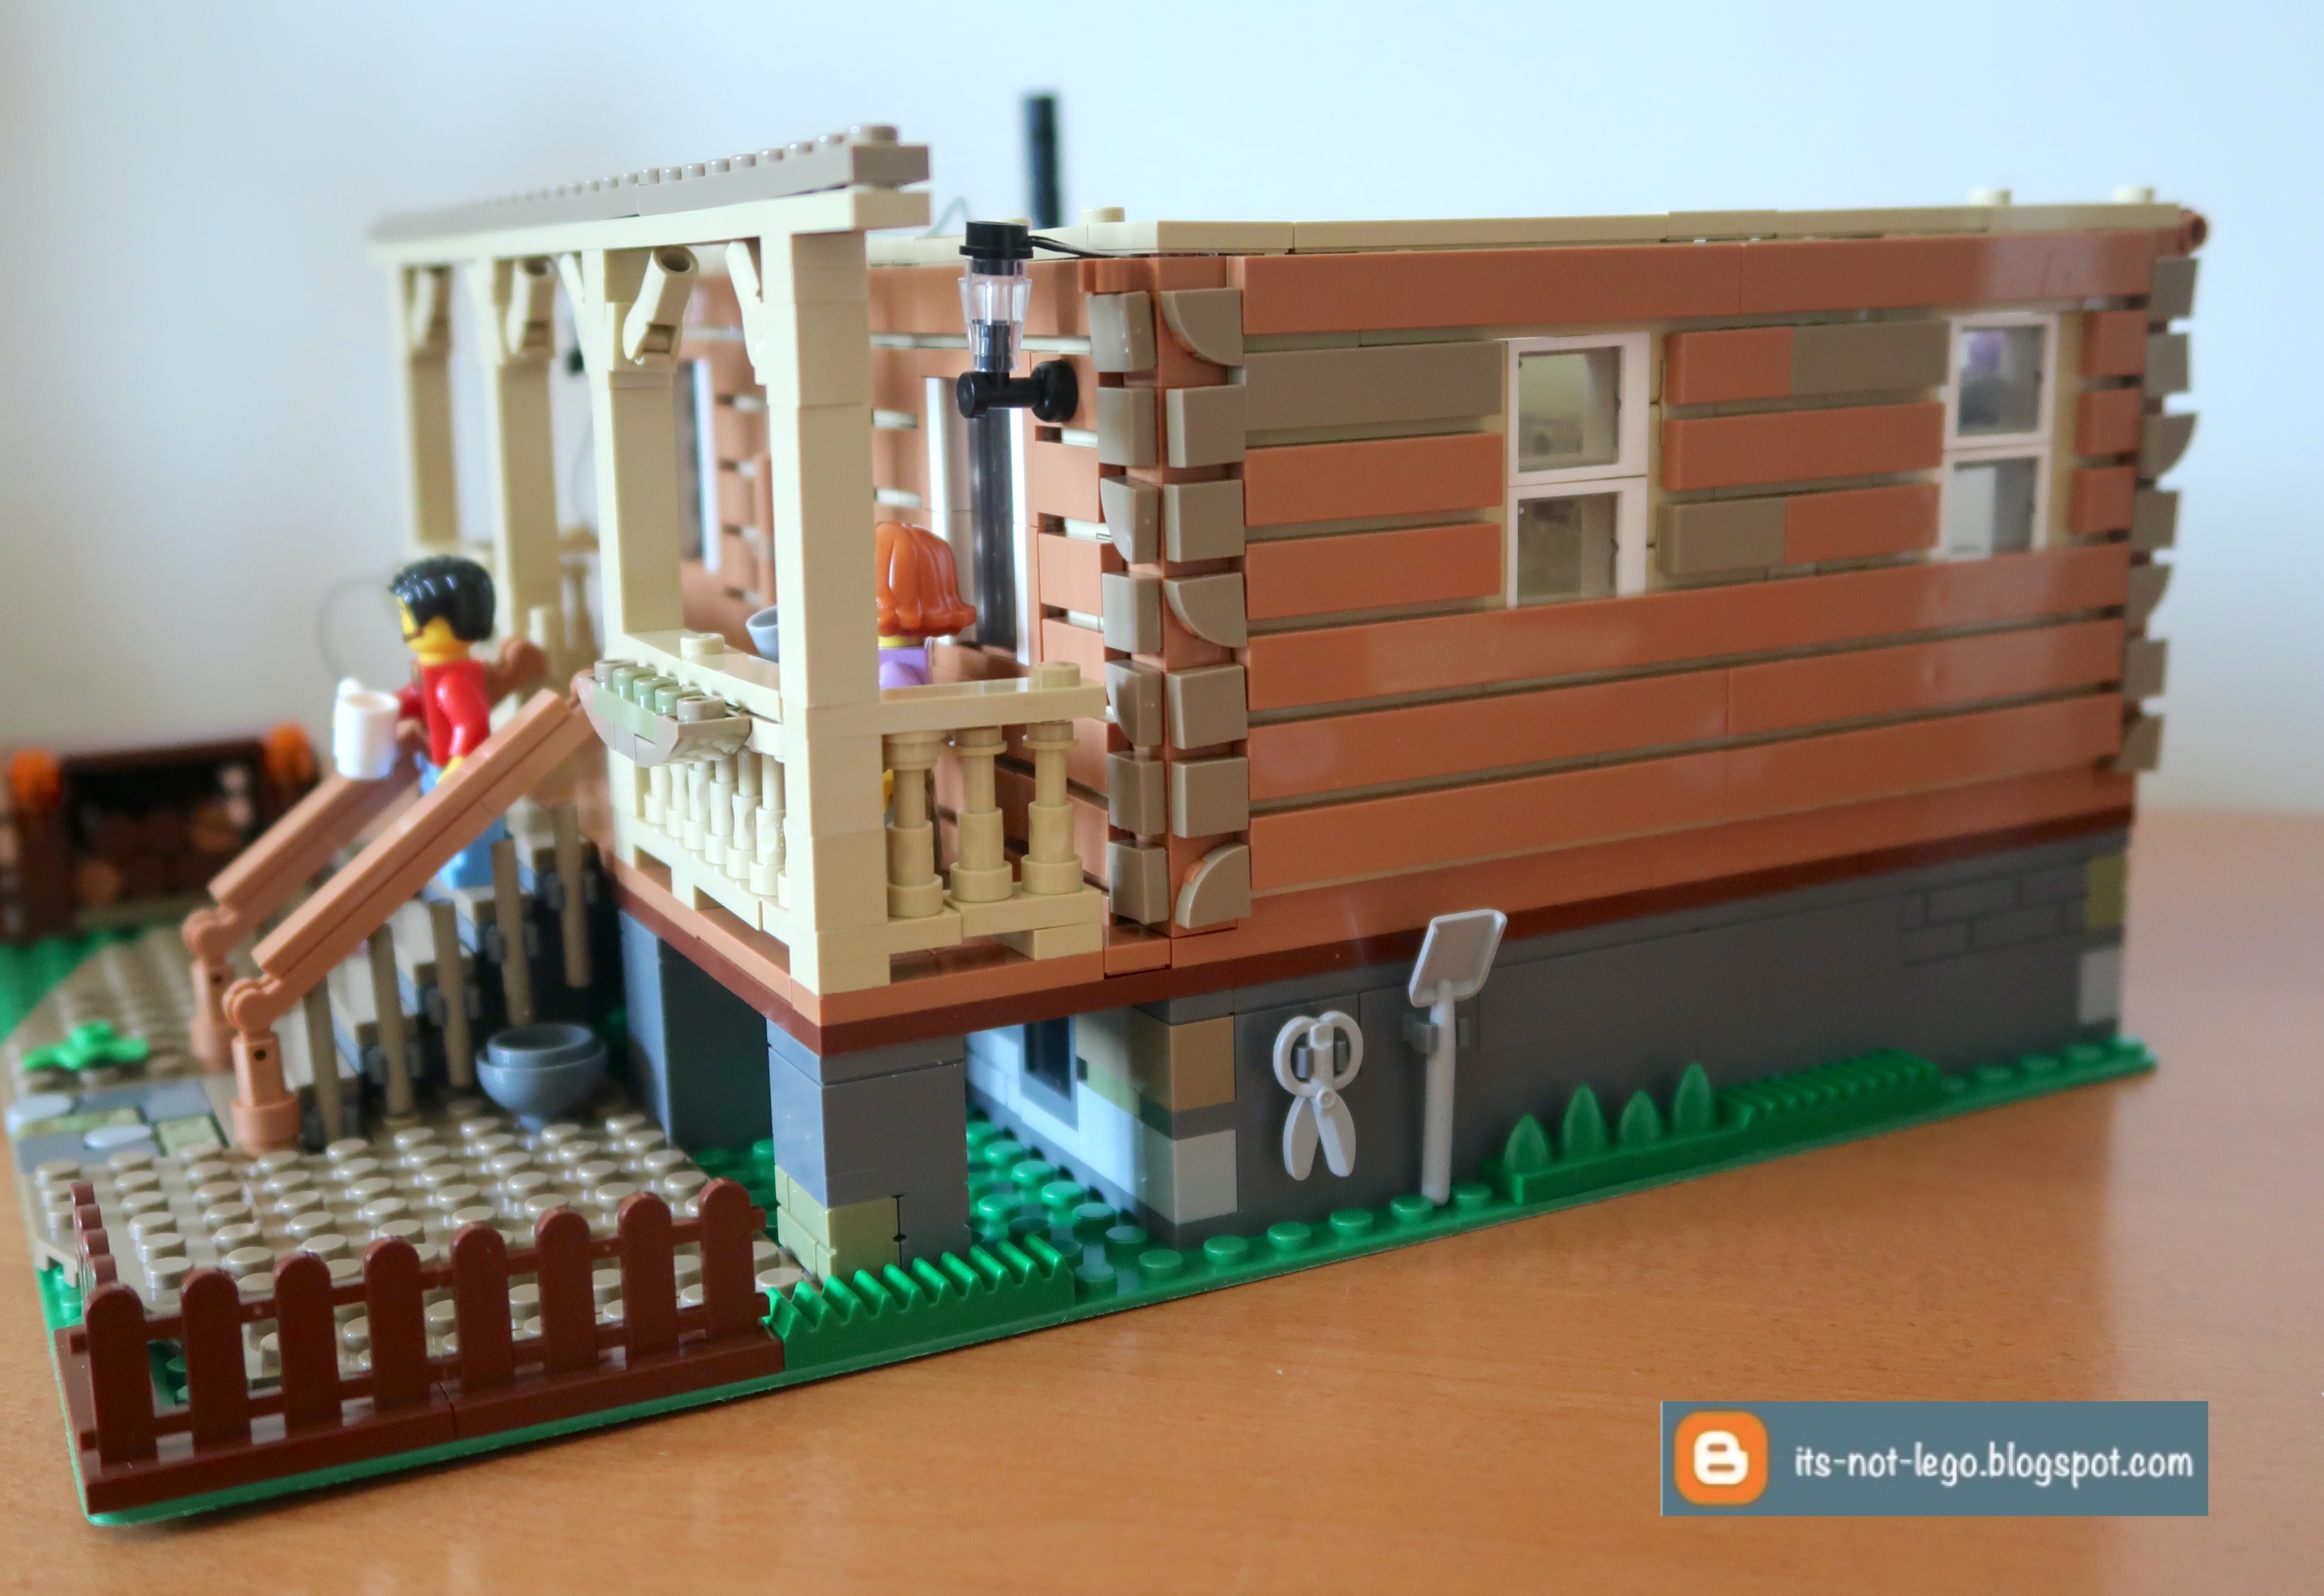
In section 4, we finish building the front porch ...
and detail the walls ...
don't mind the wires, these are temporary to see how everything tests out ...
Er, no back wall! So this isn't modular style, as much as it is dollhouse style. It would have been better if we got a back wall on hinges. Kind of disappointed.
Luckily there's a bookshelf and this nice looking wood stove. I really like the lighting inside the stove.
The kitchen gets a table with seating for four. All foodstuffs come with the set!
To wrap up section 4, we do an exterior light test.
Oh, almost forgot to mention, see that paper with the two copper discs? That's the connection point for the second storey. The underside of the second storey has a brick that completes the circuit, to permit lighting there (see next section).
Build Section 5
As mentioned earlier, here's the flip side of the second storey. A LED light strip will illuminate the first floor from the ceiling, and the small 1x2 connection brick is what will power the lights on the second floor.
Section 5 completes the second floor loft/bedroom. The bed looks comfy enough, with end table and nightstand. There's also a small desk. Although the wood cabin doesn't come with minifigs, it does come with a dark gray cat. Access to the second floor is via a hinged ladder (not pictured).
The second floor is attached to the main floor to do a quick lighting test before we move on to section 6. Everything A-ok!
Everything is nicely lit up! Look how bright the kitchen and living areas are. Although you can't see it in this picture, there's lighting in the bathroom as well. Just love it.
Build Section 6
Here's the construction of the cabin roof ...
and the roof for the porch.
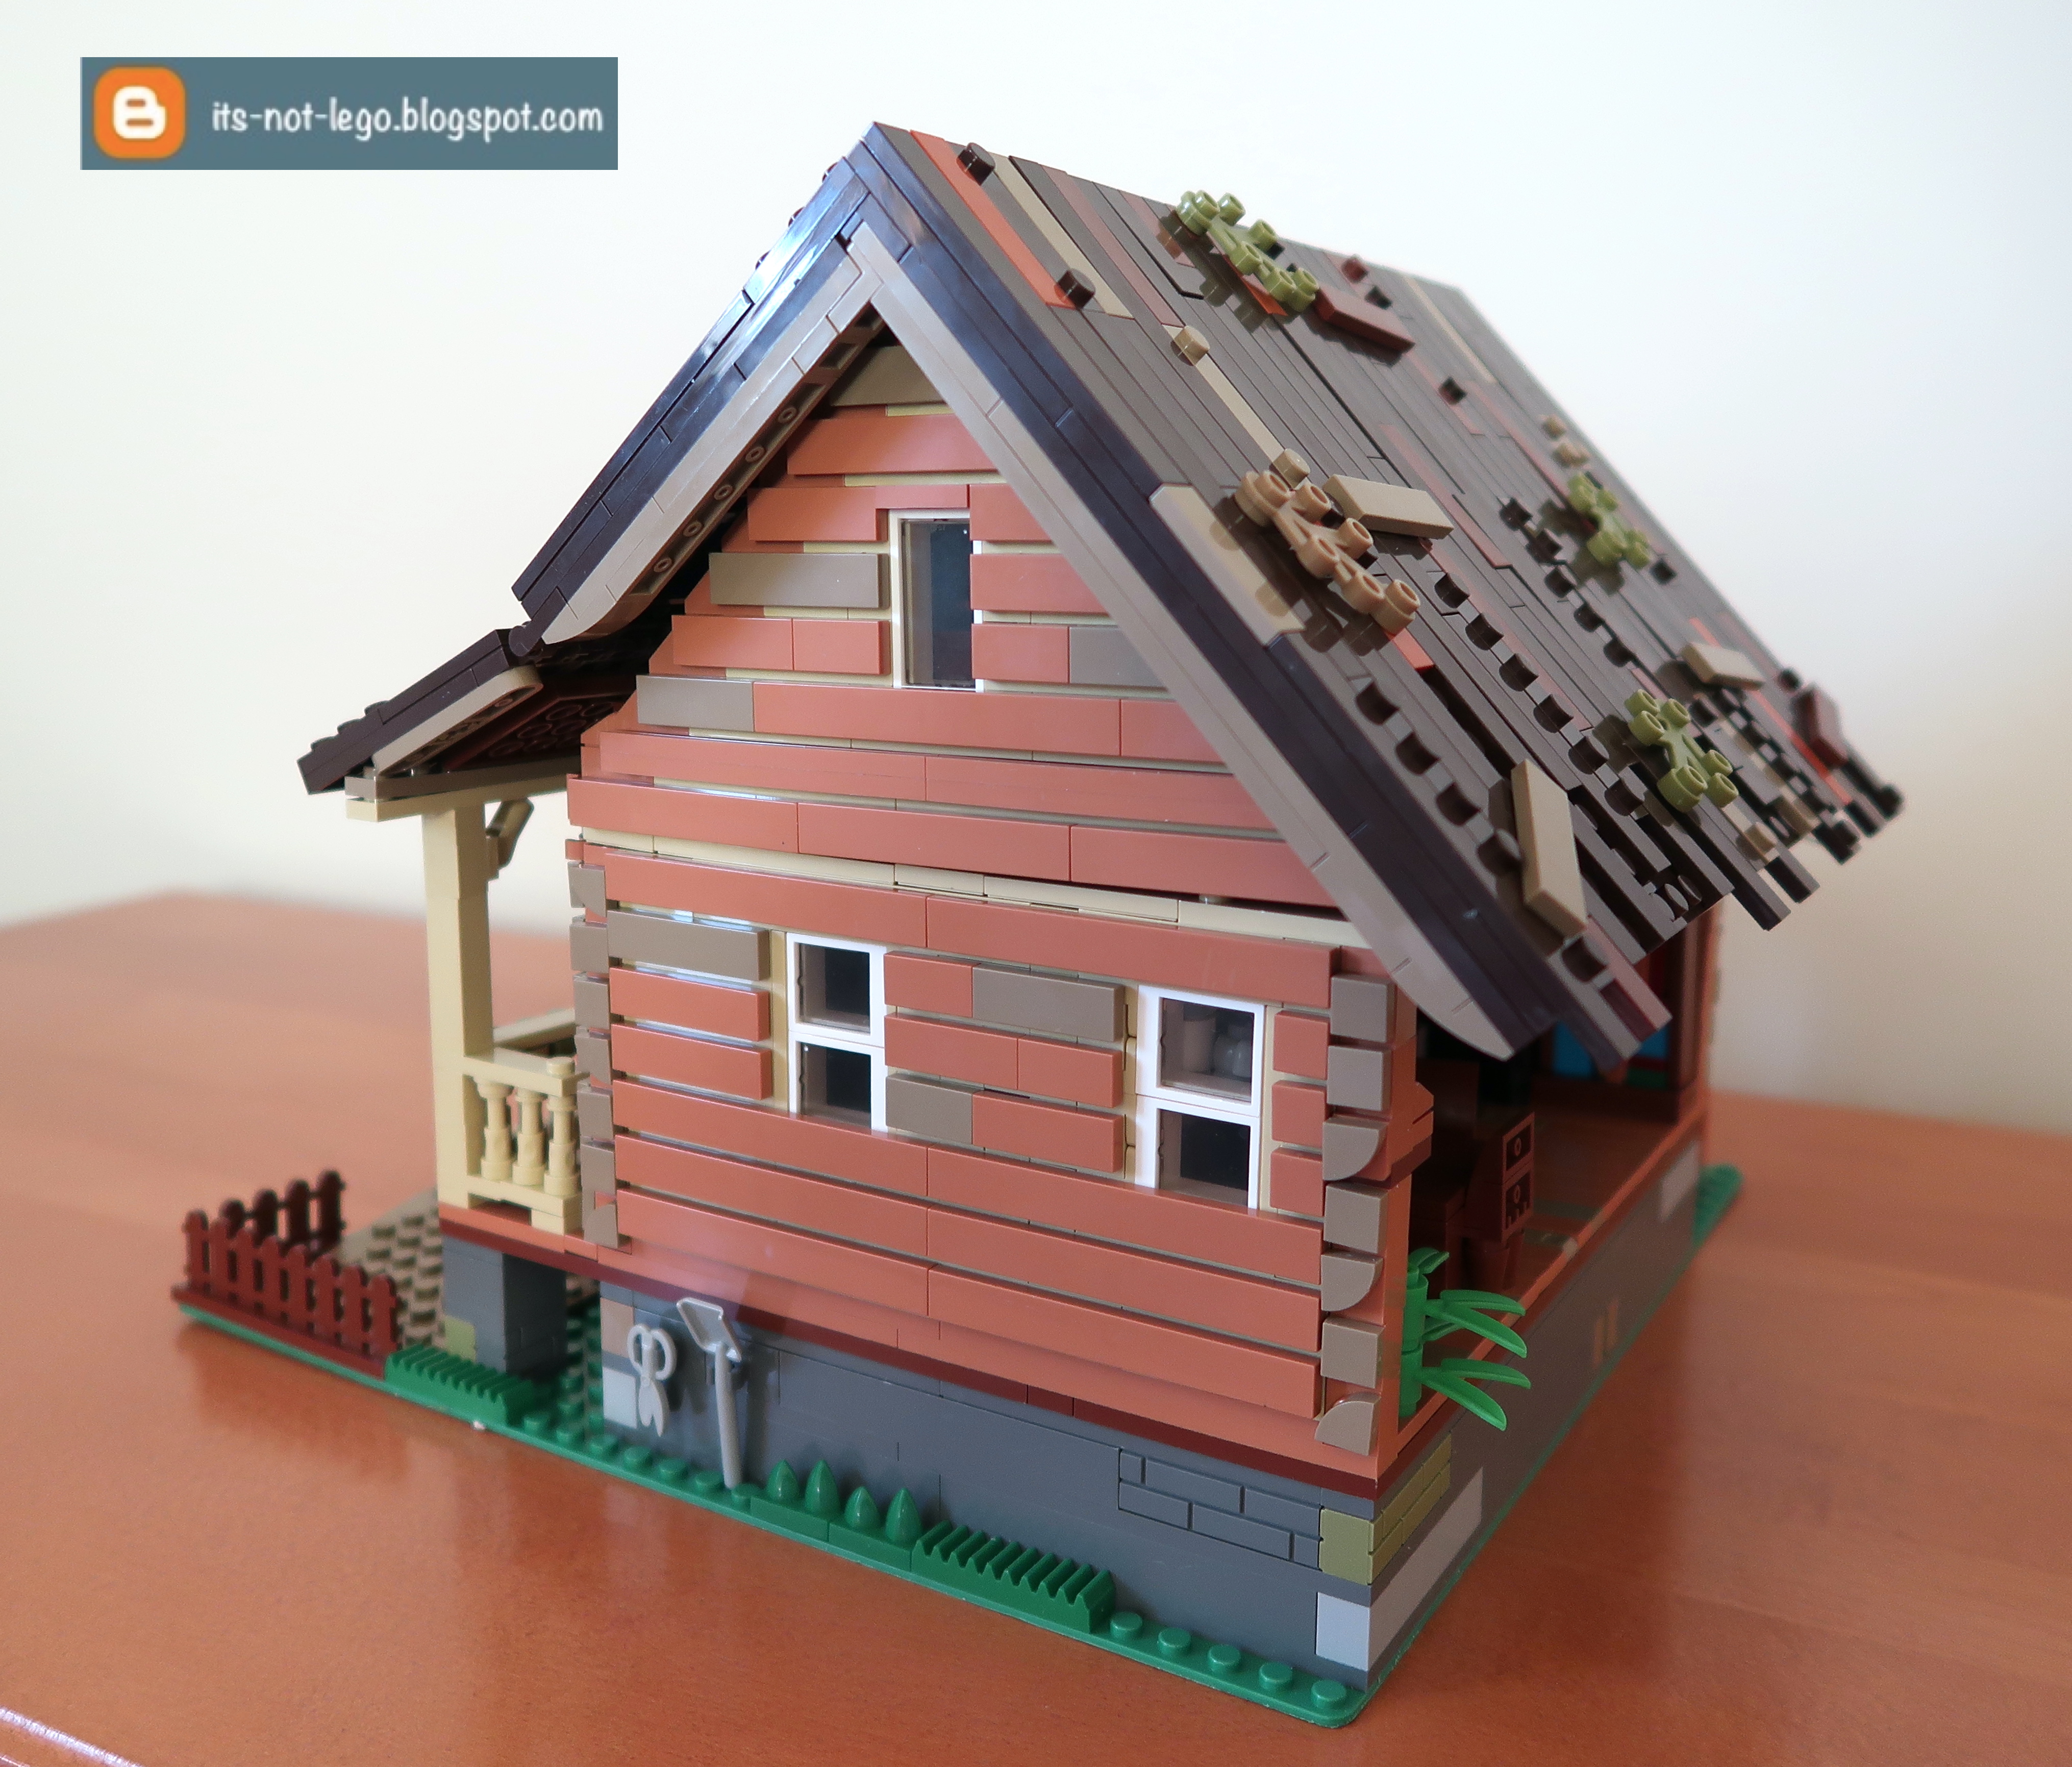
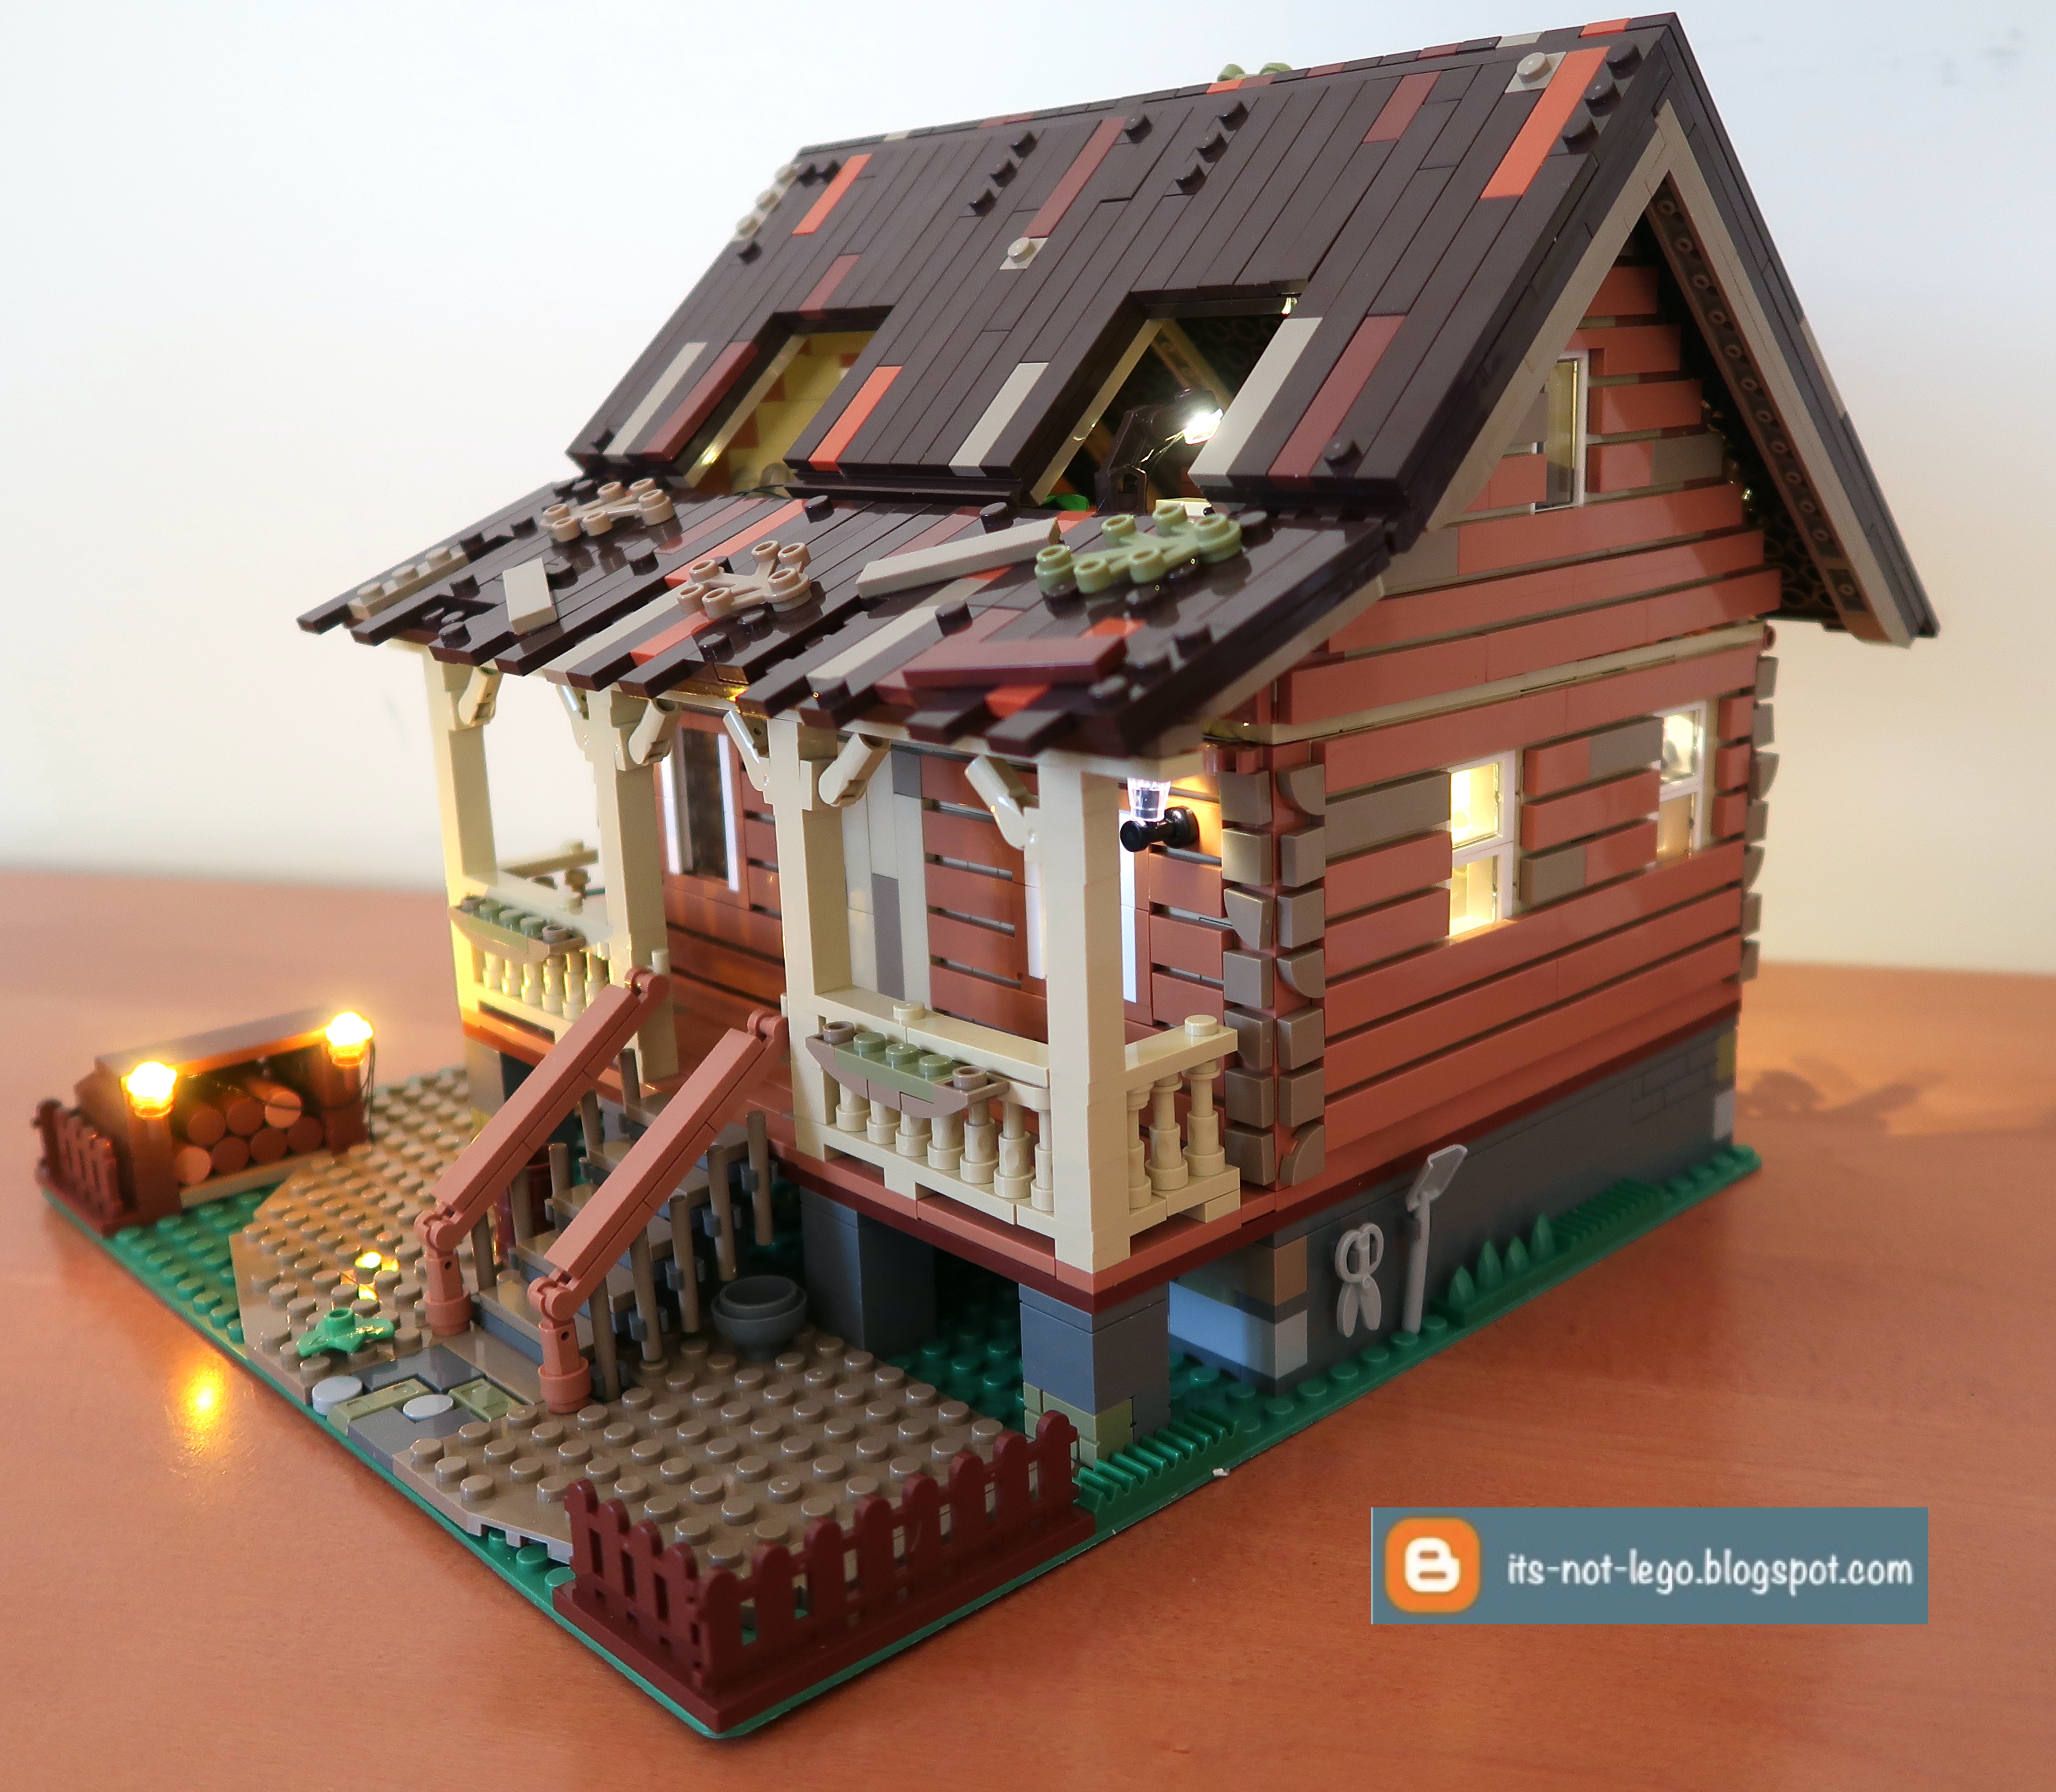
And here is how the wood cabin looks with the roof on.
Ok, here's where the Lumibricks wood cabin loses a bit of shine for me. The cabin roof doesn't attach firmly anywhere. It just sits atop the walls and it wobbles. The same goes for the porch roof, it's attached to the main roof but doesn't attach to the actual porch itself. So basically, the roof just kind of floats on top of the building.
Also, the pitch and length of the back half of the roof looks a bit asymetrical for me. Did I build it wrong or is it just me? It's kind of disappointing that the roof construction and design doesn't match the excellent build of the cabin itself.
A lighting test to wrap up section 6.
Build Section 7
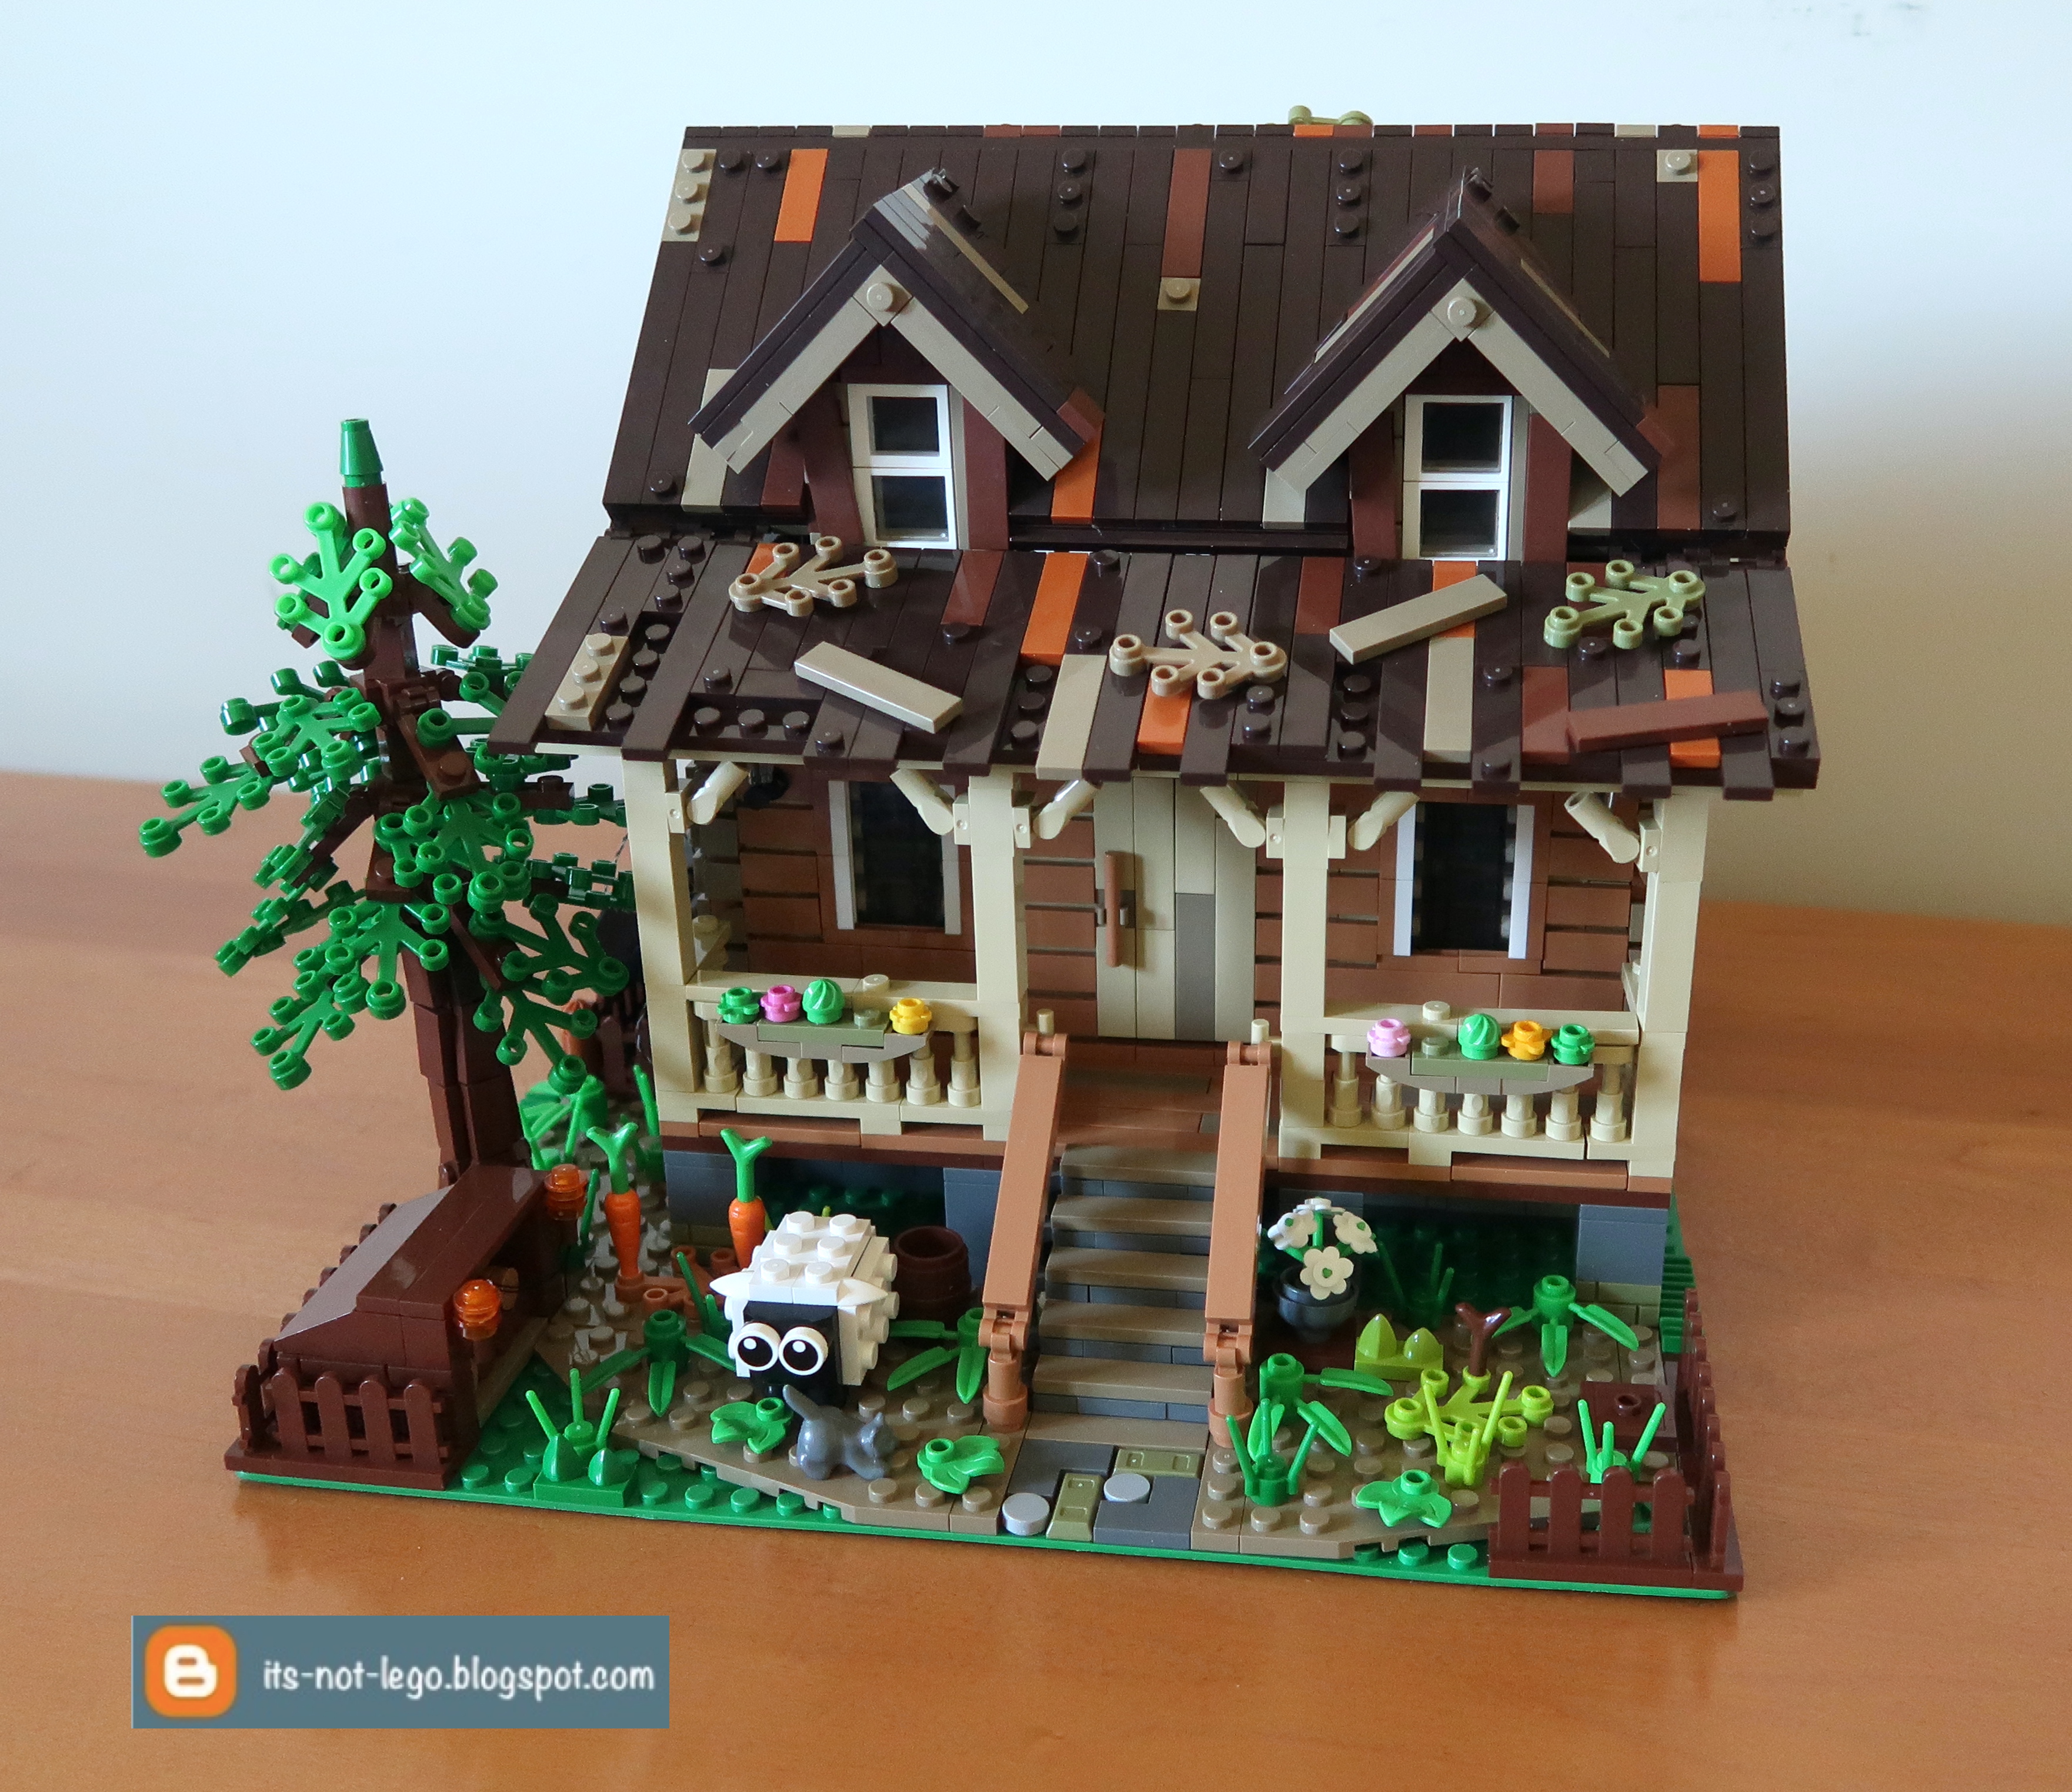
An unexpected surprise is this build of a sheep. I wish I could say he's little but he's not.
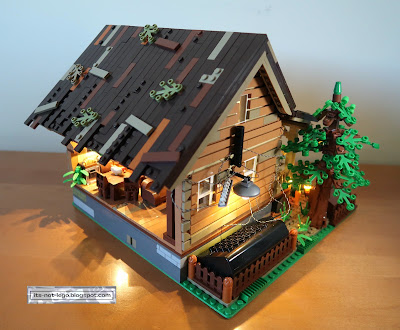
The completed Lumibricks wood cabin with dormer windows added. As you can see I've added in all of the landscaping that should have been there from Section 1. There's also a fairly decent representation of a conifer next to the cabin. This is the daytime look.
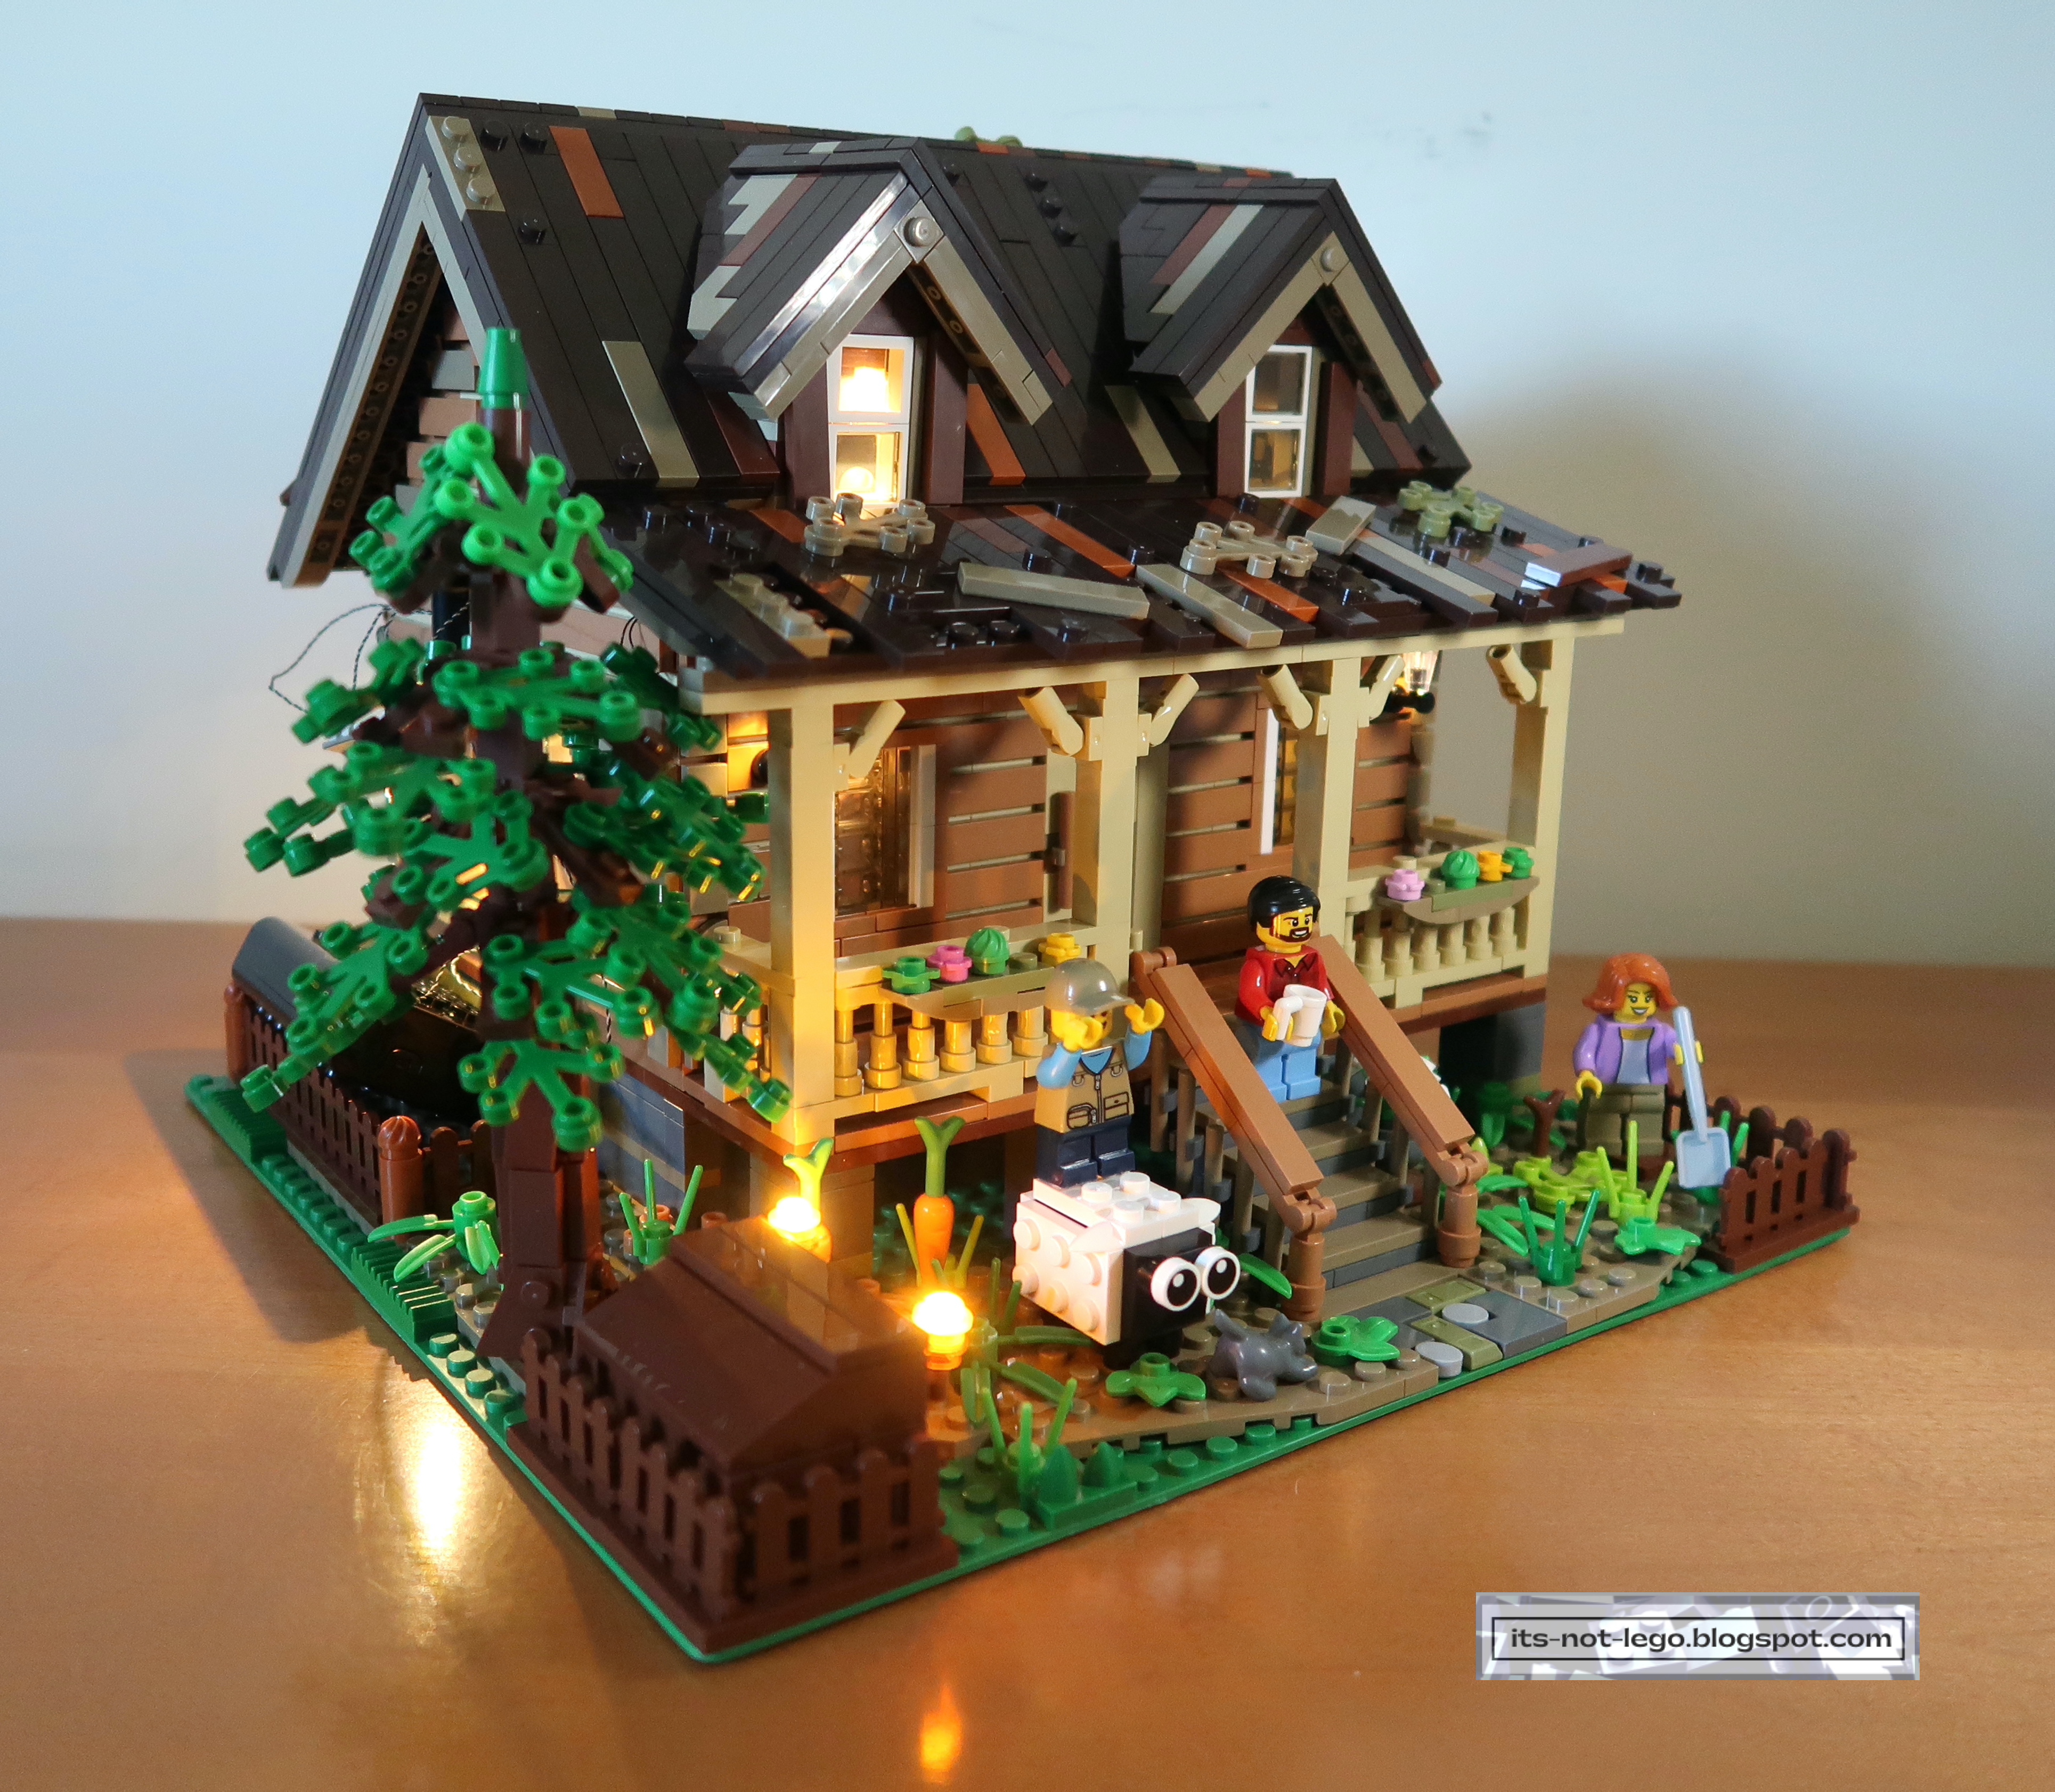
And here's the Lumibricks wood cabin lit for for the evening.

Ok, so let's talk about the two dormer windows. Each of them have an embedded LED light that uses the connection point on the roof. So the idea is when you seat the dormers into the roof, the lights will come on automatically. Sadly, this did not work for me.
Because the roof was loose to begin with, the dormers also would not stay fixed into the roof, and because of that, the dormer lights couldn't make the connection properly. I tried to re-seat the connections several times, but at best I could only get one dormer light to come on, never both.
I checked the videos of a couple of Youtubers who reviewed the Lumibricks wood cabin and it did not appear that they had the issues I had.

Opinion and Rating
Ok, let's summarize what I liked and what could be improved about the Lumibricks wood cabin.
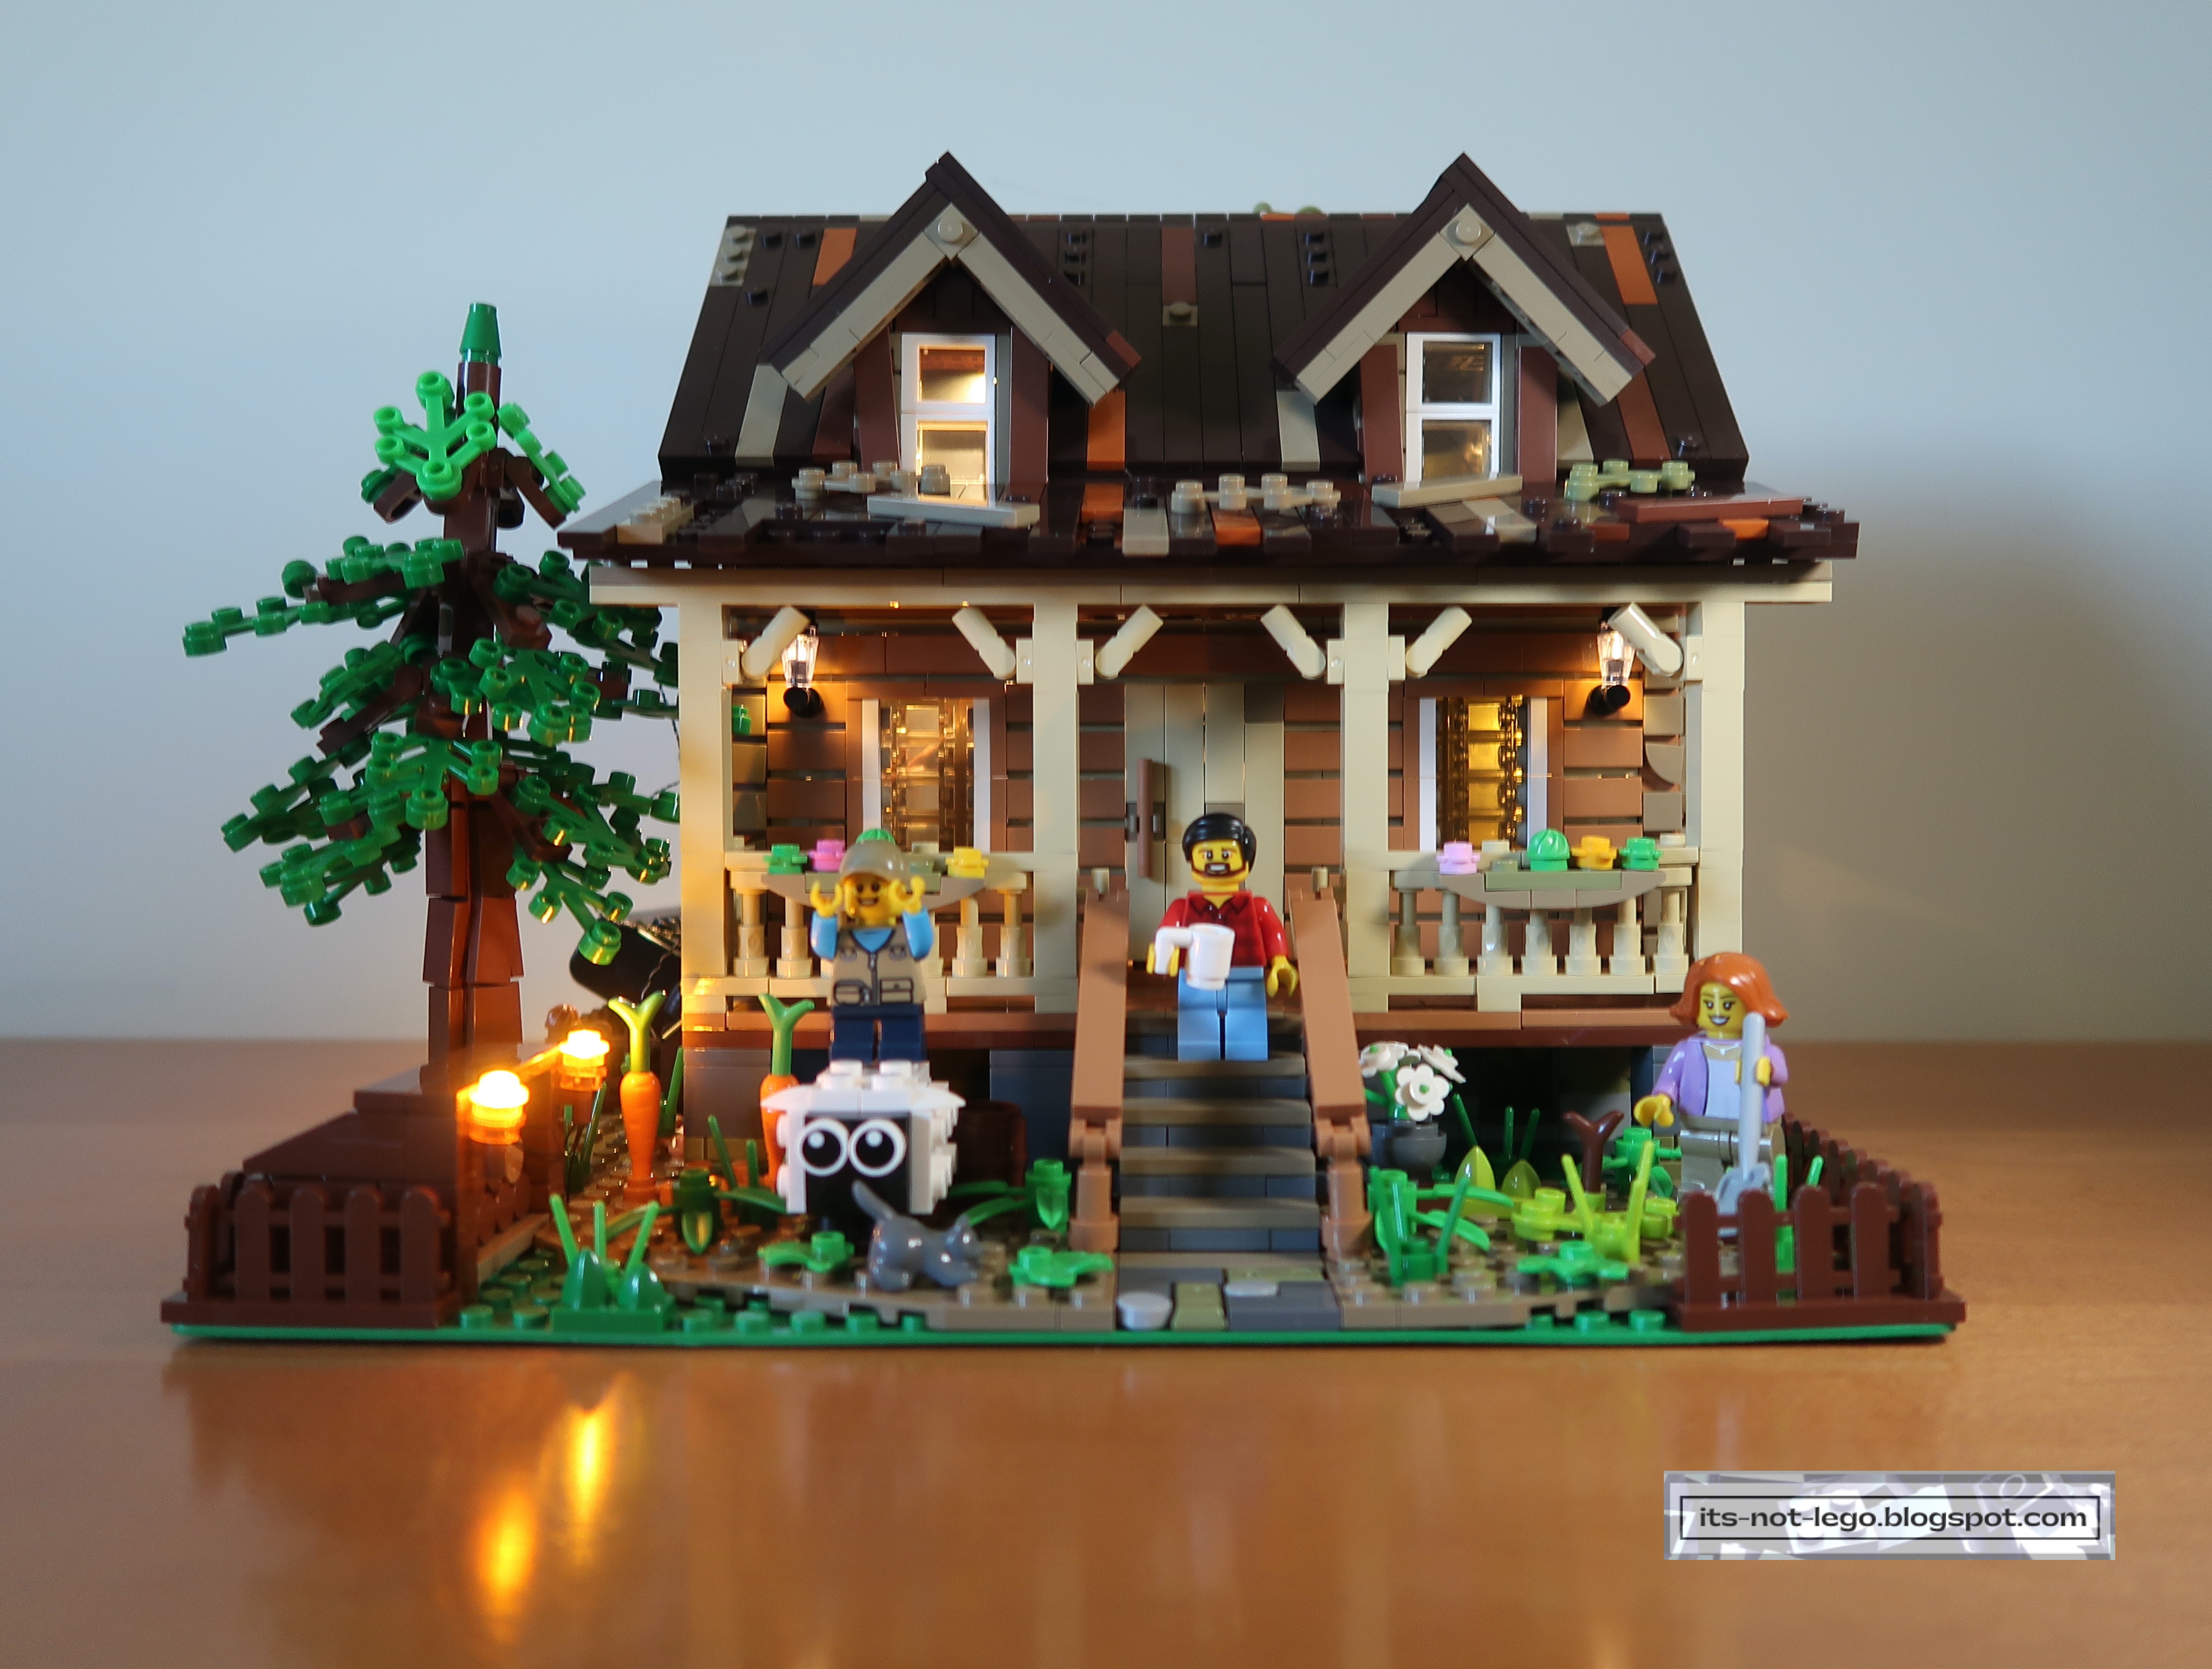
I thought the Lumibricks brick quality, finish of the bricks and clutch was excellent. The cabin interior was extremely detailed and laid out nicely. Definitely the wood stove was my favourite interior piece.
The exterior has a nice woodsy feel to it and big tree outside is a nice touch. he porch is nice and there's lots of landscaping, with flower pots and carrots to boot. The sheep is cute albeit it's a bit large for the set.
For the most part the lighting worked as intended (except for the dormer windows), and it was nice to have that as a standard part of the set, making a set this size good value for the money. Remember that this set has just under 2100 pieces and retails for about $100 USD.
I thought the Lumibricks set would have benefited from having some minifigures for play value. I also would have liked the cabin to have a hinged back wall. And printed parts instead of the sticker sheet (which I didn't use, BTW).
I couldn't get my dormer windows to seat properly into the roof, so maybe that's on me to try to rebuild that portion of the set. Overall, it's a decent set for the money.
For my rating, I'll give the set 4 out of 5 stars. Agree or disagree with my rating? Feel free to leave your comments below!
Thanks for visiting and talk to you in my next post!


.jpg)


I cannot for the life of me get the second floor lights to work, sadly.
ReplyDeleteThe build was difficult due to the lighting and because much of it did not have enough overlocking which made it flimsy.
ReplyDeleteSo glad for this review. Considered this for my grandson for Christmas, but for the money, I won’t risk lighting issues; and really, the finished roof is awful looking for how cute the cabin is. But that’s me, I’m not impressed with that messy, hodge podge look on the roof at all. I don’t understand all the different pieces and colors that make it appear like they just threw it together at the end. Way nicer would’ve been a finish that simulated a simple tin roof, or even old wood, with more realistic coloring. It kind of looks like a bunch of trash and scraps blew up and landed there.
ReplyDeleteOur kit was missing way too many critical pieces and we had to quit a quarter of the way through.
ReplyDelete