, my blog where I review the latest not Lego branded brick sets. In this blog post, I'll be giving you a detailed look at the steps I followed to build the Pantasy 81101 Spirit (Ling) Cage: Incarnation set.
To see the completed set pictures, please part one of this post
here.
The build consists of seven steps, although it's really only six steps because the last step just assembles the minifigures that are included.
Step 1.
Step 1 is comprised of 5 bags of parts. As per the instruction manual, Step 1 builds the platform on which the rest of the structure sits and all the "plumbing" underneath it.
Opening all the bags, the majority of the parts are dark gray coloured. We also find the Pantasy brick separator in step 1. Want to guess how many pieces there are?
The platform is assembled by connecting several technic pieces together.
Here's the platform flipped over so that we can attach the cloud layer to the underside. Nice conduit detailing around the perimeter of the base.
Printed tiles around the bottom.
These are the leftover pieces from step 1. There's enough parts to assemble another cylindrical tank.
Step 2.
Step 2 uses seven bags of parts to construct two container homes.
Parts separated by colour, sort of.
Interior of the first container dwelling. Looks to be a workbench with tools, worklight and shelving.
On the other side is a bunk bed with a secret cabinet to hide beverages. I remember this was shown in the anime, although I forget which episode.
Some sort of machinery with opening lid gets attached to the side of the beige coloured container dwelling.
With the remaining wall panel and door added, it can be seated to the base.
In the brown container, there is another bunk bed with a desk and a small cooktop with large metal pipes behind it. More printed pieces, a computer monitor and a family photo on the bed.
Placing the next container onto the platform. I like the red pipe extension with wheel crank.
Here are the leftover/extra parts from step 2. The baseplates will serve as the roof pieces in the next step. A random hotdog appears in this step, lol.
Step 3.
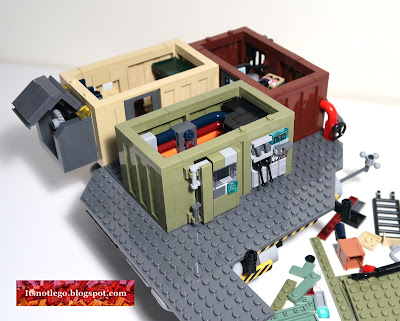
Five bags of brick pieces for step 3 builds the olive green container.
Parts unpacked.
Some cool conduits run into some of kind of power unit.
A heavy metal door and controls for the power unit are located on the outside. As this container is exclusively used to manage power, there's no bunk beds inside this one.
The baseplate pieces from step 2 are combined together to form the single roof that covers the three container units.
There's only a narrow alleyway to access the other two container units.
Viewing the containers from a different angle.
Here are the extra brick pieces after completing step 3. Also show are extra embellishments for this level. There's another control station, a ladder to the second floor, a telescope and perimeter barricades. The first level is now complete, time to move on to the second level.
Step 4.
Step 4 adds two additional container units to the structure using 6 bags of parts. Step 4 will also finish detailing the second level with accessories.
We see some cool printed pieces after dumping out the parts.
A unit for storage of tools and other items. Here's where the missing 1x1 round tile was supposed to go.
The sand green container with bedding and supplies.
After placing the two new containers, the next step was adding in all the boxes, piping, wiring and signage that make up the second floor details.
More leftover pieces after step 4.
Step 5.
Six part bags for step 5. The final container unit to build, this one in sand blue.
Mostly gray and sand blue pieces.
The last container dwelling houses another 2 occupants based on the bunk bed.
A crane for lifting heavy objects to the different levels.
Leftover parts from Step 5.
Step 6.
Step 6 sees only 1 bag of parts.
These parts make up the overhead girders.
This part of the instructions was really useful as it helped me to precisely adjust the technic connector to the correct position.

Parts leftover from step 6.
Step 7.
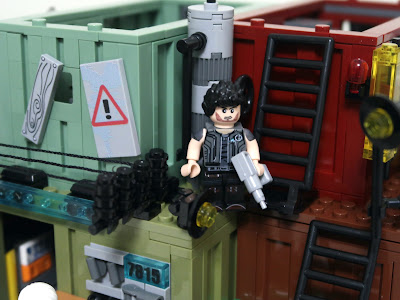
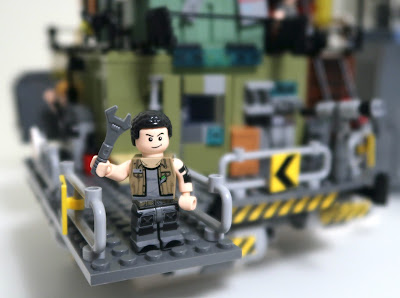
The last step saves the minifigures for last.
This set comes with six minifigures, but they can't be considered as Lego compatible because the torsos and arms are a different design. One might be able to swap out the heads and hair with Lego compatible versions.
I found a screenshot of the minifigures. Lowborn or dust people don't have names, only numbers, hence the only two highborn characters are Mark and Ran Bing.
4079
I think I counted about 90 extra pieces leftover.
That's it! Hope you enjoyed all the pics! Bye!