Wednesday, December 22, 2021

Unboxing and Building Pantasy 86218 221B Baker Street Set (Full Review)


Hey alt Lego brick fans!  Welcome back to another episode of It's Not Lego.  Today we will be unboxing and reviewing the Pantasy brand Sherlock Holmes 221B Baker Street building block set.   

Use discount code ITSNOTLEGO at checkout

This set depicts the interior of the fictional address of 221B Baker street, the domicile of Sherlock Holmes.  There are three rooms which you can build, the kitchen, the sitting room and the study.   This set reminds me of the layout of Lego Central Perk set and as you can see later in the details, it is roughly the same number of pieces.

This is going to be a long post with lots of pictures, so let's get right into it!


First off, I'd like to thank www.brickkk.com for sending me this set, complete with box.  

Use discount code ITSNOTLEGO at checkout


The box art is beautifully detailed and very high quality.  The set colours really pop against the jet black background.


Opening the box, we find a big instruction booklet with the name of the set which is 221B Baker St. and the Pantasy set number 86218.  The bricks for this set are neatly packaged in several pink and blue numbered bags.  I also got a 150 rmb/yuan discount card in the box, but not sure if I can use it for future purchases or not.


The instruction booklet is prefaced by a few pages of intro and some pictures of the set highlights.  Although I couldn't get google translate to work with the wording, I'd imagine that the intro probably mentions that this set is officially authorised by the estate of Conan Doyle, the creator of the Sherlock Holmes franchise.


On this page we can see the breakdown of the numbered steps and what part of the Sherlock Holmes set they pertain to.  Steps one and two build the kitchen, steps three and four build the study and the final steps five and six build the living room.

Building the Kitchen


Step 1 consists of 3 bags of parts.

This is what the first part of the kitchen looks like after completing step 1.  The primary colour of the kitchen is sand green with sand blue curtains and a dark green backsplash.  Lots of cupboards, a sink, a small stove and various pots and bowls and other assorted knick knacks.

Although this set is supposed to be displayed from the front, the back wall is not without it's details, such as the flower box under the window.  Those little pieces are extras that came in step1.

In case you were wondering, Pantasy provides a very pink free brick separator in the set.


To finish off the kitchen display, there are two more bags of parts in step 2.

One of the bags build the kitchen table and chairs.  Lots of bottles, a chicken leg and a microscope sit on the table.

The other bag contains the minifigure Mrs. Hudson, Sherlocks' landlady, with a teapot.

Building the Study


Step 3 consists of the three bags to build the study.

The study room without any adornments.  Walls are dark red with brown strip floors.

Here too, there is an exterior window treatment and flowering vine.  A few extra pieces as well.


Step 4 contains three bags to complete the display of the study.

Oh btw, I had a chuckle when I saw these instructions.  You really can't screw up this up!

That deer head above the desk has to be my favourite piece of this set.  It just looks so cool.  Another cool item is the typewriter.   Rounding out the furnishings in the study is a floor lamp, a sofa, and a round table.


Almost forgot to display the office chair and the extra pieces in this step.  The Dr. Watson minifigure appears in this step.

Building the Sitting Room


Step 5 has four bags of parts.

Constructing the sitting room floor.  Of note, there are some shiny gold tiles used on the area rug.


This step builds the dark red walls and bookshelf of the sitting room.


Step 6 has seven bags of parts to complete the display of the sitting room.

A fireplace for the sitting room, complete with knife, metronome and a skull?

Next up is another book case.


Placing the fireplace and book case into the sitting room.

Does Sherlock Holmes have a drinking problem?  We'll never know.


A chess set and old school telephone.


A hat rack and some kind of musical instrument.  Does it look like a violin to you?

Ta-da!  The fully furnished sitting room with two chairs, a sheet music stand and wall sconce.   I'm not that familiar with the Sherlock Holmes franchise, so if there are easter eggs to some of the stories, I'm completely oblivious.   Please let me know!

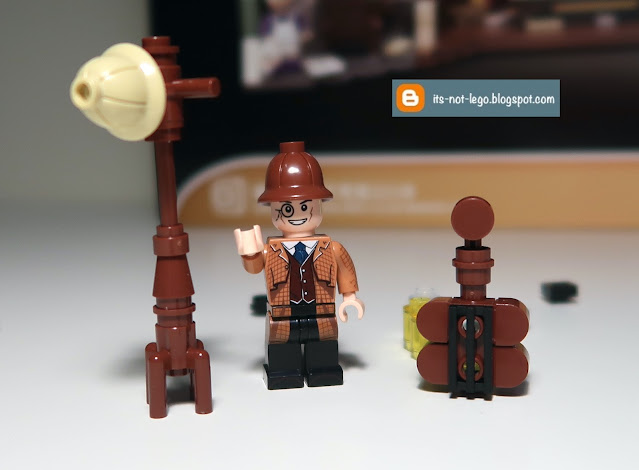
I realized I forgot to take a picture of Professor Moriarty earlier.  Anyways here are the four minifigures pictured together.  All of them have two faced heads.

Here are the minifigures with their alternate faces.

Each character has its own accessory.  Not sure if that gun Moriarty is holding is right for the times!

Final thoughts


This was a fun set to build.  So many cool little details and the minifigures are top notch.   For the most part the bricks used were near Lego quality in finish and clutch.  I did have a scratched door glass piece that was part of the sitting room book shelf, although the rest of the window glass was clear and scuff free.


Another big plus to this set is that it doesn't use any stickers.  Here are all the printed pieces that came with the Baker Street display.

I was curious about the total number of pieces in this set, so I took it upon myself to count up all the pieces.  The total is 1016 pieces, which does not include the parts to make up the four minifigures.   Additionally, there were 60+ pieces of extra parts.
This makes the set similar in size to the Lego Central Perk set because I think that set is also between 1000 and 1100 pieces.

I've seen people make a sitcom tower modular building consisting of the sets from Central Perk, Big Bang Theory, Seinfeld's Apartment and Bro Thor's Apartment.  I bet one could totally add this Sherlock Holmes set to the sitcom tower as another floor in the building.


I'm not 100% sure but the Pantasy Brand Sherlock Holmes 221B Baker Street set can't be found anywhere else except on the www.brickkk.com website.   

Use discount code ITSNOTLEGO at checkout


And, as a bonus of this writing, the set is on sale as part of brickKK's holiday sale.   Do check it out if you get a chance.

Thanks for spending your precious time reading this blog post.   Take care and see you in the next post!   Bye!


Friday, November 12, 2021

Happy Build YC-QC009-2 Coco Colo truck


Hello and welcome back to Its-Not-Lego, my blog about the latest alternate Lego building sets that I've added to my collection.

Today, I'll be looking at the 302 piece Coco Colo truck building set by Happy Build.  The set number is YC-QC009-2.  Coco Colo is obviously a take on Coca Cola and the logos are identical.  From a distance, you might not notice the difference in the spelling.  

As part of this set, there is a sticker sheet, an instruction booklet and one minifigure.   Pictured above is the back of the instruction manual.  As you can see from the manual, there are four different trucks that come in the series.   

I bought all four trucks from Aliexpress and will review the other trucks in the near future.  


The 302 pieces of this set are split between six bags.

Normally, I don't like to apply stickers to my building sets, but I made an exception in this case because this truck would look pretty boring without the logos on it.  Those logos don't show up in sticker sheet above, because the of the white lettering.


I built the truck following the instructions, but then I decided I didn't want all the stuff on the roof, so I went into my brick stash and found some smooth tiles to cover the roof of the truck.

I made some slight modifications to the side panels as well.

The Coco Colo truck has a vending machine built into the rear of the truck.

Here's the minifigure that comes with the set.

Good clutch on the bricks means my side panels will stay in the up position.

Nothing to see here folks.

I designed my roof so that it could be removed to store stuff inside the truck.

Jammed packed with stuff!  Everything fits!

The giant bottle was originally supposed to go on the roof of the truck, but I think I will keep it as a separate display piece.  I made a Coco Colo sign and flag from the provided stickers, they aren't part of the original set design.  Neither is the girl minifigure, she doesn't come with the set either.

I like how the vending machine turned out because of the stickers.

I thought that the vending machine on the rear of the truck looked so good, I wanted it as a stand alone display piece.  In its place I substituted a lift up panel door.


Here's everything that comes with the Happy Build Coco Colo set and a little more!

This truck set is hard to find on Aliexpress, so the way I search for it, is via the piece count which is 1197pcs.   This will bring up a few of the listings you see in the picture above.   You can buy only the ones you want or the entire set of four.


Bye for now!


Sunday, November 7, 2021

Jiestar 89100 European Jazz Cafe Set Review

Hey whats up, alt brick fans?   Welcome back to Its-Not-Lego.blogspot.com!

I had the opportunity to pick up this latest modular building, which is called the European Jazz Cafe, set 89100 from the Jiestar brand.   

I just finished building it and I can tell you this is unlike any other modular building I've built before.


The European Jazz Cafe is an alternate build of the Assembly Square.  This version has 3369 pieces.  It is a corner modular building and comes with a unique vehicle, a three wheeled stroller and eight Lego style minifigures.  The set design can be found on the rebrickable site as MOC 32576, the original designer is Inyong Lee.  Jiestar has copied it and made some minor changes to the original design.


Here's a fun fact:  In December 2016, I made the original jazz cafe by customizing my Hsanhe 6410-1 corner coffee set.  Follow the link to see more pictures of it.

The Exterior


The modular building consists of a cafe on the main floor and a stage on the second floor where patrons can listen to live music.  The third floor overlooks the stage and has extra seating.  


The interesting thing about this design is that it's schizophrenic.  It has two completely different facades depending on which side you are viewing it from.  Which do you like better, the left side or the right side?

Here's an overhead shot so you can see the rooftop.  There's a lot of great building techniques in this building.  The sloped roof on the third floor is an example of that. I'll probably employ this design in a future modular build.

Just some views of the backside of the Jazz Cafe.  It should be noted that the clutch of the bricks is extra tight, that's why you see a lot of gaps between the bricks.  I didn't press down too hard because it will be difficult to separate them in future.

I wasn't really a fan of how the back walls are put together, but I guess the original designer had to use what bricks were available to him.  I really want to rebuild parts of this building using normal building techniques.  The main floor walls in the rear  is also a hodgepodge of colours.  I'd want to fix that.

Thankfully the pretty front facade makes up for the ugly backside.

First Floor Interior


The first floor is a masterpiece.  I like the use of colours, and the fact that it has a bathroom conveniently under the stairs.  Each floor has a little micro build. On the main floor stair wall, there is a little red train.

This coffee counter looks amazing and is probably my favourite part of this set. I don't have enough words to describe all the little details, so just look at the pic.

Here's the seating area by the windows.

The entrance to the Cafe is on the corner of the building.  But it looks like there's also an emergency exit near the stairs, which take you up to the second floor.

Second Floor Interior


The second floor consists of a large stage with a drum set and upright piano.  The VIP seating is closer to the stage.  Regular seating is by the windows.

I probably didn't build the drum set properly.  Looks a bit wonky.  The drumsticks are located on the wall.

Those blue tables are crucial in securing the triangular shaped windows to the wall. This was probably the most challenging part of the build.

The second micro build can be found by the corner window of the second floor.  It's a tiny representation of the Assembly square modular building.

Third Floor


The third floor mezzanine can be reached by the stairs.  There's more counter seating and lighting for the stage located here.

The last micro build can be found on the third floor, it's the tower bridge.


Here's the modular building deconstructed into it's various floors.

My favourite things


This coffee sign.

The folded patio umbrella.

The design elements.


The dark tan accents along the turret window.

The triangular windows that stick out.   The Jiestar version uses different pieces to secure the window.  The original design uses thor's hammer.

Here's a screen grab of the original building technique used.

Here's the oddly looking vehicle. It probably didn't need to be made, in my opinion.

The three wheeled stroller and a bike with no tires.

These are the minifigures that come with the Jiestar version of the Jazz Cafe.  You'll definitely see some differences between the these ones and the figures depicted on the rebrickable website.  I wouldn't have expected minifigures to be included on a MOC design building, so this was a pleasant surprise.

I can say honestly that this set is for advanced builders only.  Anyone else might get frustrated at some of the techniques used, but if you are looking for a challenge, this set is definitely for you.


You can also find the Jiestar Jazz Cafe on Aliexpress.  Search for  other modular buildings by using the search term: streetview.

I'll be doing a separate post highlighting the build process of the Jiestar jazz cafe.  Look for that one soon!   Bye for now.