Showing posts with label afobrick. Show all posts

Monday, November 27, 2023

Kumamon's Japanese House - Inbrixx 880018 Building Block Set Review


Hiya brick fans!  Or should I say Konnichi-wa?  Yup, we are going to review another Japanese themed building block set.  Today's set is by Panlos/Inbrixx and this is my first ever experience with this brand.

First of all, a huge shout out to Afobrick.com for providing the set for this review.  In addition to this Kumamon set, they have a wide assortment of other building block sets that you might want to check out. See the special Black Friday promotion at the end of this blog post!


Before we get deeper into review, let's look at the set details:

  • Set Name: Kumamon Japanese House
  • Set Info: Panlos/Inbrixx 880018
  • Price: approx $50 USD
  • Piece Count: 1099 pieces
  • Manual included: Yes
  • Stickers: Yes
  • Printed Parts: Yes
  • Brick Separator included: Yes
  • Minifigure: Yes, One (Kumamon Bear)
  • Numbered Bags: Yes
  • Missing pieces: None
  • Extra pieces: Yes
  • Bonus: 2 LED light bricks
  • Size:  27.2 × 14.4 × 21.3 cm


About Kumamon

Meet Kumamon, the amiable black bear residing in Kumamoto, Japan. Serving as the official mascot, he warmly greets all who venture into this picturesque prefecture.

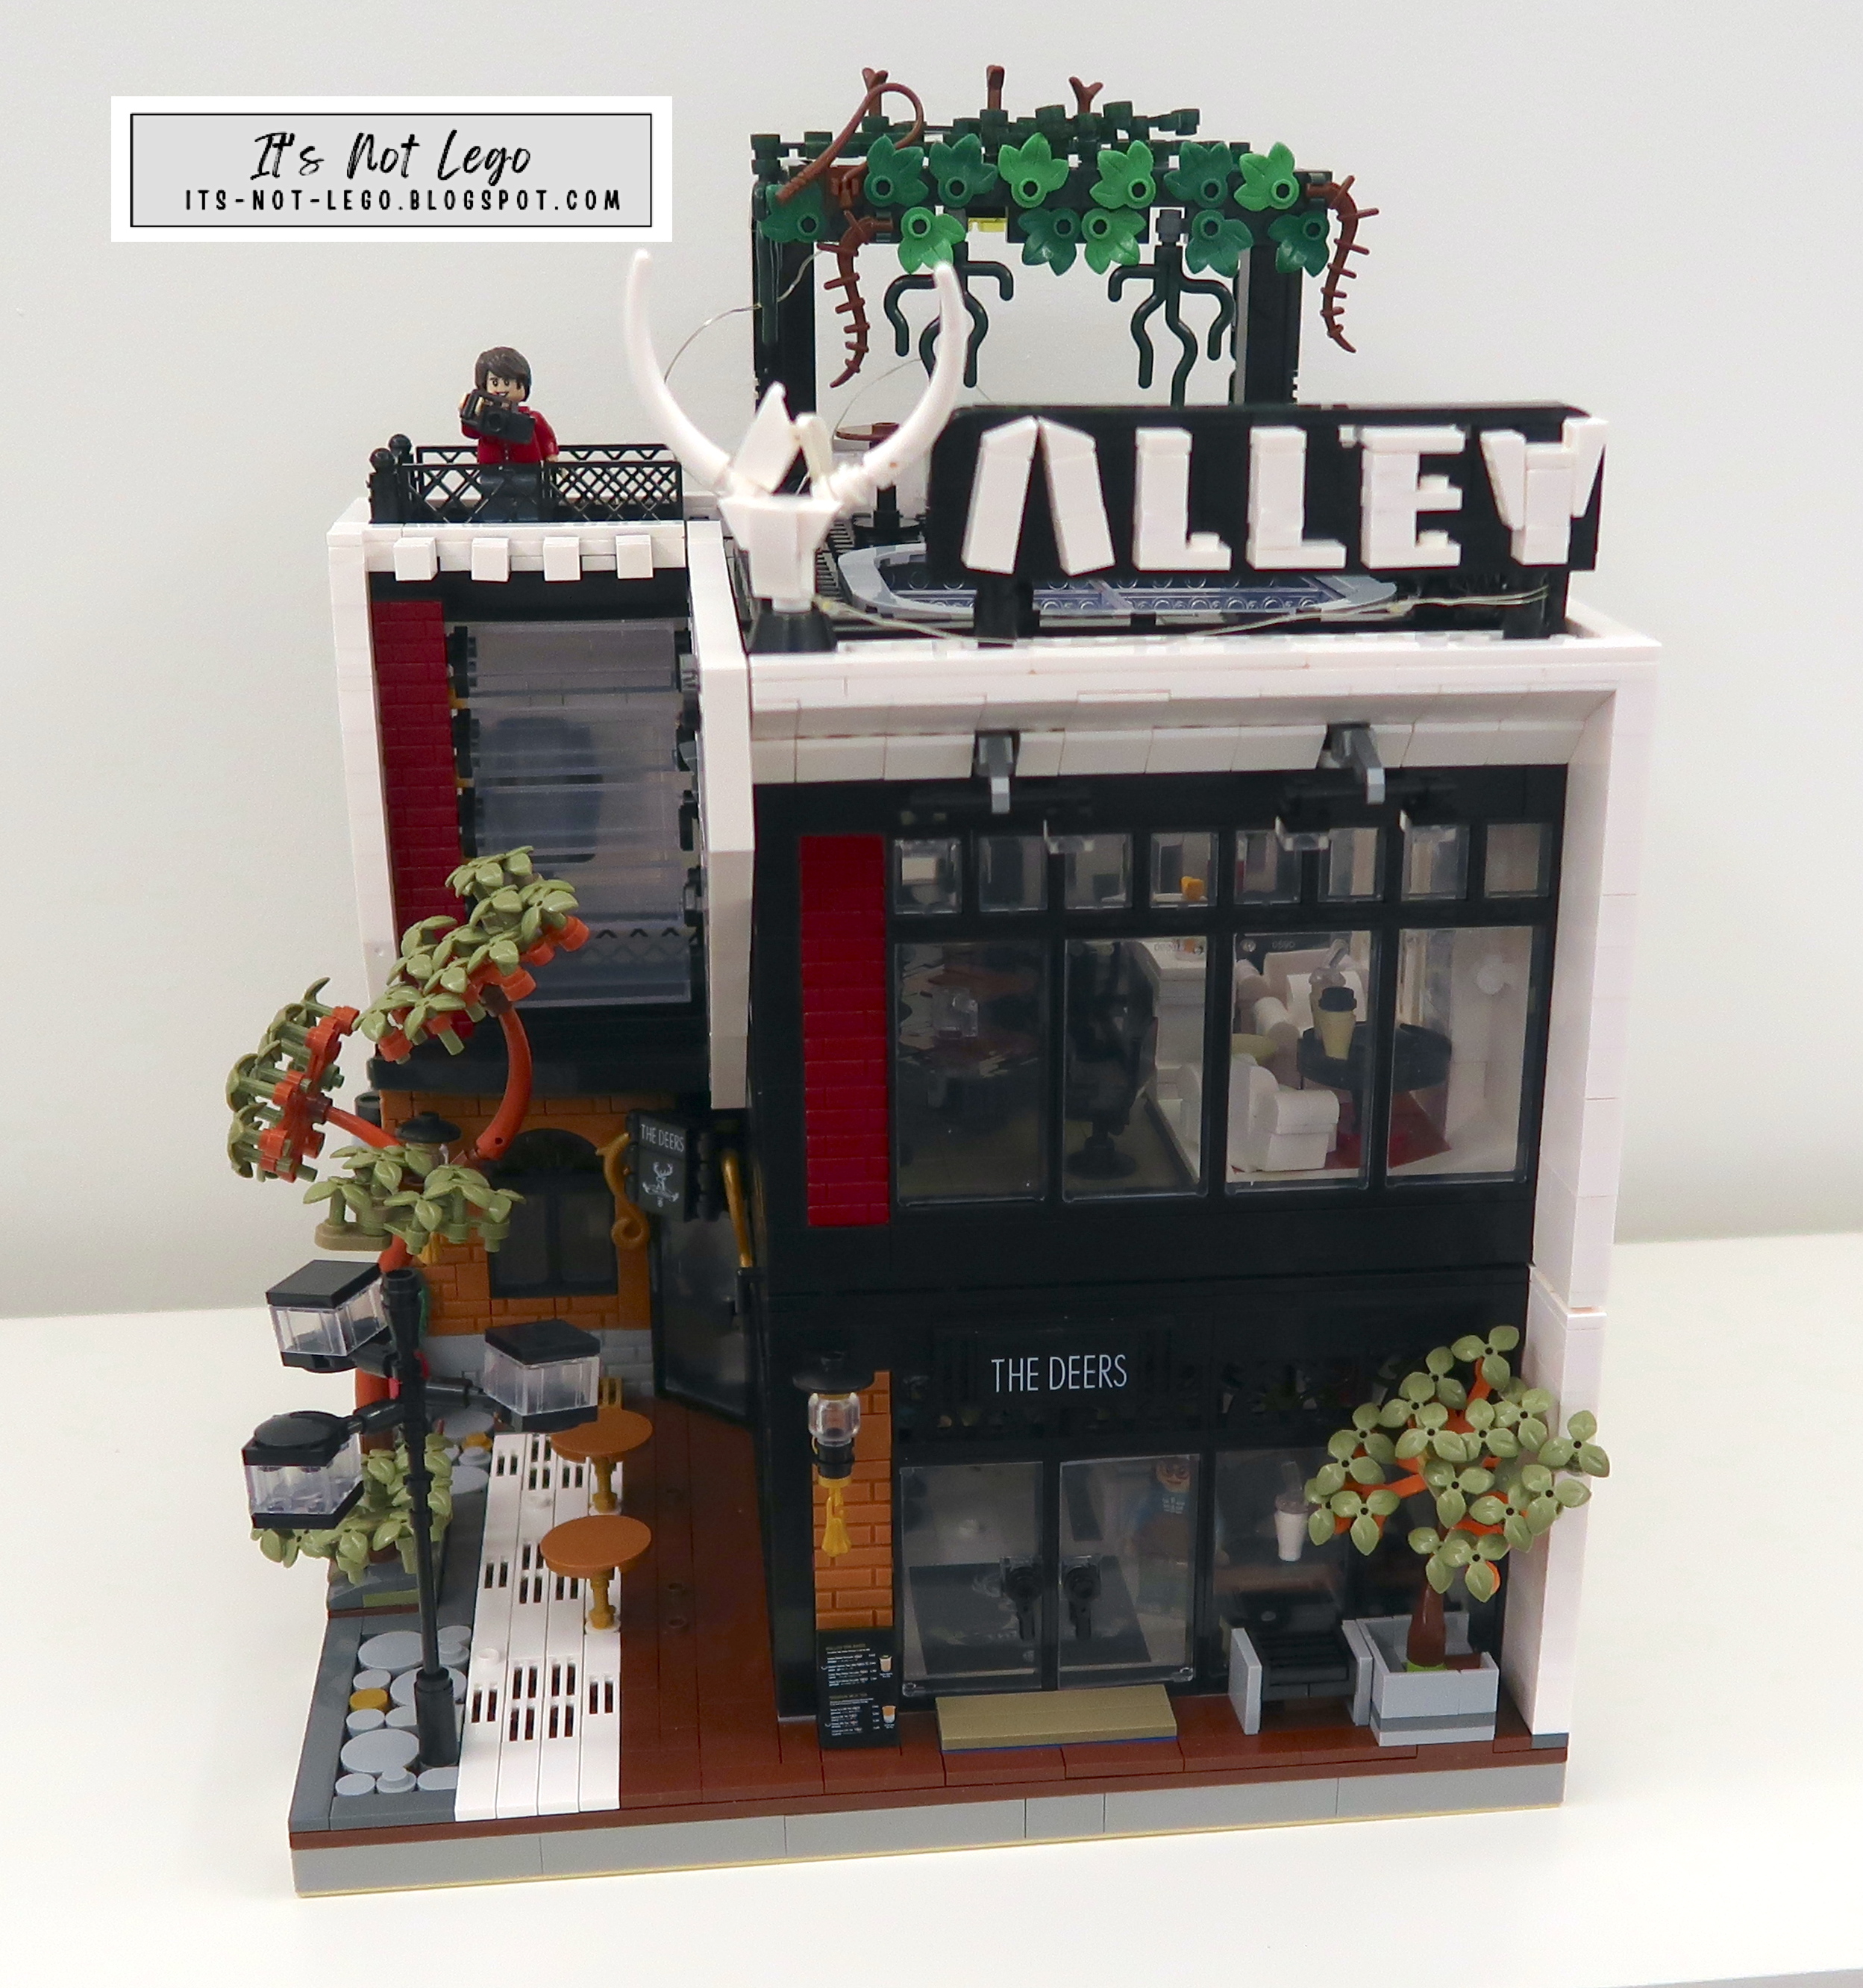
Exploring the Kumamon House


Nestled by a serene creek, this two-story Japanese-style dwelling is adorned with a meticulously landscaped garden featuring a fountain, a stone bridge, and a stone lantern, all enveloped by lush bamboo plants. 

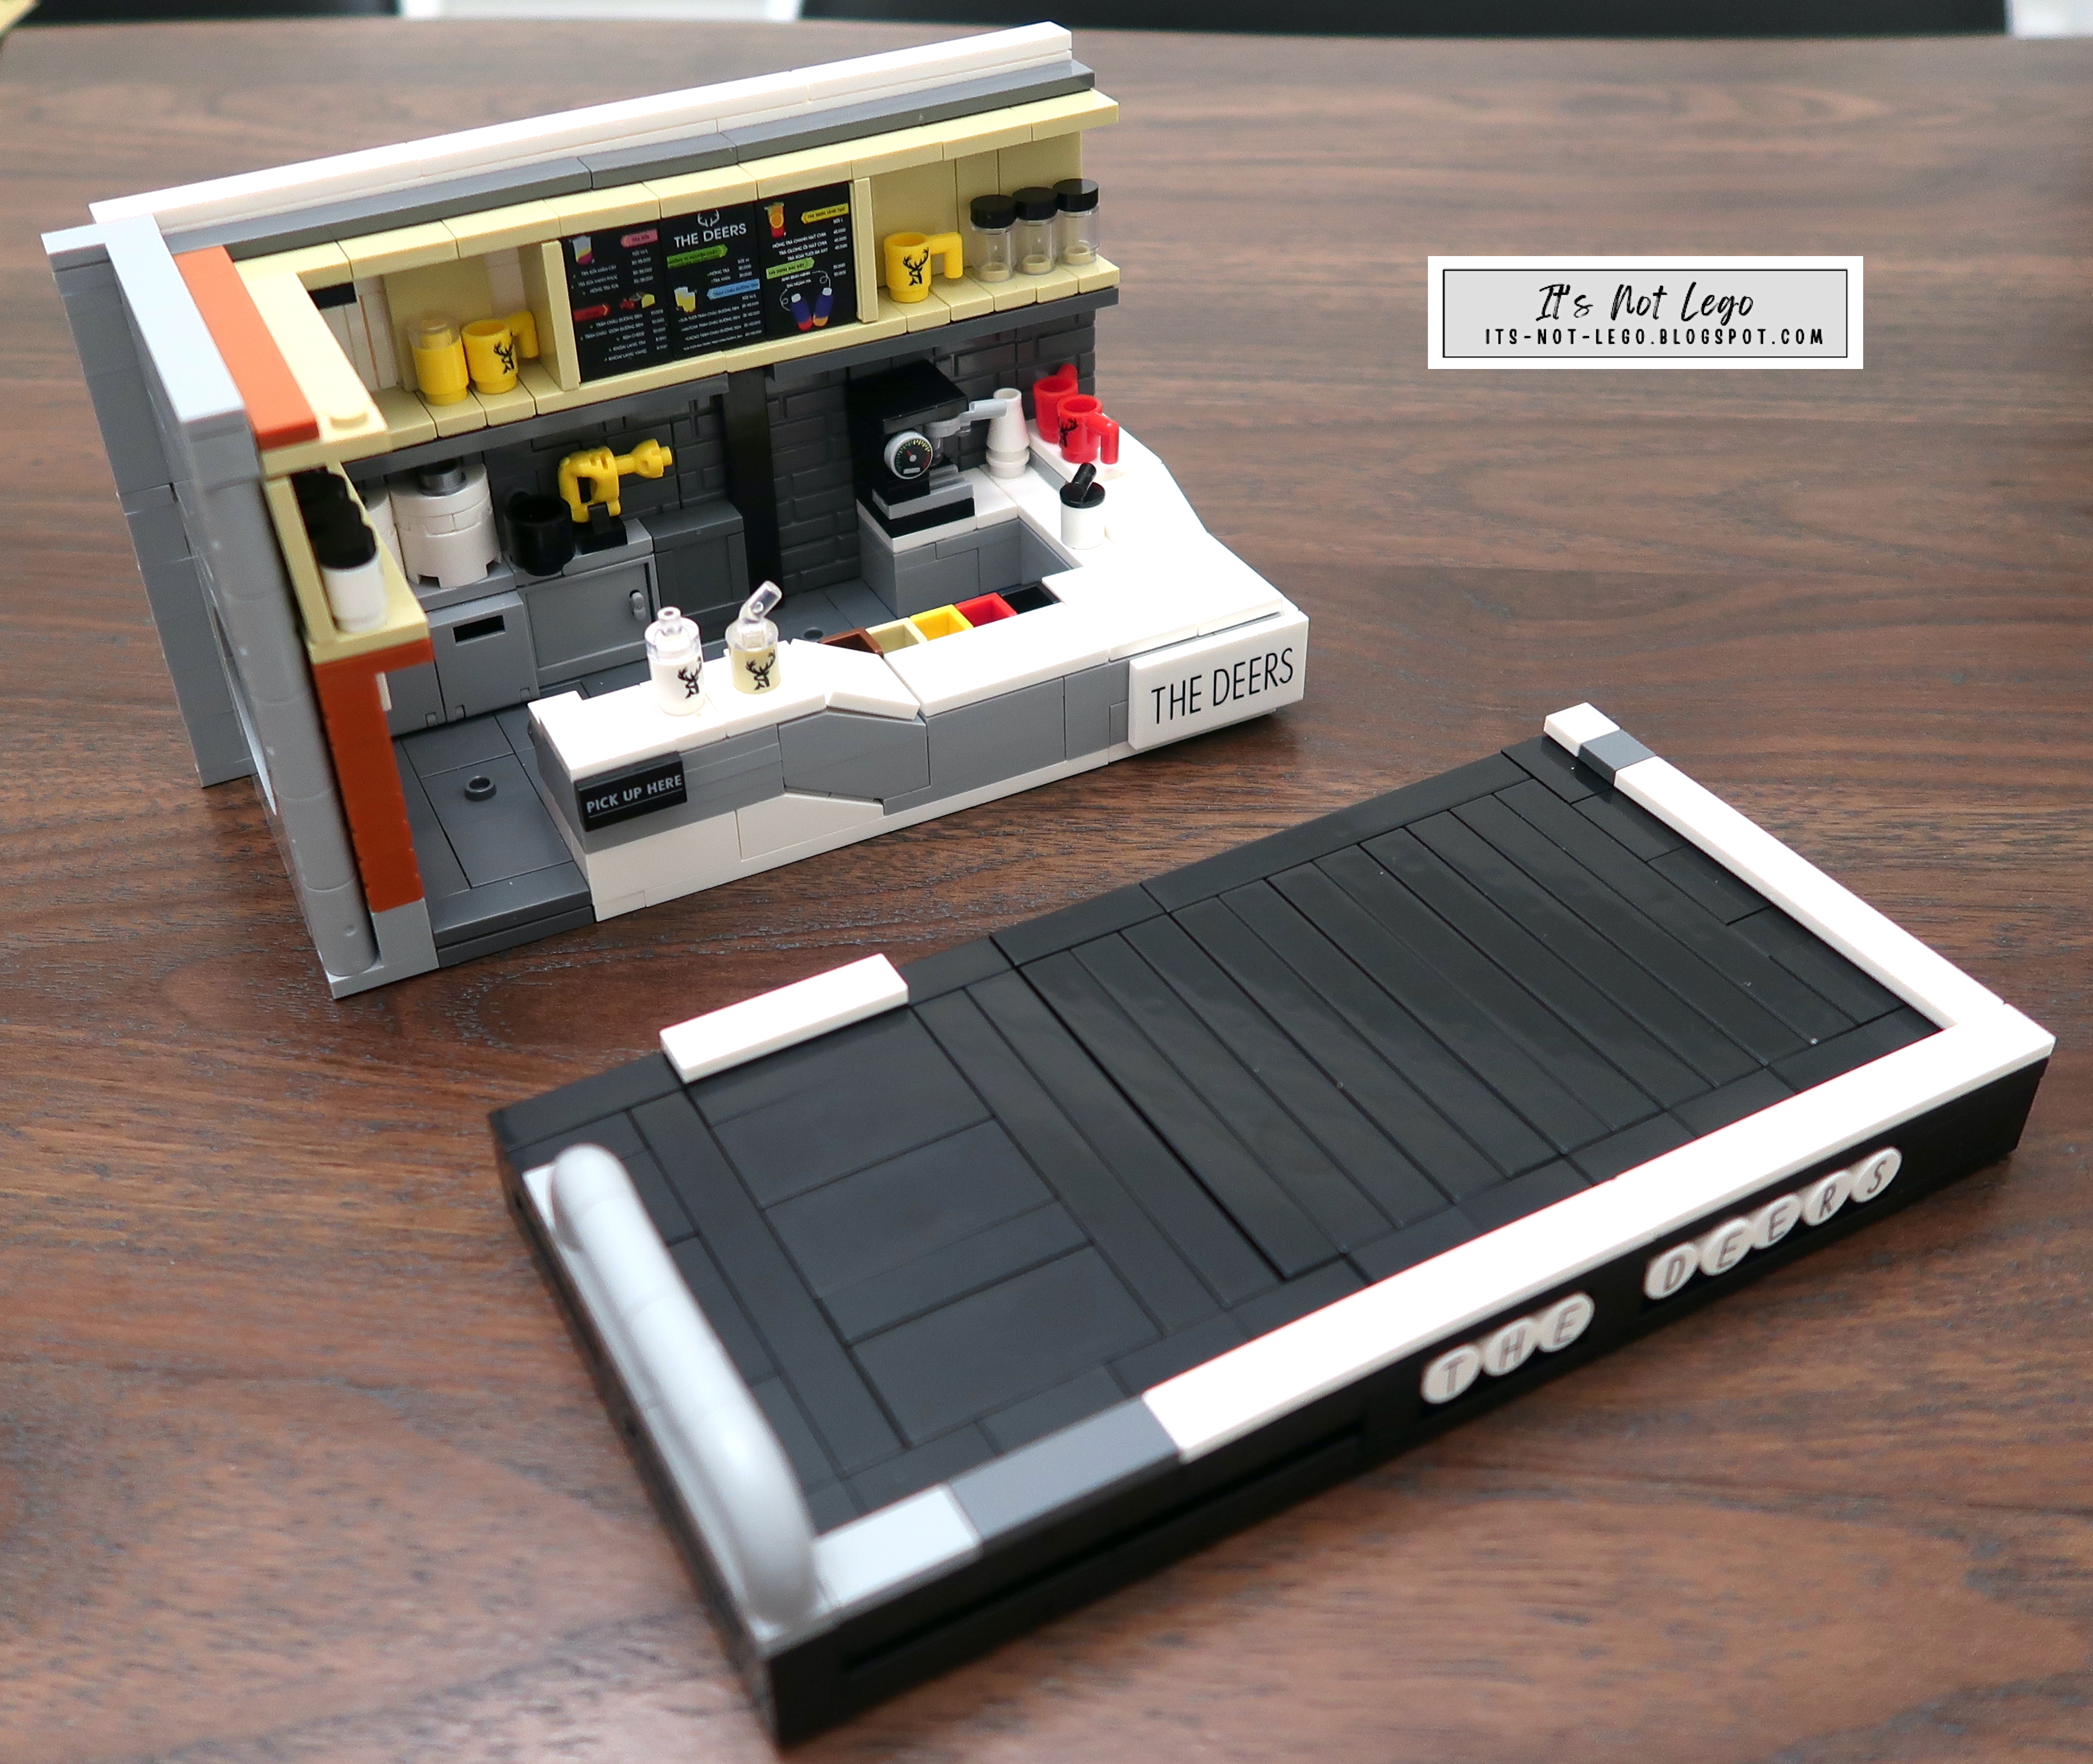
The first floor of Kumamon's abode boasts two rooms—an expansive living and dining room in one, and a cozy tea room adorned with an ikebana display in the other. The second floor features a spacious bedroom and study area, complemented by a petite terrace to take in the natural surroundings of the region.

The set occupies a space of 16x32 studs. You have the flexibility to detach the second floor from the first, and both levels come equipped with LED lighting, courtesy of two compact light bricks.

Unboxing the Set


My set didn't arrive in the original box; instead, it was securely packaged in a generic plastic bag. Despite the absence of the box, it was well-protected with thorough wrapping.   The bags are numbered to follow the steps in the manual.

Here are the 8 bags of parts for Step 1.

And another 8 bags for Step 2.

Step 3 also has 8 bags of parts.

There is a small sticker sheet and 4 more ancillary bags which contain wooden curtains, lamps and baseplates.  Also included are two dark green 16x16 plates.


The provided manual is 47 pages long.

At first glance, I feel like the instructions are quite compressed and the pages are very thin.  The Kumamon face is plastered on every page as a watermark which makes it sort of visually distracting.

The sticker sheet will be used to adorn the fan and room divider in Step 2.


Constructing Step 1

Step 1 will build the house foundation, small garden and the back wall of the house.

Very straightforward build at this point.  This is my first time building with Panlos/Inbrixx and the quality of the bricks is very good.

There's a stone bridge and lantern in the garden.

A cute fountain that comes out of a teapot.  The transparent blue rod could have been made a bit longer, I think.

And here are all of the printed pieces I found for step 1.  I really like the little wall calendar and the slippers.


Constructing Step 2


In this step, we will finishing building the first floor and install the interior lighting.

Here's the first floor completed.  You can see where the LED lighting is mounted.  There's a total of three lights, two in the main room and one that lights up the tea room.


These are the shades used in the tea room, they actually feel like wood.  Be careful handling these as they are very delicate.

The ikebana, or floral arrangement adorns the wall in the tea room.  The yellow flowers and leaves get washed out by the lighting.  Inbrixx should have made the flowers some other colour like pink so they can stand out more.


Here's the low Japanese table called a kotatsu with a plate of watermelon slices and some sushi on it.  There is also a large floral centerpiece but I think it's size overwhelms the table.  

Here's a look at the printed pieces found in Step 2.

I love all the details on this set like the large fan and the clock.  Even though the fan is a sticker, it looks great.


Constructing Step 3


So the last step of the Kumamon house is to build the second floor and roof structure.

Before adding the roof, you need to install the lighting for the second floor.  Those LED lights are really bright.


There's even more printed parts that can be found to enhance the bedroom.

Even the window pieces have prints on them.

And here's the second floor with roof installed.

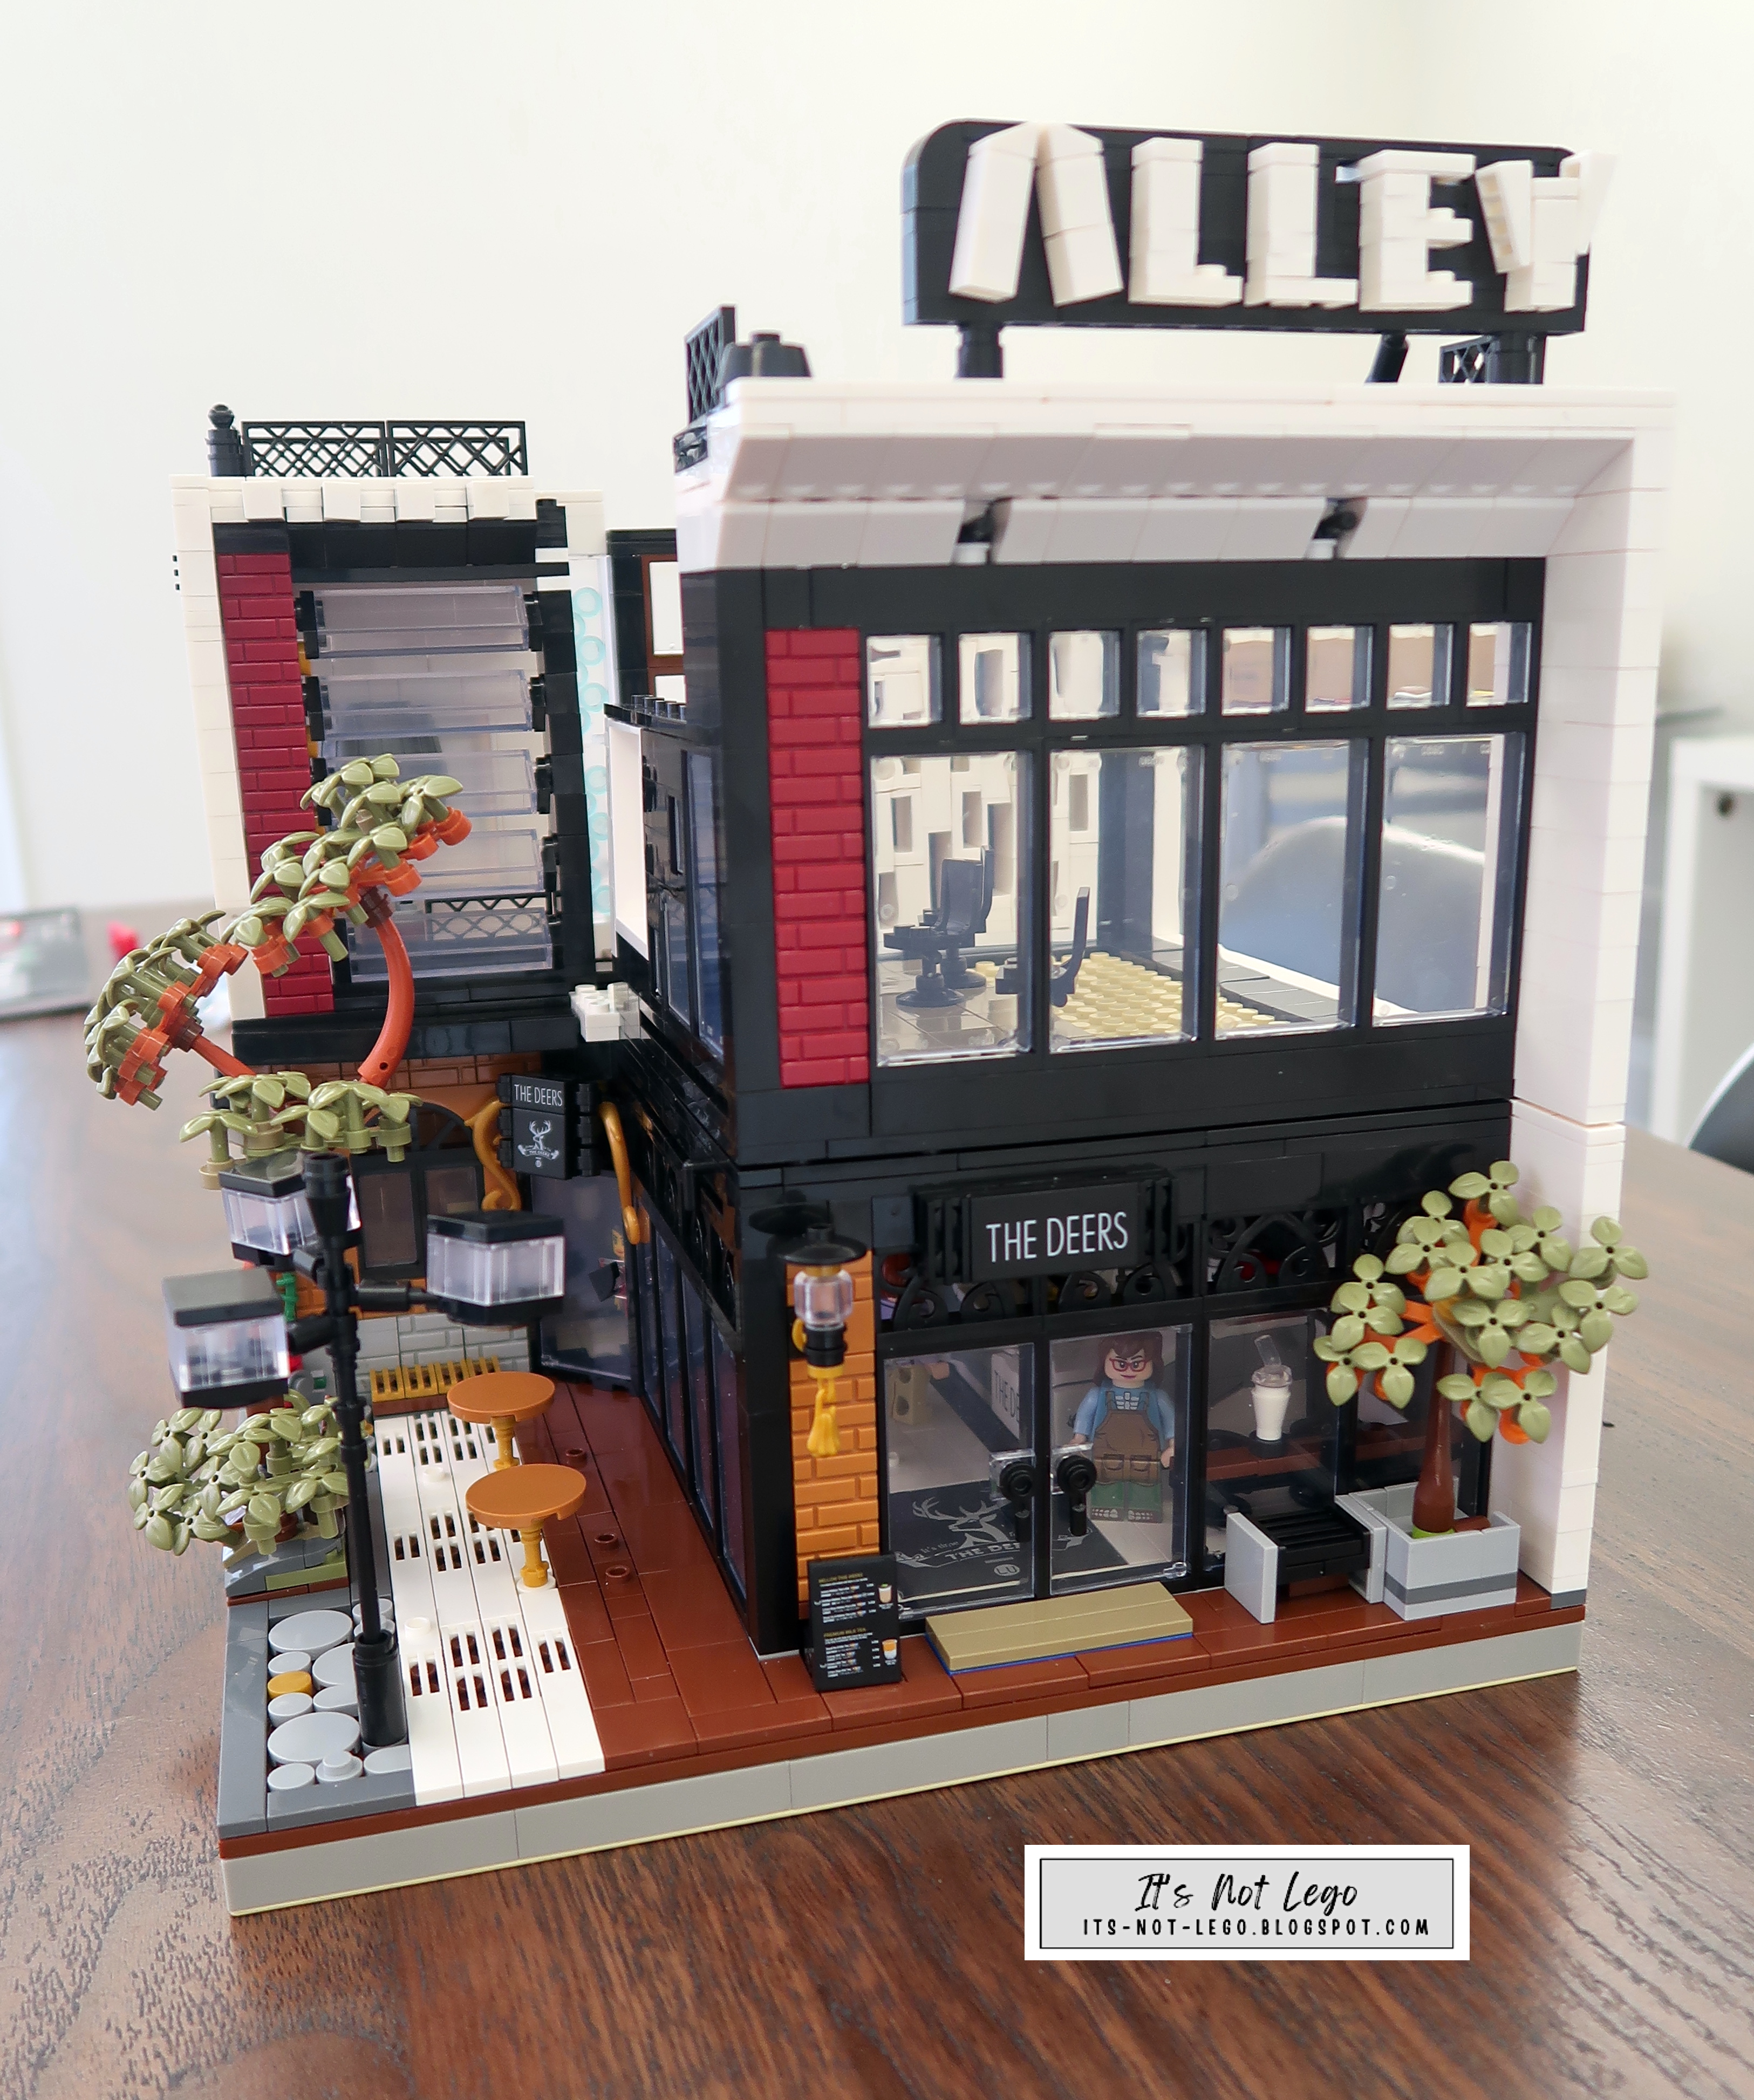
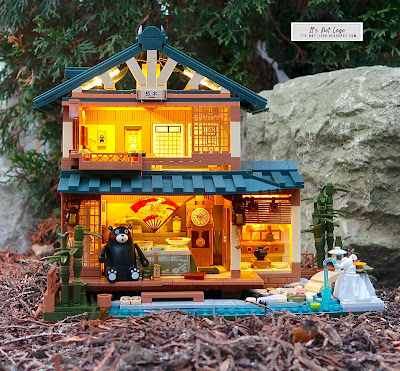
And here is the completed Kumamon house.  Looks fantastic!

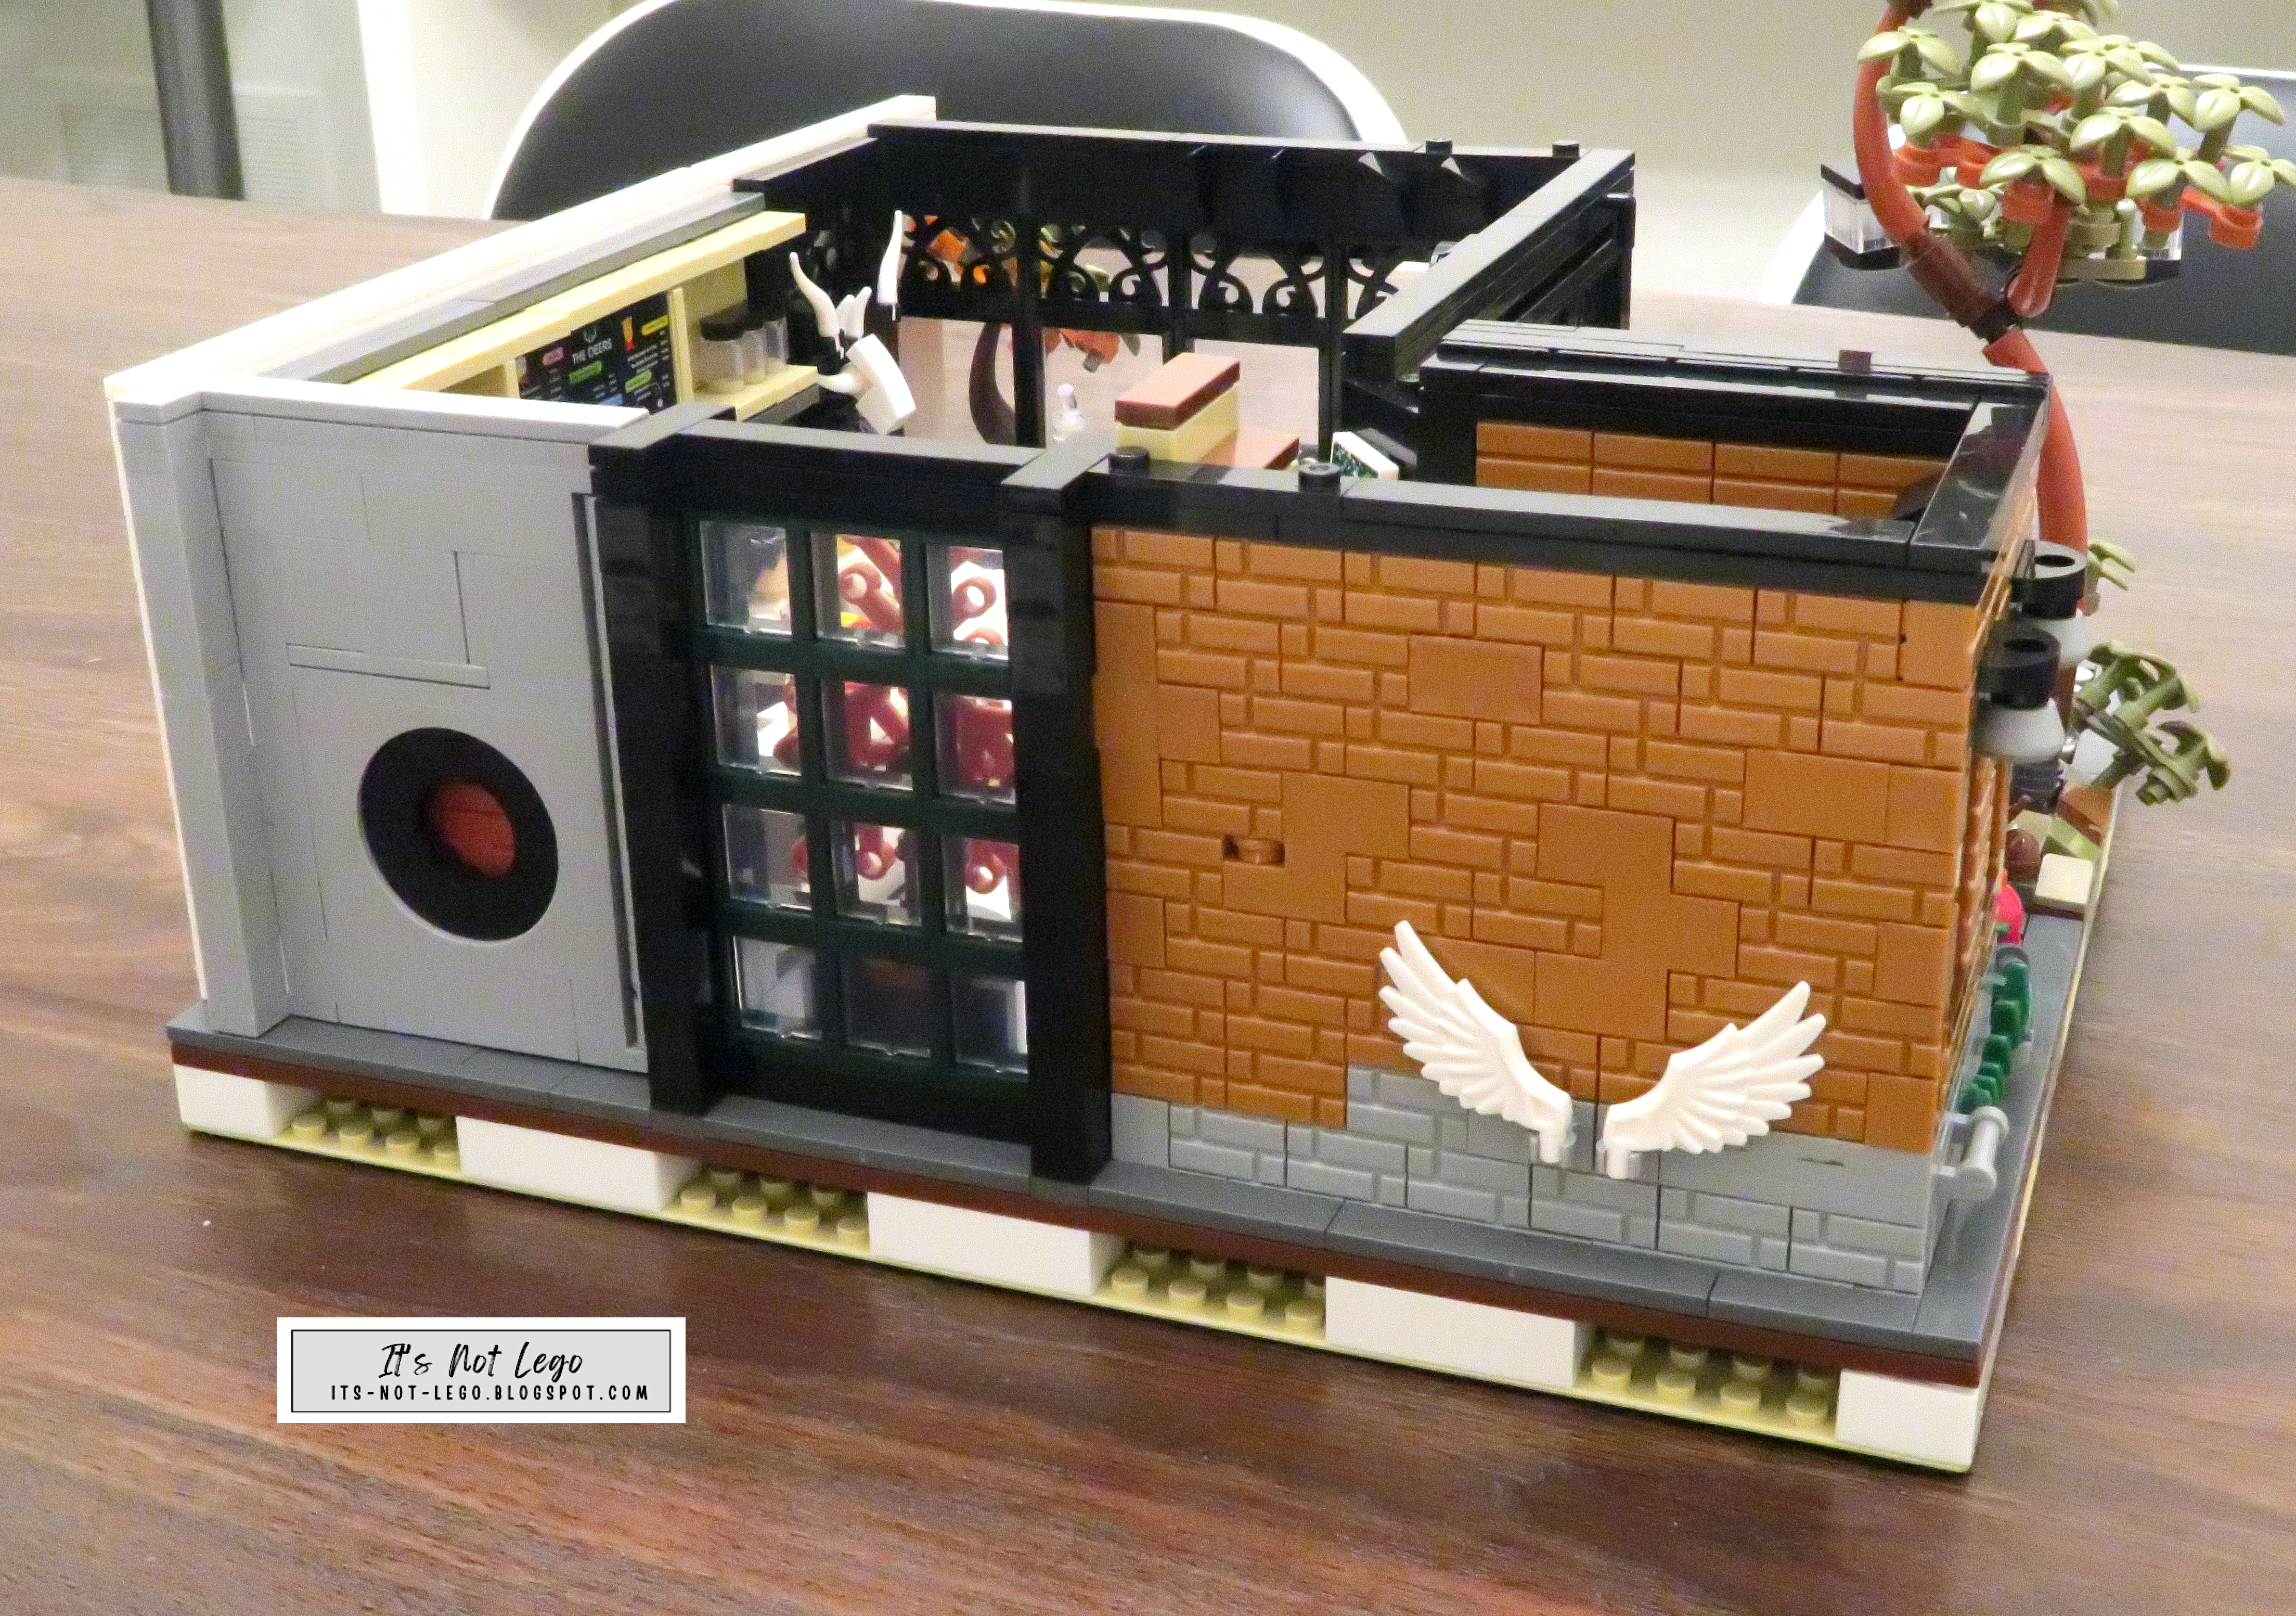
And just in case you're curious about how the set looks from the side ...

And from behind.

Here are all the leftover, extra pieces I got.  The 2x2 brick is not extra, it fell on the floor during the build and I didn't find it until afterwards, luckily not using it did not affect the structure.  Also, the two brown lanterns that came packaged could not support the cylindrical yellow lens part, and the new updated lantern pieces were included in a separate bag.  

Here is the Kumamon bear that comes with the set.  His facial expression is that of surprise, but in every other picture I've seen of him, he is smiling. 


If you are wondering about the size of the Kumamon minifigure, here he is pictured with a Lego compatible figure.

Here is a final look at the tea room's curtains.

Final Thoughts


I found that this set was really fun to build and all of the printed pieces and the LED lighting really made the set. stand out  I wish the bear was cuter and I'll probably remove him from the set and put in some Japanese style minifigures instead.  

While the Japanese themed Kumamon house makes a nice display, I won't be able to display it wth my other Japanese buildings, because they are all 16 studs wide whereas this house including the garden is 32 studs wide.  I suppose I could modify it at some point in the future but I will keep it as is for now.  But this is more of my personal issue and should not be considered for your own display purposes.

Fit and finish of the pieces were really good, however there were two different tints of tan bricks, which I believe, was on purpose. But it was really hard to differentiate the correct coloured piece because of the manual's colour rendition.  That would be my biggest complaint of the set.

Minor points were deducted because of the  manual's colour rendition of the tan pieces and because of the strange expression on Kumamon's face.  There were only 4 stickers to apply and they looked nice, so I didn't deduct any points for them. My final  rating would be 4.6 out of 5 for this the Kumamon Japanese House and can therefore I can highly recommend this set.


Ok, just to let you know there is still time to get 10% off  purchases over $100 using the code black10% during checkout on the Afobrick website.  This limited time offer expires Nov 30, 2023.

Here's the direct link to the Inbrixx Kumamon Japanese House 880018 if you are a Kumamon fan or you love the look of this Japanese building.

Thanks for looking, see ya next time, bye!

Saturday, April 15, 2023

Why Ohsojang's The Alley Tea Shop 10208 is my favorite Lego compatible modular building in 2023


Greetings brick fans and welcome back to It's Not Lego!

Today I'd like to introduce to you the latest modular building in my collection. It was designed by Ohsojang who is well known in the Lego community for his unique and exquisitely designed contemporary modular buildings.

These are just some of Ohsojangs modular building creations.  His modern MOC designs can be found on Rebrickable and his sets have been reproduced by various Lego alternative brick brands such as Mould King, Cada, and Urge to name a few.

As you can see Ohsojang buildings have a very unique style that is immediately recognizable as his own.  So I was super delighted when Afobrick.com asked me to review Ohsojang's recent Alley Milk Tea shop by Mork, set number 10208.  This is an authorised collaboration between Ohsojang and Mork brand.


If you are interested in getting this set, please check it out over at Afobrick.com. Here's the direct link to the product listing.


Afobrick.com have a great selection of Lego compatible brick sets and they offer free shipping worldwide.

They've graciously given me a 5% discount code to pass on to my viewers, just use code ITSNOTLEGO at checkout for your entire purchase.

Let's now take a look at the particulars of this awesome set.

  • Set Name and Number: The Deers/Alley 10208
  • Brand: Mork
  • Theme: Modular Building
  • Piece count: 3423 pieces
  • Numbered bags? Yes
  • Stickers or printed parts? Printed
  • Missing or deformed pieces: No
  • Extra parts: Yes
  • Minifigures: No
  • Lighting kit: LED light string
  • Brick Quality and Clutch: Excellent
  • Measurements (approx): 36.9cm(L) x 37.6cm(W) x 44cm(H)
  • Age Rating: 6+

Unboxing


Unpacking the set, there are numerous bags, a 32x32 baseplate, some smaller brick plates and a battery powered LED light string.


I counted a total of 70 bags of parts numbered 1 through 7.  Here's the breakdown of bags for each numbered section.

1 - 11 bags
2 - 10 bags
3 - 11 bags
4 - 5 bags
5 - 14 bags
6 - 12 bags
7 - 7 bags

The instruction booklet is quite thick with 163 pages broken down into corresponding 7 major sections.

Following are the highlights of each section of the build.

Section 1 - The Tea Station


I have to keep reminding myself that this is a Milk Tea or Bubble Tea shop and not a Coffee shop, because there are so many modular building creations that are coffee shops. According to Ohsojang, this modular MOC was inspired by a tea shop he saw in Danang, Vietnam.  There is a global brand of Milk Tea shops called the Alley which features a deer in the brand's logo.  Probably because they didn't/couldn't get licensing for the Alley brand, the Mork set is called The Deers.

The great thing about this set is all of the printed pieces you get such as menu boards, mugs, cups and other signage.  These are not generic Lego printed pieces, but rather custom printed pieces exclusively for this set.

Here is the tea station which is rich in details.  Note that this is actually a set within the larger set.  You have the option of displaying the tea set on it's own and it comes with it's own custom base.  I've never seen this unique feature in any other Lego or alt Lego set.

When you are done displaying the tea station, you can remove it from the base and add it back into the modular building.

Section 2 - Construction of the first floor


I decided to fabricate a raised baseplate for the Tea shop to give it extra stability when moving it around. I've been slowly converting all of my other modular buildings to raised baseplates as well.

Here's one of the cool designs that grace the interior walls of the tea shop.

More printed parts!

The tea shop interior has white tiled floors with 4 circular stools for seating at each of the two counters. There's two corner walls of expansive floor to ceiling windows. The deer head logo on the floor is composed of 9 printed tiles.

Here's the integration of the tea station into the first floor of the building.  Outside the walkways are tiled off.  Although this set doesn't come with any minifigures, I'ved a add a few of my own to provide a sense of scale to the shop.  As you can see the minifigures look perfect in the setting.

Section 3 - Finishing the 1st Floor


We will finish building the first floor in this step.  Interior accessories include a decorative tree fronting the two storey window, a merch rack and a small table for extra cups and sweetener.

The stairwell connects the first floor to the soon to be constructed second floor.

All of the little landscaping details are added outside including a fire hydrant, foliage, a brick built lamp post, some small tables and a tree whose colour scheme I really like.  It uses olive green leaves paired with dark orange branches.  I like it so much that I plan to plant more trees like these throughout my city.  I'm going to buy the parts from webrick.com.

So if you are wondering why there is a pair of wings attached to the back of the shop, I think it must be one of those places where people take pictures for their social media accounts.

Here's how I imagine a typical day at the angel wing photo spot.  Because I've built the tea shop on a raised base plate, I might end up relocating the wings to the front of the building in the near future, so that a platform is not needed to reach the wings.

The first floor is now complete and we can move on to the next step.

Section 4 - The Stairwell


I really like the creativity Ohsojang used to make the cantilevered windows.  The little blue bubbles in the adjacent windows are cool too.
We find more printed parts on the stairwell windows.

Check out this large 4x4 printed piece with the Deers logo and the words "It's time for tea".  I'm so happy no stickers were used in this set.

The enclosure for the stairwell is finished and attached to the building.

Section 5 - Building the Second Floor


Here is the interestingly designed staircase that goes from the second floor to the rooftop.

The surprises keep coming with this opening in the second floor wall. 

And check out this curved table, wow!

The second floor of the tea shop is almost complete. With all the windows, the building feels very light and airy.  The Alley namesake sign gets mounted to the second floor.

Section 6 -

Just as the first floor gets a removable diorama, the second floor lounge seating area is removable as well.  A few more printed parts can be found on the cups and table top.

After you build it, you can display it separately outside or tuck it back into the building.


What a clever design!  The swivel piece locks the diorama into place while the handle facilitates it's removal from the structure.

The last bit of exterior cladding is now added to the side of the tea shop.

Section 7 - Constructing the roof

Nothing about this tea shop is boring and that includes the roof.  It has a small patio that is accessed by the staircase.

The patio is covered in vines and foliage. A railing wraps all the way around the roof to keep minifigures safe.


The giant skylight lets a lot of natural light into the second floor but since it's not cordoned off, it means it has to support the weight of anyone who is standing on it.

Gallery

I'll just let the pictures speak for themselves.  The Deers tea shop looks great from every angle.


Lighting the Deers/Alley Tea Shop


Mork includes a battery powered LED light strand to put inside the tea shop.  It is meant to light up both the first and second floors.  I used the original light exclusively on the first floor and added an additional light strand to the second floor and in doing so, I was able to light up the Alley sign on the roof as well.

Although I didn't use it, there is a secret compartment under the second floor staircase. I think it is where you can place the battery brick for the light strand.

I should also let you know about the secret drawer in the first floor stairwell as well.  All sorts of surprises in this set!

Final Thoughts

The Mork Deers/Alley Tea Shop by MOC designer Ohsojang is one of the most detailed modular buildings I've ever built.  With over 3400 pieces, this set did not disappoint in terms of novel building techniques or brick quality.  Every step was a joy to build with something new to be discovered along the way.

The removable dioramas were really fun to build and I definitely learned some new techniques to use in future modular MOCs.  With all the printed pieces that came with this set at it's affordable price point, the Milk tea shop is way ahead of anything Lego would ever do.

I enthusiastically give this set a 5 out of 5 and highly recommend the Mork model Milk Tea Shop to anyone who is a fan of Ohsojang's creations or loves to build Lego style modular buildings.   I think this might be the first time I've ever assigned a perfect score to a set!

Let me know what you thought of this model and don't forget to use my code ITSNOTLEGO on the Afobrick.com website to help you save some money.

Thanks for looking, bye!