Thursday, September 15, 2016

Hsanhe 6411-2 Not Lego McDonalds Restaurant Set Review

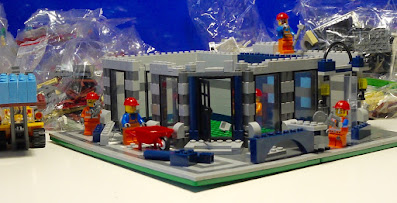
It's time for another building set review.  Today, it is the Hsanhe Fast Food Restaurant.  It's part of the Mini Street series.  This model number is 6411-2 and it has 194 pieces and two minifigures.  As mentioned in a previous post this small modular building is part of Hsanhe's six building offering of different shops.

The first thing you might notice about this set is that there is no mention of McDonalds, even though it's obviously copying the logo design and colour scheme, right down to the happy box handle on the roof.   Please be reminded that Lego never produced any set like this, so it's not a Lego bootleg.

In this set, we find a male customer minifigure and a restaurant employee minifigure.

Just in case you wanted to see how they looked from behind, here's the pic.  The customer looks to be wearing a hoodie.   Both figures are near Lego quality in fit and finish.

The restaurant has seating for two with a table and umbrella.  There is also a small flower patch and fire hydrant.  I chose to swap the locations of the two because it was awkward for the customer to be setting right next to the hydrant.  Our customer is getting ready to eat his hamburger and the store employee looks like he might be delivering an order.  McDonalds don't do deliveries in Canada, but I know they do in the big cities in Japan.  Does McDonald's deliver food to you in your country?

Here's a side view of our fast food joint.   The sizable awning gives good protection from the rain and sun.

Around back, we can see the inside of our fast food restaurant.  It's a little dark, but there's a cash register and order microphone on the counter.  Looks like someone forgot their burger order.  There's a grill to cook a burger with some condiments.  Above the grill is a storage container.

When you come into the restaurant, there is a counter for eating.  I put some ceiling lights on the inside but they ended up being too low because the ceiling is not that high.

Our Hsanhe restaurant is in a good location with lots of traffic and sales, so we could justify hiring another employee.  She's a trainee, so please be kind to her.

Here's the trainee pointing out how low the ceiling lights are hanging. She hits her head on them all the time.

Ok, so the lights were a bad idea, so we got the trainee to take them down.

Let's do some minor renovation to the fast food restaurant.  First let's remove the roof.

We definitely need a higher ceiling, so let's add a row of bricks, and make it easier to remove the roof in future.

Ta-da, new higher ceiling.

But wait, we're not finished. Let's add some real lights to the building using a couple of 2x3 light blocks.

Our trainee doesn't have to work in the dark anymore, yay!

Looks like customers and employees are happy with the higher ceiling and new lights.
Well, that's it, thanks for looking at our slightly enhanced Hsanhe Fast Food Restaurant modular.  

Brand: Hsanhe
Series:  Mini Street Modulars
Model: 6411-2 Fast Food Restaurant (Mc'Donalds clone)
Number of pieces:  194, plus about another 10 that I added myself.   You get two minifigures with the set, but not the trainee, sorry.
Lepin 15002 Not Lego Cafe Corner Set Review - Part Two

Due to my busy schedule, I'm not able to sit down and build the Lepin Cafe Corner modular all in one go.  So I'm just pacing myself and building it when I have time.   I took a look at the instruction manual and I figure I will build 10 steps each day. 

its-not-lego.blogspot.com, lepin 15002 cafe corner modular

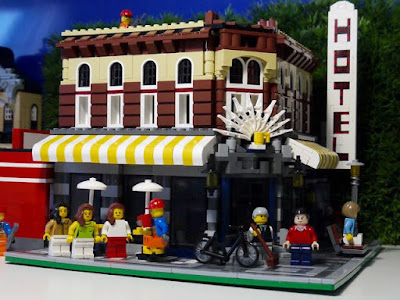
The completed Lepin Cafe Corner.
*   *   *   *   *

Day One


its-not-lego.blogspot.com, lepin 15002 cafe corner modular 

The above picture shows the progress after reaching step 10 of the first floor.  All of the tiles for the base have been applied.  The building foundation has been laid and the walls and step construction is underway.  Day one complete.

*   *   *   *   *

Day Two


its-not-lego.blogspot.com, lepin 15002 cafe corner modular

its-not-lego.blogspot.com, lepin 15002 cafe corner modular

Here's the progress after day 2.   The building has now reached step 20 as per the instruction manual. The walls of the main floor are now up, as are the doors and windows.  First floor staircase for the hotel is now complete.  I had to bring in a few friends to help out with the construction.

*   *   *   *   *   *

Day Three


Welcome to day 3 of the Lepin Cafe Corner build.   Got lots of pictures to share today.

its-not-lego.blogspot.com, lepin 15002 cafe corner modular

The first floor is now complete.  All the awnings and over door details have been installed.  As the interior space is empty, there's nothing new to report there.  The Hotel signage has also been fixed to the side of the building.

its-not-lego.blogspot.com, lepin 15002 cafe corner modular

Here's Sam the supervisor confirming that the left side of the cafe is complete.

its-not-lego.blogspot.com, lepin 15002 cafe corner modular

There's Dan the Man, taking a break in the shade.  Boy, is it ever hot out day.   Please note that the front door design of the Lepin Cafe is different than the original Lego door.   The baseplate corners are lifting ever so slightly, despite me trying to bend the corners down.

its-not-lego.blogspot.com, lepin 15002 cafe corner modular

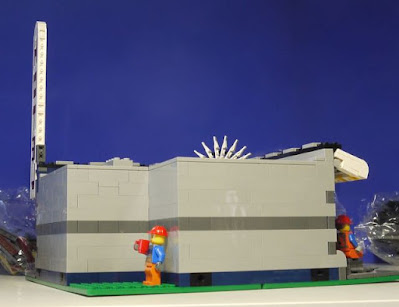
Carpenter Ken decides to hide from Sam the Supervisor behind the cafe.  No windows here for anyone to spy on him.

its-not-lego.blogspot.com, lepin 15002 cafe corner modular

The back of the cafe is really devoid of any details.   Hmm, this would be a really good place to put an outhouse, lol.

its-not-lego.blogspot.com, lepin 15002 cafe corner modular

The HOTEL sign sure looks confusing when seen from behind.   The hotel door goes up the completed staircase but the second floor still needs to be built.

its-not-lego.blogspot.com, lepin 15002 cafe corner modular

Dave and Mike are still cleaning up the mess left inside.   We are now finished step 30 in the instruction manual.  Today, I encountered a missing part, light gray 1x2 tile.  Not sure if I dropped it on the floor or it was missing from the set.  Luckily I've got lots of these in my brick inventory, so no delays yet on the build.  Well that's it for the pics from day 3.   See you tomorrow.

*** http://its-not-lego.blogspot.com ***


*   *   *   *   *

Day Four


So this is how things looked at the end of Day 3.  On day 4, I started to build out the floor of the second storey and found I didn't have the necessary black plates to complete.  I kept checking the remaining parts and could not find them.  It was upon reviewing the instruction manual that I discovered that I made a big mistake on the last step.  

its-not-lego.blogspot.com, lepin 15002 cafe corner modular

See the black brick plates over the awning?  That's supposed to be dark gray, not black. After I realized this mistake, the build started to go smoothly again.

its-not-lego.blogspot.com, lepin 15002 cafe corner modular

Ok, this is how it's supposed to look.   All the debris has been swept up from the first floor too.

its-not-lego.blogspot.com, lepin 15002 cafe corner modular

The exterior details like the tables and umbrellas have been added.  Also the bench and lamppost.  The bicycle was challenging until I realized the bike rim was two pieces.   The second floor walls are now being built up at the end of day 4.

*   *   *   *   *

Day Five

its-not-lego.blogspot.com, lepin 15002 cafe corner modular

More brown bricks added to the second floor walls today.  The second floor kind of snaps into the first floor, but it's a little bit loose.  Not sure if it's supposed to be that way or not.

its-not-lego.blogspot.com, lepin 15002 cafe corner modular

Second floor windows installed and we're starting to use some red bricks now.  The last of the light blue bricks have been used up.  Stair railing added too.

its-not-lego.blogspot.com, lepin 15002 cafe corner modular

Here's the street view of the cafe corner so far.

its-not-lego.blogspot.com, lepin 15002 cafe corner modular

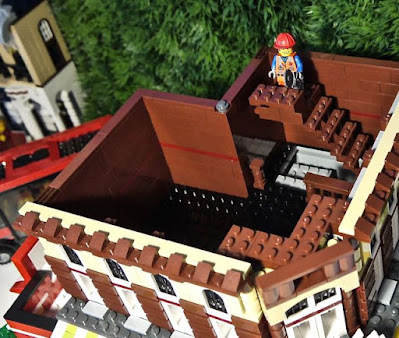
And finally the overhead shot of the second floor.   Oh, I forgot to mention that I changed the white lamp post from the set to a silver one instead.  I didn't like how the white post stood out.  Ok, that's a wrap for today.

*   *   *   *   *

Day Six


Welcome to day 6.  We didn't really do a lot today so it will be a short update.  The top of the second storey walls were completed and the arch windows and grills added.  The grills are up and down grid shaped and not diagonal like the original Lego set.  The second floor staircase was put in also.

its-not-lego.blogspot.com, lepin 15002 cafe corner modular

its-not-lego.blogspot.com, lepin 15002 cafe corner modular


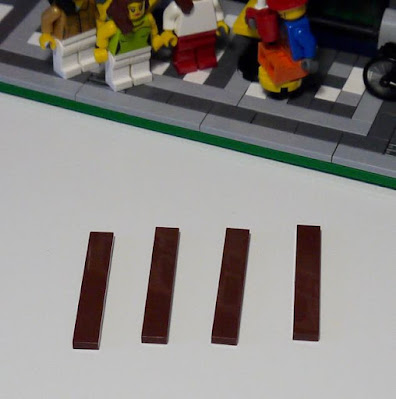
To complete the second storey walls, you need to put some non-studded pieces around the rear perimeter of the cafe building.  I was supposed to have 4 1x4 brown smooth bricks to complete the top of the walls.  

its-not-lego.blogspot.com, lepin 15002 cafe corner modular

Instead, I got 4 1x6 smooth bricks instead.   I used a couple of them and rearranged the placement of the bricks.  I didn't have any 1x2 smooth brown bricks, so I ended up using a couple of 1x2 brown grill pieces instead.

its-not-lego.blogspot.com, lepin 15002 cafe corner modular

Wrong bricks, should be 1x4, not 1x6.

its-not-lego.blogspot.com, lepin 15002 cafe corner modular

 Anyways, after that little diversion, work started on the third floor base.

its-not-lego.blogspot.com, lepin 15002 cafe corner modular

Carpenter Ken, get back to work and quit ogling the girls.  Tomorrow, the third floor walls and windows go up, see you then.

*   *   *   *   *

Day Seven


Well it's been almost one entire week, ( well actually a couple of hours each day), and the Lepin Cafe Corner is finally complete.

its-not-lego.blogspot.com, lepin 15002 cafe corner modular

After the third floor walls went up, we didn't stop to take any more pictures. The workers had to hurry up construction as they have another job to go to.

its-not-lego.blogspot.com, lepin 15002 cafe corner modular

These were the left over parts after completing the build.   Luckily the handful of parts that were missing were easily replaced by other bricks in my stash.

its-not-lego.blogspot.com, lepin 15002 cafe corner modular

And here's the completed set. Yay!

So I really enjoyed the build, although I did it somewhat leisurely.   I did not sort out all the parts, and basically left them in their 43 different bags (yes, I counted) and hunted for them as I needed them.

I really like the colour scheme and some of the interesting building techniques such as building the hotel sign, and putting in the angled front facade.   I wished that there was an interior on each floor, but that's now something that I will plan for and add to the building later.   The set is quite sturdy so I don't have to make any adjustments structurally, however the door leading to the hotel stairs is loose (looks like a design flaw), so I will come up with a fix for that.

I'm already thinking of some minor modifications to the Cafe corner such as replacing the front door with a full glass door.  I want to fence off and make a patio area where the tables are.  I want to add some planter boxes under some of the windows and add a door and window or two to the rear of the building.

Well, that was fun, soon i will tackle my next set which is the Lepin 15004 Fire Brigade set.  See you then.

its-not-lego.blogspot.com, lepin 15002 cafe corner modular


Brand: Lepin
Series: Creator Modulars
Model: 15002 Cafe Corner
Number of pieces:  2133 pieces, according to the description
Price paid: $71 CDN (after Aliexpress seller discounts and coupons),  DHL shipping included.

Recommended?  Big YES.

Saturday, September 10, 2016

Lepin 15003 Not Lego Town Hall Set Review - Part Two

Hello and welcome back to the construction of the Lepin Town Hall modular building.  Sorry for the taking so long to get to this second update.   Part One of the Town Hall build can be found here.     Without further ado, let's return to the Town Hall to see how the build is progressing.

Day Five


Most of this day involved constructing the Town Hall's elaborate facade which includes the columns and support system for the portico.  


 Interior wise, not much has changed on the main floor.  We find our mini figure couple in the auditorium having a lively exchange.  Let's hope they're not bickering about something already.


In the previous post I thought that the first floor was pretty much completed, but I was wrong.  There's another couple of rows of dark gray bricks that were installed with more windows at the back of the building.  Wow, this first floor is almost as high as the main floor of the Fire Brigade modular.


Did a preliminary test of the elevator and it's working fine.  I'm really looking forward to the completion of the main floor front facade.   That's it for another ten steps done!

*   *   *   *   *

Day Six


Day six was probably the most challenging part of the Town Hall build because it is between steps 48 thru 61 where you will recall from my previous post that the Lepin instruction manual was incorrectly put together.   The area that was specifically affected was the portico that protrudes from the front of the building.  I improvised as much as I could, before going on-line to confirm the proper brick placement.

Here is the completed facade and I must say that this is my most favourite element of the Town Hall.  


Here's a closer look at the exquisite details of the portico.  My only nitpick is that the front doors can't fully open because of the proximity of the columns.  


I would love to rebuild the front so that it protrudes out further giving some space between the columns and the front walls.

At long last the ground floor is finished!  We started to lay our first orange-brown bricks.


Here's the helicopter view of the completed main floor.  Day six done.

*   *   *   *   *

Day Seven


On Day seven, we start a new level, yay!  Although it's still ten steps, it doesn't look like we accomplished much today, other than laying down the foundation of the second floor.


A lamp post and landscaping completes the front of the Town Hall . I install the second floor onto the first for a quick test fit.


Unlike the first floor which was mostly light and dark gray, the second floor will be composed primarily of the red brown bricks.  This is a unique colour for me, as I don't have any other bricks in this colour in my collection.


Looks like the mini figure couple is taking some preliminary photos on the steps of the Town Hall with their professional wedding photographers.  I guess they can't wait for the Town Hall building to finish construction.  Sorry for the delays!   Day seven over and out.

*   *   *   *   *

Day Eight


The second floor walls are starting to take shape and they were quick to bring in the furnishings, such as the office desks, lamps and rug.


Everybody is already testing out their workspaces before the second floor is even completed.  Luckily the second floor railings are in place so nobody accidentally falls into the first floor from all the excitement.


The original office administrator's (we don't say secretary anymore do we?) was a tad too small for her impending workload, so I gave her a L shaped desk and gave her some technology in the form of a computer.

Here's a closer look at the admin's desk.


Hey wait, is that Spiderman paying us a visit and posing for pictures? Cool!


At the back, the window sills have been installed to support the second storey windows.  So this was a fairly long blog post that covered the activities spanning days five through eight.  I guess there will need to be a third blog post to report on the final completion of the Lepin Town Hall.  Stay tuned and thanks for looking!

Update: here's the third and final post for the Lepin Town Hall review