Wednesday, November 30, 2016

Hsanhe Mini Street Not Lego Modular Building Set List - 2016


I created this blog post today to consolidate everything I know about the Hsanhe brand of small modular buildings, in case you are looking for them.


These little modulars were originally proposed to Lego Ideas CUUSOO back in 2012, but were rejected by Lego.  Here's the link:  https://ideas.lego.com/projects/15229.

There are six modular shops that feature well known store brands such as McDonalds, Starbucks, Kentucky Fried Chicken, etc.  They are part of the Hsanhe series called Mini Street.  To avoid trademark infringements, the Hsanhe brand changed the names and logos of the stores.


These six buildings are minifigure scale and each set comes with two different minifigures, typically a shop clerk and a customer.  Please note that Hsanhe makes a smaller set of shop buildings that are not minifigure scale.  I've seen some errant listings for them on Aliexpress, where they depict standard minifigures standing next to the smaller buildings, but you would be disappointed if you got those ones because they are a different scale and the smaller building sets don't come with any minifigures, so please be careful when ordering.

Here's the list of the six modular buildings:

Shop Name Hsanhe Model Name         Set Number           Number of Pieces       
Dunkin Donuts      Sweet Shop 6409-1 193
Apple Store Apple Store 6409-2 184
Starbucks Corner Coffee 6410-1 190
Seven Eleven Seven Shop 6410-2 208
KFC KFE Shop 6411-1 188
McDonalds Fast Food Shop 6411-2 194

Here are some pictures of the set packaging.  I've also customized some of the building sets to make them bigger and added more details.   Links to my set reviews and customizations can be found below.

The Sweet Shop 6409-1


Sweet shop MOD coming soon!

The Apple Store 6409-2


The Corner Coffee 6410-1


The Seven shop 6410-2


The KFE shop 6411-1


The Fast Food Restaurant 6411-2


Fast food MOD coming soon!


I got the entire set of buildings off Aliexpress for about 5 or 6 USD each, but that was back in June 2016 and I think due to their popularity, the prices of the little modular sets have gone up to just under $10 USD each.

Saturday, November 26, 2016

Sluban M38-B0555 Not Lego Tower Crane Set Review - Part Two


Welcome back to my  review of the Sluban M38-B0555 Tower Crane building set.  In my previous post I looked at the minifigures, the utility truck and the four storey house that come with this set. Those were the appetizers.  Now we look at the giant tower crane that is the main course.

I'll be building the tower crane as per the provided instruction manual and snapping pics about every five steps or so.  After step 5, you can see the large base of the tower has been constructed using a lot of technic style pieces.  Most of the parts are black, with a smattering of yellow and light gray.

Here's the first set of supports affixed to the base in step 10.  Note that the foundation of the base stays in this position all the time.  It would have been cool if Sluban designed the legs to fold upwards for easy transport and space considerations when not in use.  Or what if you had an uneven surface?  If each of the legs could adjust to accommodate the terrain, that would be bonus.

A lot of progress has been achieved between steps 10 and 15.  We now have three mast sections of the main tower in place.  The yellow girders are secured to a continuous central shaft via technic axles and pins.   For extra support, there are some flexible struts to keep the tower at right angles to the base.   It is a good design, because I find that the yellow framework has a tendency to lift a little, even with the center shaft and struts.  I looked at some pictures of real tower cranes and they don't have the struts on the bottom.

The main tower assembly is completed after step 20.    This thing is high!  So I had to google "parts of a tower crane" to make sure I called the next few things correctly.

The next part we are building is the operator's cabin.  It will sit atop the slewing unit or turntable. We are on step 25 now.

The operator's cabin has room for a seat and levers for the minifigure to operate the crane.  Here is the winch handle set into place.  It will be used to control the hoisting rope and hook once we get the cord attached.

This is a look at the completed cabin after step 29.

The back door of the cabin is supposed to swivel open, but I discovered you can't easily open it, the way it's designed.


I swapped out the original 1x3 yellow brick, and replaced it with a 1x2 brick, a 1x1 brick with side stud and a round button piece.  Now I have a door handle that will let me open the door to the cabin.

The next parts I'm assembling is the crane runway or jib.  On the jib, there are two arms, the working arm (that's the long one), and the machinery arm that holds up the ballast or counterweight (that's the shorter one).  The Sluban instruction guide resets the step numbers for the crane arm assembly, so this is a picture after step 5.

Here's a look at the jib that will hold our counterweights.  Step 6.


Ok, so we have added the tower head or peak to the unit.  That provides support to the front and rear jib suspension rods.  Step 9.

Time to thread the cord and connect it to the crank at one end and the hook at the other end.


Not having a good go of it here.  While trying to attach the cord to the crank, the platform to which the cabin is attached to keeps coming off

Arghh.

Not sure if you can see from the instruction manual, but it's the pieces in the center blue box that keep unclutching from the square plate piece.  I added my own 1x2 tile and 2x3 plate piece to secure the cabin platform to the square plate, and that seemed to fix the issue.

Here's pictures of the assembled hook block (center) and trolley (right).   So getting back to the cord, you tie one end to the rotating crank then you tie it off at the end of the jib.  You then insert the trolley on the jib arm.   At this point the cord is situated between the jib arm and the trolley.  You pull the cord out  and down from the trolley.   Carefully, take off one side of the hook block and place the cord under the two pulley wheels, now snap the side of the hook block you previously removed back into place.


Here's a minifigure view of the tower crane.

Here's a closer look at the trolley and hook block with load attached.  The crank which the cord is attached will lower and raise the hook block, but you have to manually slide the trolley along the jib yourself.

Here's the rear view of the tower crane with counterweights attached.  I made my counterweight a bit bigger than the one provided with the set.

These were all the extra parts leftover from the set.  


The Sluban tower crane can carry a whole pallet of bricks no problem!   A new structure now looms high above the skyline of Lepin modular town.   Thanks for looking.

Oh, if you missed part one of the Sluban Tower Crane review, you can find it here.

Brand: Sluban
Series: Construction
Model:  M38-B0555 Tower Crane
Number of Pieces:  1461


Tuesday, November 22, 2016

Lepin 15008 Not Lego Green Grocer Set Review - Part One


The Lepin Green Grocer 15008 is my sixth bootleg Lego modular building.  It is a knock-off of Lego's Green Grocer  modular set 10185.  I wish I could say that the building process was as smooth as the previous five buildings, which include the Cafe Corner, Fire Brigade, Town Hall, Parisian Cafe and the Detective's Office.

However, as soon as I opened my large package of brick parts, I knew something was wrong.  The Green Grocer base plate is supposed to consist of two pieces of 16x32 thin green tile, however I only received one tile with my building set.  I raised a dispute right away with the seller on Aliexpress.

Fortunately, I happened to have an extra 32x32 thick baseplate in my brick parts stash, so I was able to start building my Lepin Green Grocer without much delay.  Here's my visual record of building the Lepin Green Grocer modular.  As with my previous posts, I will take pictures of the progress after each 10 steps or so.  I will be using the Lepin instruction manual for reference.  

You are visiting http://its-not-lego.blogspot.com.

Step 10

When you get a Lepin modular, you get a big package of brick parts.  The big package is made up of smaller bags containing similar sized parts.  Each parts bag may or may not contain a number.  Usually there are 40 or 50 bags of parts that make up a modular building.   Before opening any parts bag, I will typically sort my parts bags in numerical order to see if I'm missing anything.  In this particular instance, I noticed one of the bags containing sand green 1x8 bricks had been ripped opened.  Also I received a duplicate bag of 1x6 gray bricks.  So at this point, I'm unsure if my Green Grocer will have all the parts, but I figure I will address any deficiencies when I get to it.  For this Lepin Green Grocer set there is supposed to be 2462 pieces.


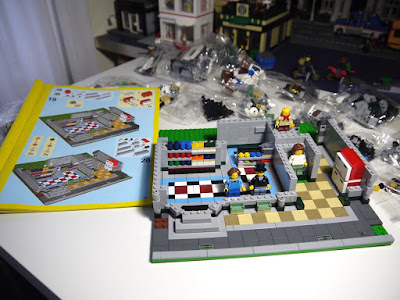
Having replaced the missing base plate with my own, here's the Green Grocer floor for the first level all tiled in at step 10.  I like the tan and light yellow floor tile.  I should point out that the Lepin modulars use a thicker base plate than Lego does.  Since I don't have any of the original Lego modulars to integrate with, I've been using the Lepin supplied thicker base plates instead of reverting to the thinner baseplates.  I was lucky that I bought the thicker green 32x32 baseplate about a month earlier with plans to replace the two base plates of the Lepin Cafe Corner with just one.  Now, I will just keep the Cafe Corner the way it is as use this new baseplate for the Green Grocer instead.

Step 20.


its-not-lego.blogspot.com, lepin 15008 green grocer

Moving along to step 20, I've put together the first four minifigures.  There's a lady who looks after the store, a young boy scout, another lady and a man with top hat.  Sorry guy, but the top hat has to go.

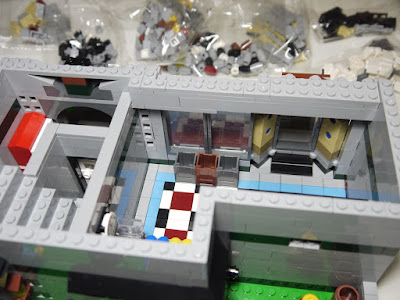
The first floor walls are in place and some of the merchandise for the store shelves has been put on display.  There's a large bank of mailboxes and the stair well to the second floor is starting to take shape.


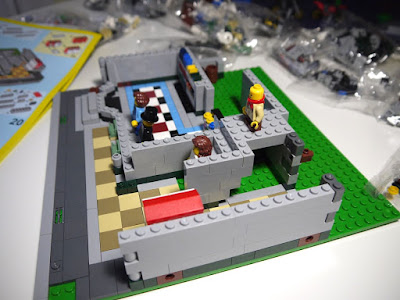
A quick rotation of the base and we can see the rear of the Green Grocer's first floor.

its-not-lego.blogspot.com, lepin 15008 green grocer

Some pictures of the side view.

its-not-lego.blogspot.com, lepin 15008 green grocer

Step 30


its-not-lego.blogspot.com, lepin 15008 green grocer

I would say the first floor of the Green Grocer is at about 70% completion. I didn't put any of the fruits or vegetables into their bins yet, but at this early stage, I just end up losing them because the pieces are so small.   See those two holes in the archway? I make them disappear later in step 40.

its-not-lego.blogspot.com, lepin 15008 green grocer

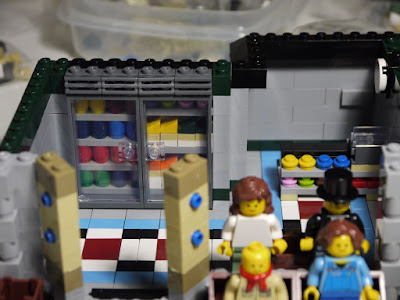
I like the cooler at the back of the shop.  In fact I liked it so much, I made a copy of it for my Hsanhe Seven Eleven modular upgrade.

its-not-lego.blogspot.com, lepin 15008 green grocer

Here's the side view of how things look after step 30.  Still needs doors and windows to be installed.

its-not-lego.blogspot.com, lepin 15008 green grocer

Another view from overhead.  We got the door into the staircase put in.

its-not-lego.blogspot.com, lepin 15008 green grocer

Here's the back side of the first floor, step 30.  Some light fixtures have been added here.


its-not-lego.blogspot.com, lepin 15008 green grocer
And I couldn't find the little guys cap yet, hopefully it will show up soon.

*** http://its-not-lego.blogspot.com ***

Step 40


its-not-lego.blogspot.com, lepin 15008 green grocer
Doors and windows have now been put into place on the first floor.

its-not-lego.blogspot.com, lepin 15008 green grocer
Here's a closer look.

its-not-lego.blogspot.com, lepin 15008 green grocer
 Here's how things look around back.  I moved my dumpster here from the Lepin Parisian Restaurant set.  It was taking up too much room at the back of that set.


its-not-lego.blogspot.com, lepin 15008 green grocer
When it came time to complete my staircase, I found that I was missing all of the 2x4 gray bricks.  Instead I think they gave me an extra bag of 1x6 bricks by mistake.  Luckily the 2x4 grays are a common brick for me, so I managed to continue the first floor without any further problems.

its-not-lego.blogspot.com, lepin 15008 green grocer
More storage bins that I need to fill up later.


its-not-lego.blogspot.com, lepin 15008 green grocer
Despite numerous tries, I could not get the stupid sextant part of the light fixture to stay in place with the holes in the archway.  They kept falling out so in my frustration, I decided to dispense with them altogether.  So what you see in the picture is how the light fixtures look like now.


Step 47


its-not-lego.blogspot.com, lepin 15008 green grocer
Here's the completed first floor staircase with finishing tiles.

its-not-lego.blogspot.com, lepin 15008 green grocer
The blue and white canopy has been installed above the front windows.  Street lamp and fire hydrant have been added too.


its-not-lego.blogspot.com, lepin 15008 green grocer
The lady minifigure gets a baby carriage, but sadly no baby minifigure. I really was hoping for one.  I still haven't found the red baseball cap for the young boy minifigure. Hopefully it will show up, when I build the second floor of the Lepin Green Grocer.

Here's a summary of my Lepin Green Grocer changes.  There will be more changes later as I continue the build.
- replaced missing 16x32 base plate with larger 32x32 thick baseplate
- replaced missing 2x4 gray blocks for staircase
- did not install light fixture details on either side of front archway
- added dumpster from Parisian Restaurant set

You are visiting http://its-not-lego.blogspot.com

That's it for now, hope you have enjoyed the pictures of the Lepin Green Grocer modular this far.  I will post the second floor build pictures soon.