Hi Brick fans!
I recently picked up another Lego compatible set from Temu! Here's everything you should know about the Xbert Antique Shop 66055 modular building set.
Xbert is a new brand of bricks that hasn't produced that many building block sets. Looks like it's a sub brand of JieStar.
This building block set has 1954 pieces and when the pieces are put together, it creates a beautiful two storey modular building that houses an Antique shop.
The set is designed by Ohsojang/shinjungseub, who has some other unique modular buildings that you can find on rebrickable.
The set has seven large bags of parts and each bag is further subdivided into another set of smaller bags. The seven bags correspond to the number of steps during the build process. To see everything that came in the box, check out my unboxing post here.
It's time to open up the bags and start building!
Step 1 - Building the baseplate
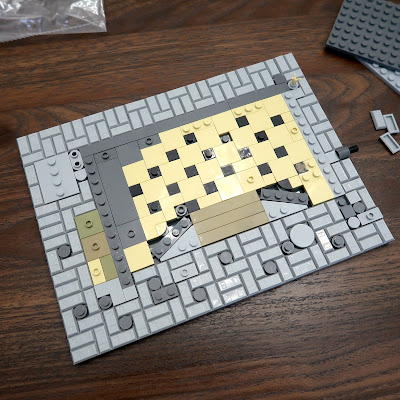
The footprint of the baseplate doesn't follow the normal standard of 32x32 studs or 16x32 studs. The Antique store is 27 studs wide and 13 studs deep. The actual building footprint is even smaller at only 18x12 studs. Most of the baseplate is tiled in ingot bricks with the interior floor tiled in tan with black accents.
First impressions: Brick quality is good, but the clutch is too tight! It's really difficult to press the bricks together.
Step 2 - Building the Storefront
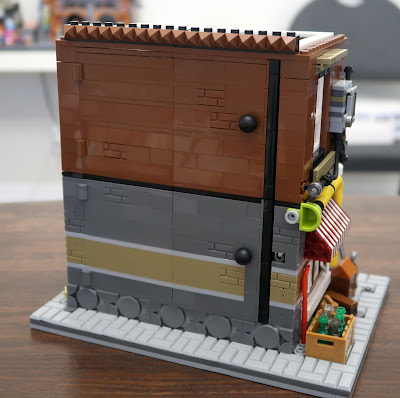
Ohsojang has designed a storefront that angles inwards towards two brick built doors. The doors are fixed and cannot move.
Inside the first floor we've already added a table and display case. The white tiles are supposed to have stickers on them, but I didn't apply them yet. You can see the entire sticker sheet in my
unboxing blog post.
Step 3 - Building the rest of the First Floor
The back wall can fold out for easy access to the interior. It's a great idea that I will probably incorporate into my future modular building mocs.
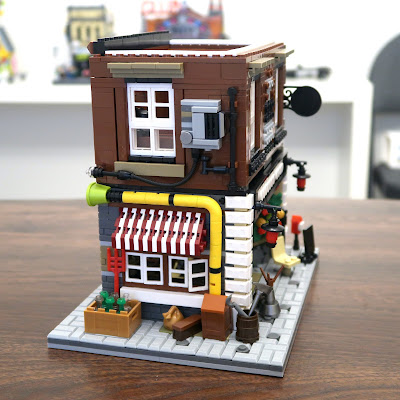
The first floor consists of dark gray walls and masonry bricks with a band of dark tan bricks for accent detail. The use of contrasting white and dark red angled plates for the window awning is a novel approach. You can see that the building isn't really that deep.
Step 4 - Add the Exterior and Interior details
I haven't decided if I'm going to keep the building as an Antique store yet, so I've left off the wording stickers for the time being.

The yellow pipe is really eye catching. Some nice accessories are displayed at the side of the building.
There are no stairs in the design of the Antique store, so ladders are the only method of reaching the upper floor.
A tall ladder on the interior will allow access to the upstairs.
Boxes and bric-a-brac sit amongst the display cases add to the clutter of the Antique store.
Step 5 - Building the second floor
There's supposed to be a giant clock on the wall over the bookcase, but I didn't apply the sticker. I would have preferred a darker brown brick to be used for the upper floor, instead of the red brown.
Step 6 Building the rest of the Second Floor
The remainder of the second floor walls are added.
Second floor ladder is added with some other details.
Back wall in the closed postiion.
Back wall in the open position. Despite the small size of the store, it's jam packed with details.
A bookshelf, loveseat and round table are some of the upstairs furnishings.
Step 7 - Building the Roof
The Completed Antique Shop!
It was an interesting build with lots of details.
The shop looks great in the pics.
The design is great, just wis the brick tolerances weren't so tight. The 1x1 pyramid pieces that make up the roof detailing all the way around were brutal on my fingers!
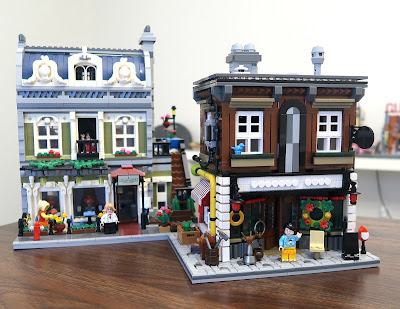
In case you're wondering if the set is compatible with Lego style minifigures, here's a visitor to the antique shop.
A look at the included lighting kit
Included in the lighting kit are some light strips, a dot light, a 6 port hub, a USB plug and a AAA battery pack (batteries not included).
The LED lights are nice and bright.
The light kit can be added in after the fact as I did here. There are some extra 1x2 plates that are provided to secure the wires properly. As you can see, I got lazy and just let the wires hang down randomly. Please do a better job than I did!
Tried to clean it up a bit but meh.
Anyways, the lighting looks better when viewed from the outside.
I didn't have any issue with missing pieces, and there were a handful of bricks and plates left over. The sprues contain the flowers that you add to the little tree at the front of the shop. Again I got lazy so I didn't put them on.
Final Thoughts
When I saw the listing on Temu, I was really attracted to the building architecture and I wasn't aware that it was an Ohsojang design until I examined the details more closely. I saw some similarities between the Antique Shop and the Lego Parisian restaurant, especially size wise, as their building depths are very close. If I had to rebuild the Antique shop, I would place it on a standard 32x32 baseplate.
The included light kit is a nice touch, and it seems a lot of the third party modular buildings sets are providing lights more and more. Now if only Xbert would change the brick tolerances, this set would be near perfect.
Design rating: 8 out of 10 (the shop could be a bit bigger and sit on a 32x32 baseplate)
Brick quality: 8 out of 10 (no missing bricks, window glass was clear, brick finish is good)
Brick Clutch: 5 out of 10 (brick tolerances were way too tight)
I was satisfied for the price I paid which was just a tad over $50 CDN from Temu. The going price is about double and I think it would be hard to justify the purchase of the antique shop at the higher price.
The prices are changing constantly on Temu, so keep checking for a good deal. Here's a search link for
the Antique shop on Temu.
Don't forget to use my affiliate code itsnotlego to get another 5% off the price.
Thanks for looking, let me know what you think! Bye for now!








This set has popped up in my FaceBook feed and piqued my interest. I was concerned from the dimensions the bricks are smaller than standard Lego, but you have out me mind at rest there.
ReplyDeleteDo you think it can be enlarged to a 32 x 16 baseplate, and are the brick colours compatible with most other makes?