Thursday, September 14, 2023

Exploring the Mysteries of Funwhole's F9011 Medieval Pier Inn: A Lego-Compatible Masterpiece

Ahoy, block-building aficionados! Today, we set sail on an epic adventure to uncover the secrets of the latest gem in the Lego-compatible universe – Funwhole's Medieval Pier Inn. Imagine a shipwrecked vessel transformed into an elaborate shelter on a deserted island. It's a nautical dream come true, and we're about to dive into the details of this impressive 2143-piece set.

Funwhole: A Beacon of Quality


Before we delve into the Medieval Pier Inn, let's tip our hats to Funwhole, one of the brightest stars in the world of Lego-style building block sets. With a growing reputation for quality, Funwhole consistently delivers exceptional creations. As a blogger who has experienced their previous sets like the Wood Cabin and the Lakeside Lodge, I can vouch for their commitment to excellence.  Many thanks to Funwhole for providing this awesome set for this review.


Medieval Pier Inn: A Glimpse of Grandeur


Now, let's get to the heart of the matter – the Medieval Pier Inn. Among the sea of building block sets I've had the pleasure to review, this one stands as a towering lighthouse of craftsmanship and detail.

If you are interested to see the set's contents, I reviewed it in a separate post on my blog here.

With a whopping 2143 pieces, it's a behemoth of a set that promises hours of engrossing construction and play. But that's not all; Funwhole's unique selling point shines through once again – a featured light kit is included, adding an enchanting glow to this medieval masterpiece.

Here's a delightful journey through the construction of this incredible set, complete with some interesting surprises along the way!


As we kick off our adventure, we reach the end of step 1. But wait, down in the cellar where the barrels are stored, a curious mouse is savoring his cheese dinner. Talk about an unexpected guest!


In step 2, we dive into adding the floorboard and underfloor accent lighting. But there's a twist; it appears a mischievous cat is keeping an eye on our little mouse friend. The plot thickens!


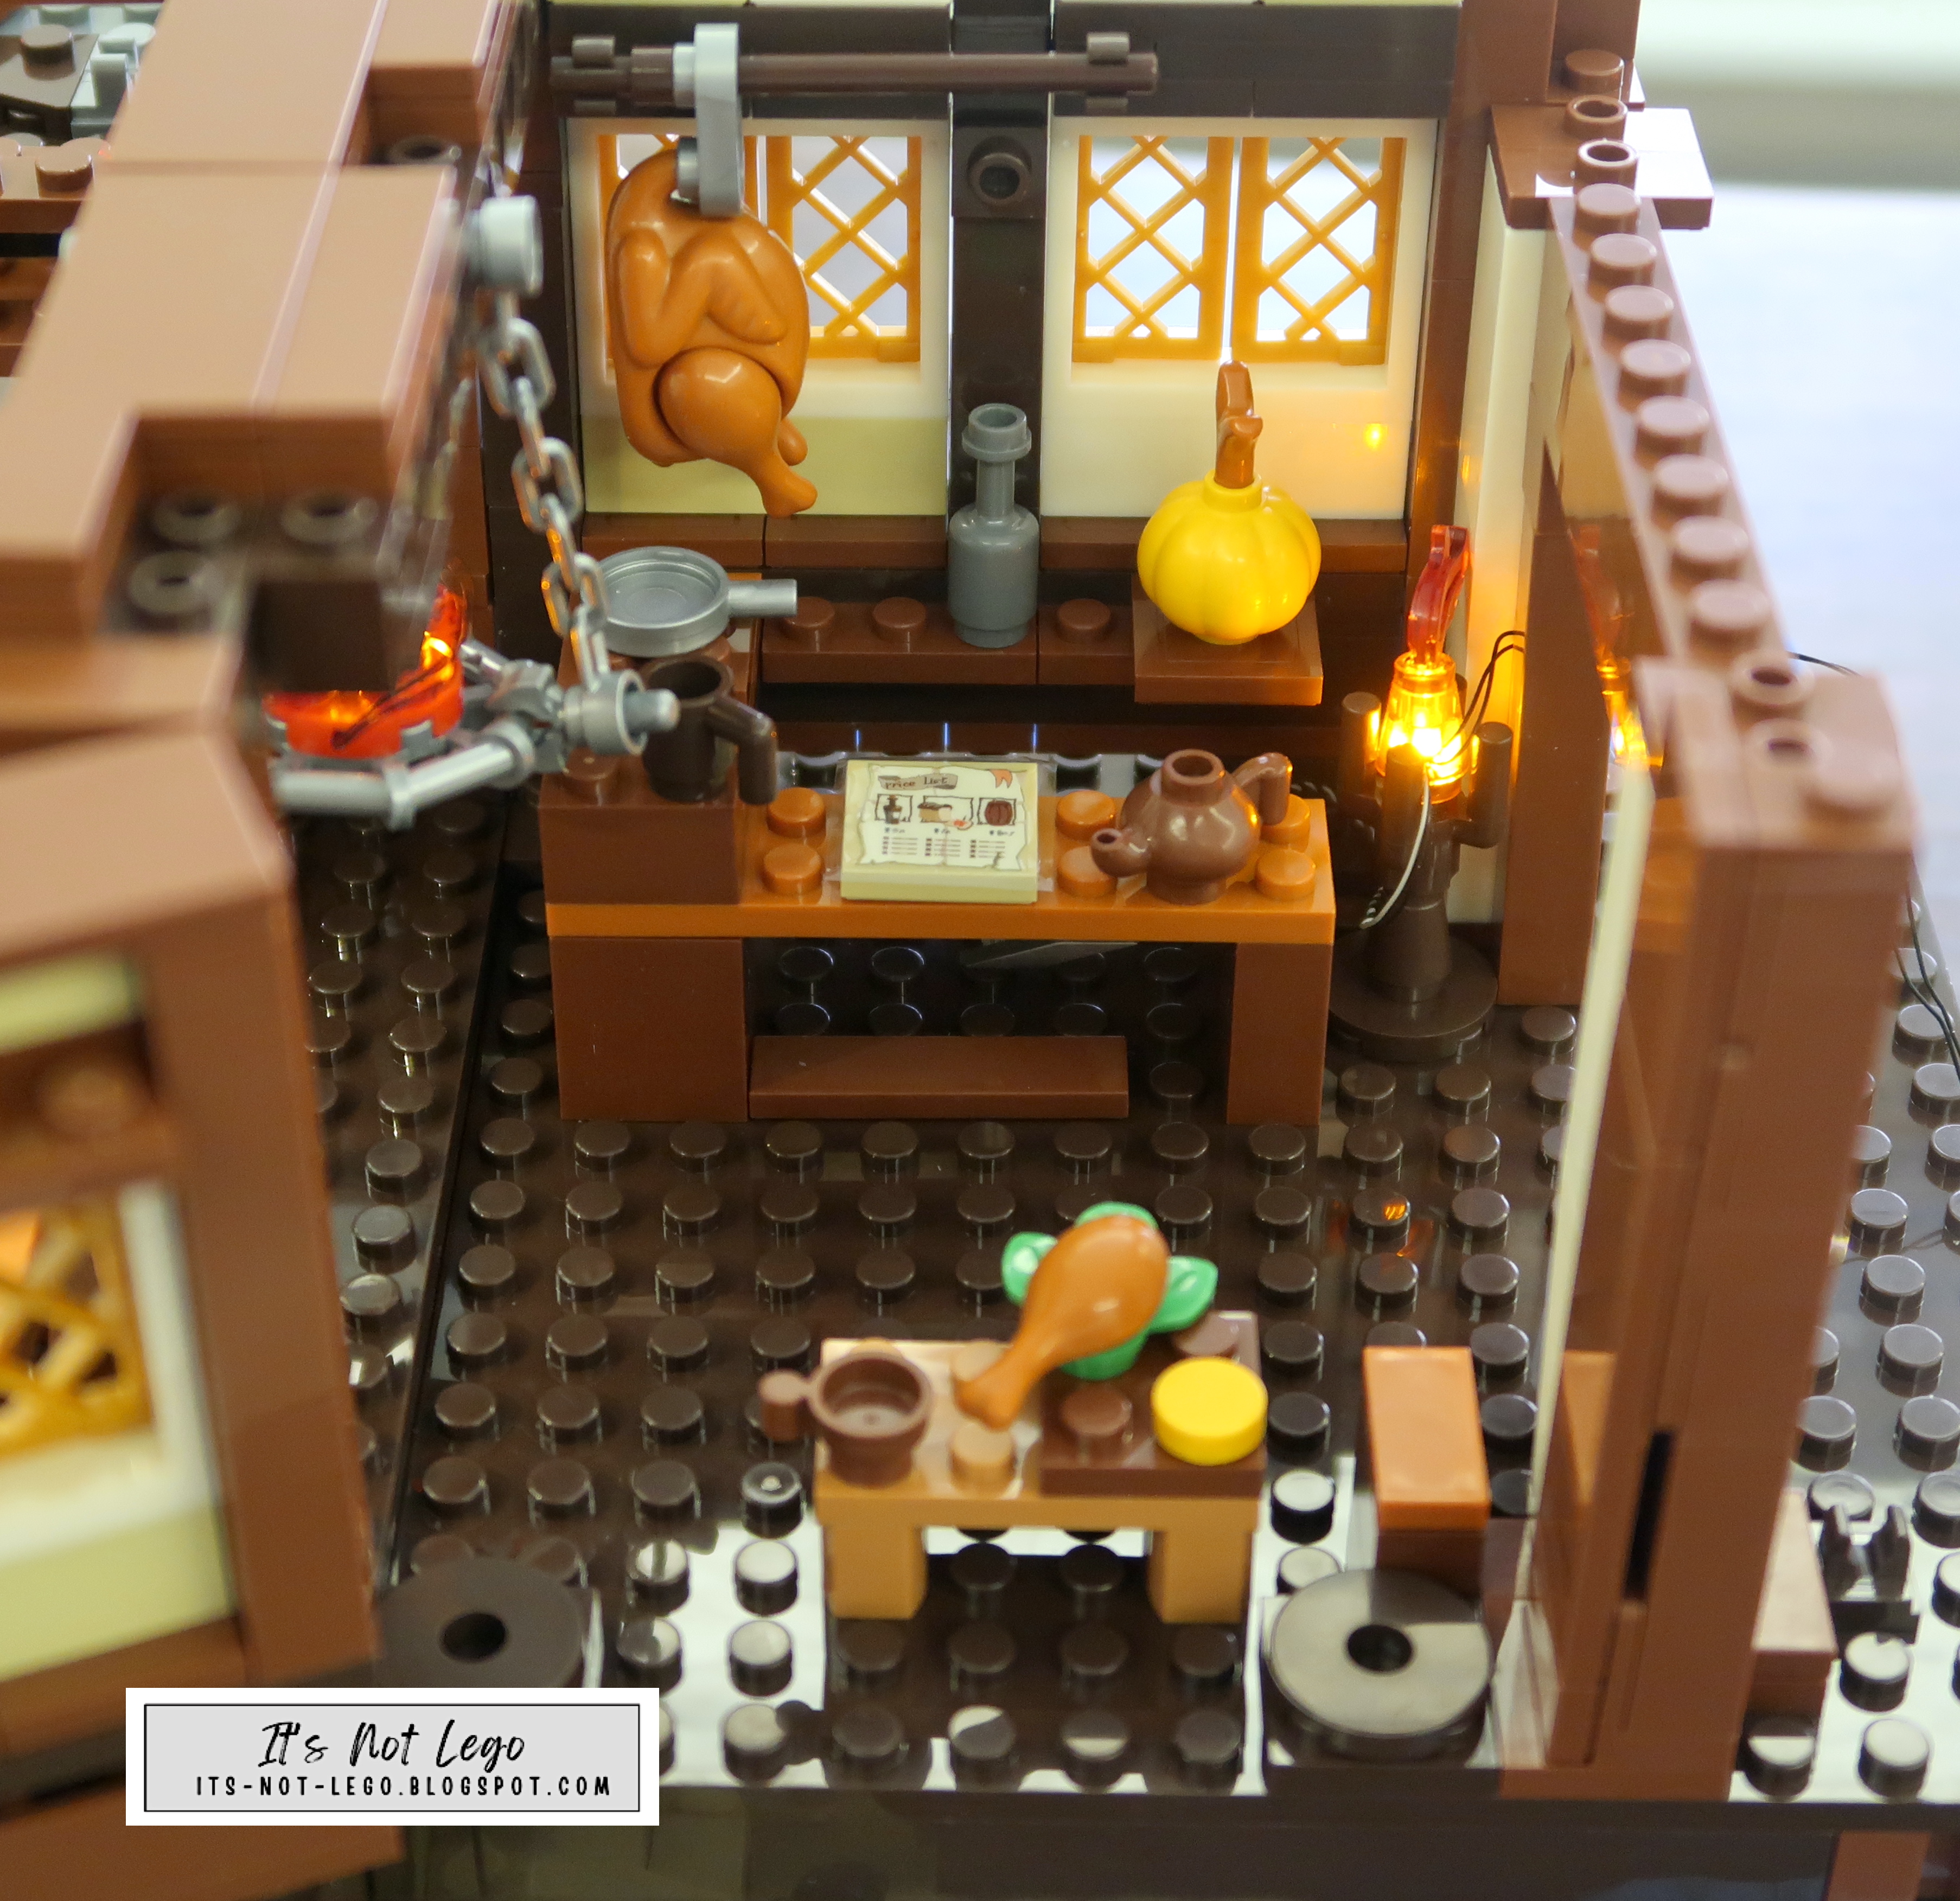
Moving on to step 3, we discover the shipwrecked stern has transformed into an outdoor cooking area. Descend the steps, and you'll find a cozy mess hall where hearty meals can be savored.

After completing step 4, the mess hall becomes an enclosed haven, bathed in the warm glow of lamps and open fire. It's a sight to behold!


One standout feature of Funwhole sets is the inclusion of top-notch lighting kits. These kits, which I believe are supplied by their sister company, Lightailing.com, truly elevate the experience.


 Check out the well-stocked galley kitchen and the myriad of intricate details in step 5. 


The lighting effects are simply mesmerizing!

Moving along to step 6, the bow of the wrecked ship serves as a winery! Grapes, bottles, and a massive tank with a tap await your exploration. The second level floor is also taking shape.

In step 7, we furnish the innkeeper's room with a cozy bed, a reading desk, and a flickering candle. Access to the lower level is through a cleverly concealed hatch in the floor.

Unfortunately, the pulley system for the dormer window got stuck during assembly, so I had to skip this feature. 

Nevertheless, there's no shortage of timber beams and wires, all part of the intricate lighting setup on the second floor.

Step 8 brings us a massive roof adorned with foliage and a striking ship's mast. 

A nifty feature is the swinging wall in the lower galley kitchen, providing easy access and better visibility.

The final roof assembly is added in step 9.  I just want to add that the build process is very easy to follow and other than the pulley wheel getting stuck, all of the other pieces clutched very well.

Here's a surprise feature, did you know that the roof panel can be positioned in either a closed or open position?  I guess this is so you can see the winery and the innkeeper's room better.   There's just detail after detail with this set!

I probably could have done a better job at securing the wires for the lighting.

Final check to make sure all of  lighting works in step 9.   The wireless connector between the first and second floors works perfectly and seems to be much improved over the ones previously used in the Funwhole Wood Cabin set.

As if there weren't already enough accessories, step 10 introduces even more adornments to the Medieval Pier Inn. 

First, we had the mouse, then the cat, and now, a dog joins the mix!


In step 11, we're treated to a charming rowboat and a welcoming dock. It's hard to keep track of all these wonderful details! 

And don't miss the ladder that ascends to the crow's nest—a true highlight.

To safeguard the winery, a sturdy fabric awning is installed over the second-floor ship hull. 

And the finishing touch is a remnant of a sail, gracefully hanging from the ship's mast.

Four proprietary minifigures are part of this package, each with their own unique role in the shipwrecked tale waiting to be told.  Let's put them together and see how they look.


Here are the Funwhole minifigures with a Lego minifigure next to them for comparison.  The Funwhole ones all look a little bit bloated and they are just a tad shorter then your standard minifigure.   This is my second Funwhole set that came with minifigures, the first being the Ruined Temple in the Jungle set.


Summary

Brand: Funwhole

Set: F9011 Medieval Pier Inn

Piece count: 2143 pieces

Age Rating: 8+

Minifigures: Yes, 4 proprietary design, plus 1 mouse, 1 cat and 1 dog

Stickers: Yes, but I didn't use them

Printed parts: No

Light kit included: Yes

Instruction Manuals: 2

Set dimensions: approx 18 inches in height, with a width and depth of approx 12 inches by 12 inches. 

In conclusion, Funwhole's Medieval Pier Inn is a testament to the endless possibilities of Lego-compatible building block sets. Its size, detail, and the added allure of the light kit make it a must-have for collectors and enthusiasts alike. 

The set is available from the Funwhole website and from their various Amazon stores.   Just search Amazon for the Funwhole products near you.

So, fellow builders, hoist your sails, grab your bricks, and embark on a voyage of creativity with this remarkable set. Until next time, happy building!


Tuesday, July 18, 2023

What's my latest build? It's the JMBricklayer 70124 Mechanical Chameleon set


Hi and welcome back to my blog about Lego compatible building block sets.  I've got another set from JMBricklayer to show you today, it's the Mechanical Chameleon 70124 and it's the latest addition to my growing collection of mecha inspired building block sets.   


In case you missed those set reviews:

70102 Mechanical Astronaut (Chrome)


This post about the JMBricklayer Mechanical Chameleon looks at the 5 major building sections and the completed set.  For the initial unboxing post for the Mechanical Chameleon, you can find that post here.

For the latest JMBricklayer promotions, check them out here.


Here's the first stage of the build.  As you can see it is comprised of the chameleon body and the head.  The heart of the chameleon is a green light brick that can light up.

Here are all the parts for stage 1.  At first glance we find that the brick quality is very good.  Colours are consistent and the transparent blue eyeball glass is not scuffed.

Here are the instructions to attach the chameleon head to the body.  It is hinged to allow some posing and movement.

So far, so good.  The eyeball can be rotated depending on the look you want.  Also, I love the look of the gears, too bad they don't do anything though.

In this stage, the body and head of the chameleon get extra greebling, along with some detail on the top.


Here are the pieces for this stage.

In the picture above, we inserted the tube that goes into the round light brick.  The top of the light brick swivels just a bit and then the light comes on.  The neon green light travels along the length of the tube.  Very cool.

I ran into problems on step 90 of the second stage.  I couldn't keep all the pieces together when attaching the light tube as per the instructions.

This is how the assembled part is supposed to look like.

Unfortunately,  the tube was a bit too stiff and it caused the other pieces not to clutch.

This was the best I could do.  I left come pieces unattached, but still managed to have the light working.  I had mentioned my issue on JMBricklayer's Facebook page, and they tried to help by putting together this small tutorial for anyone that needs it on their website.   

Here's the link to the tutorial page:  
https://www.jmbricklayer.com/chameleon-70124-building-tutorial/

Since I had already assembled mine, I decided to keep it as is, but if you are building the chameleon for the first time, please use the tutorial in combination with the instructions.

Here's stage 3.  In this stage we are adding the tail and the green translucent shell pieces for the body and tail.


The moulded pieces are tinged in light green and have some markings on them.  There are pieces for the head, body, tail, arm and leg.

Here is the tail assembled and attached to the body.  I didn't have any issues with the tail, but you can refer to the tutorial webpage I mentioned earlier if you encounter any problems.  The tail can be displayed straight or curled up.

With the body shell attached you can see the green glow from the light brick underneath.  I wish they could have had room for two light bricks, with the other tube light going down the tail.  How cool would that be?

In stage four, the legs and the remaining green tinged shell pieces will be added.  Also in this step the chameleon tongue is eating a flying insect.


Tada, the mechanical chameleon is complete.  As you can see, it is possible for the chameleon to stand on his own legs, as he is supported by his tail and tongue.

This is the view from the non mecha side of the chameleon.  Do you see that there is not only a green colour but also a purple tinge to the shell as well?

But wait, we aren't finished yet, there is still the display stand to build.

Here are the last pieces that will build the stand.

The chameleon is perched on his display.  This is the mechanical side on display.

And here is the translucent body side.  Again I wish that somehow more lighting could be added to the tail and the tongue to give it extra effect.

In case you were wondering, I had a handful of pieces leftover and did not encounter any missing parts.


Just want to add that once the mechanical chameleon is mounted to the display, it is very sturdy and can be moved around easily.  I took the set to the backyard to display and nothing fell off.

I hope you have enjoyed my review of the 827 piece JMBricklayer 70124 Mechanical Chameleon building set.  I did have some challenges on step 2, but since it is mostly an aesthetic issue and not a functional one, it doesn't affect the display of the chameleon.  Other than that, this was an enjoyable build and as you can see from the final result it was worth the effort.

This cool looking set can be ordered from the  JMBricklayer website. See their latest promos here.

It is also available from the various JMBricklayer Amazon stores, just search Amazon for JMBricklayer to find it.

Thanks for looking!

Tuesday, July 11, 2023

Unboxing the JMBricklayer 70124 Mechanical Chameleon Brick Set

Hi and welcome to It's Not Lego, my blog about the latest Lego style building block sets.  I received this latest set from JMBricklayer.com, it's a very cool looking mechanical chameleon.  For this post, I'll just do an unboxing post (part 1) and I will do a full review in another post (part 2).   


Thanks to JMBricklayer for sending me the boxed set to review!  The almost neon green highlights on black background is a great color combo for the box.  The set number is 70124 with 827 pieces.


Here's the contents of the box that the chameleon building set comes in.  Let's take a closer look at what you get.


There's a good quality instruction booklet with 269 individual steps over 94 pages.

There are 5 major bags of parts accompanied by an assortment of smaller bags.

The larger bags are numbered 1 through 5  to correspond to the steps in the instruction manual.  The smaller bags contain the neon green body parts of the chameleon.  Additionally there is two other bags, one consisting of chrome plated parts and another containing a light brick and small sticker sheet.

Here's a closer look at the sticker sheet.  Just some minor stickers mostly.

Inside the manual, it shows you the breakdown of the build process using one of the corresponding bags of parts.

It's hard to tell but these are the chromed pieces that were in one of the extra bags.

Oh, here's an interesting piece, it's a 1x5 plate.  I don't think Lego makes a piece like this one.

I wonder if we will find more interesting or unique brick pieces, once we start building the mechanical chameleon.

The JMBricklayer Mechanical Chameleon is currently available for preorder on their website with early bird pricing and also on their Amazon stores in the very near future.

It will also be available from the their Amazon stores, so keep your eyes peeled for it.  That's it for now, look for an upcoming post where I build the chameleon and give you my thoughts on the building block set.


Don't forget to check out my other building block set reviews on bricktoyreviews.blogspot.com.   Bye!