Hey brick fans,
If you're a fan of sci-fi epics and love the intricacy of Sembo building block sets, then you're in for a treat with this one! Inspired by the Chinese sci-fi action movie Wandering Earth 2, the Lego-style Lunar Truck is a killer set that captures all the action and adventure of the movie. From its futuristic design to the impressive attention to detail, this truck feels like it rolled straight out of a lunar landscape and onto your building table.
In this review, we'll dive into all the details, from the build experience to the hits and misses about the Lego compatible Moon Base Truck building block set.
TEMU
🛍️ SEMBO BLOCK 1339 Pieces Moon Base Truck Building Kit, ABS Plastic White Vehicle Construction Set with Built-in Light Module, Educational Toy for Ages 6+
🎉 Coupon price[CA$64.38]
👉 item link: https://temu.to/k/umf5eubdikp
About the movie
Wandering Earth 2 is a prequel to the 2019 Chinese sci-fi blockbuster The Wandering Earth. The movie is set in a future where the sun is dying, and humanity faces the imminent collapse of Earth's environment. In response, the global governments come together to execute an ambitious project: moving the entire planet to a new star system using massive engines built across the world.
Here is more info about the movie: https://en.wikipedia.org/wiki/The_Wandering_Earth_2. It is free to watch on BiliBili: https://www.bilibili.tv/en/video/4787546990056960.
The Lunar Moon Base Truck is featured in this movie promo picture. The truck looks really unique with the truck body mounted on top of what appears to be a six wheeled skateboard. I guess it's meant to isolate the occupants from the rough terrain of the lunar soil.
From this movie screen grab of the truck, you can get an idea of the scale with the astronaut next to it.
In 2023, Sembo made two large scale vehicles for the Wandering Earth franchise: the 1182 piece Mobile Base 107104, the 1339 piece Lunar Truck 107105, and 4 smaller building kits 107106 thru 107109. They have also made several Sci-fi building sets for the first Wandering Earth movie as well.
I have the Sembo 107007 Troop Carrier and the Sembo 107006 Cargo truck which I reviewed
here.
Ok let's check this set out.
The Set Contents
The 1339 piece building block set comes with a detailed instruction manual, 5 numbered bags, a bag containing several sticker sheets, a light kit and two smaller bags of minifigures.
Sembo's instructions are clearly marked and easy to follow.
Each of the 5 numbered bags contain several smaller bags of parts which we will see later below.
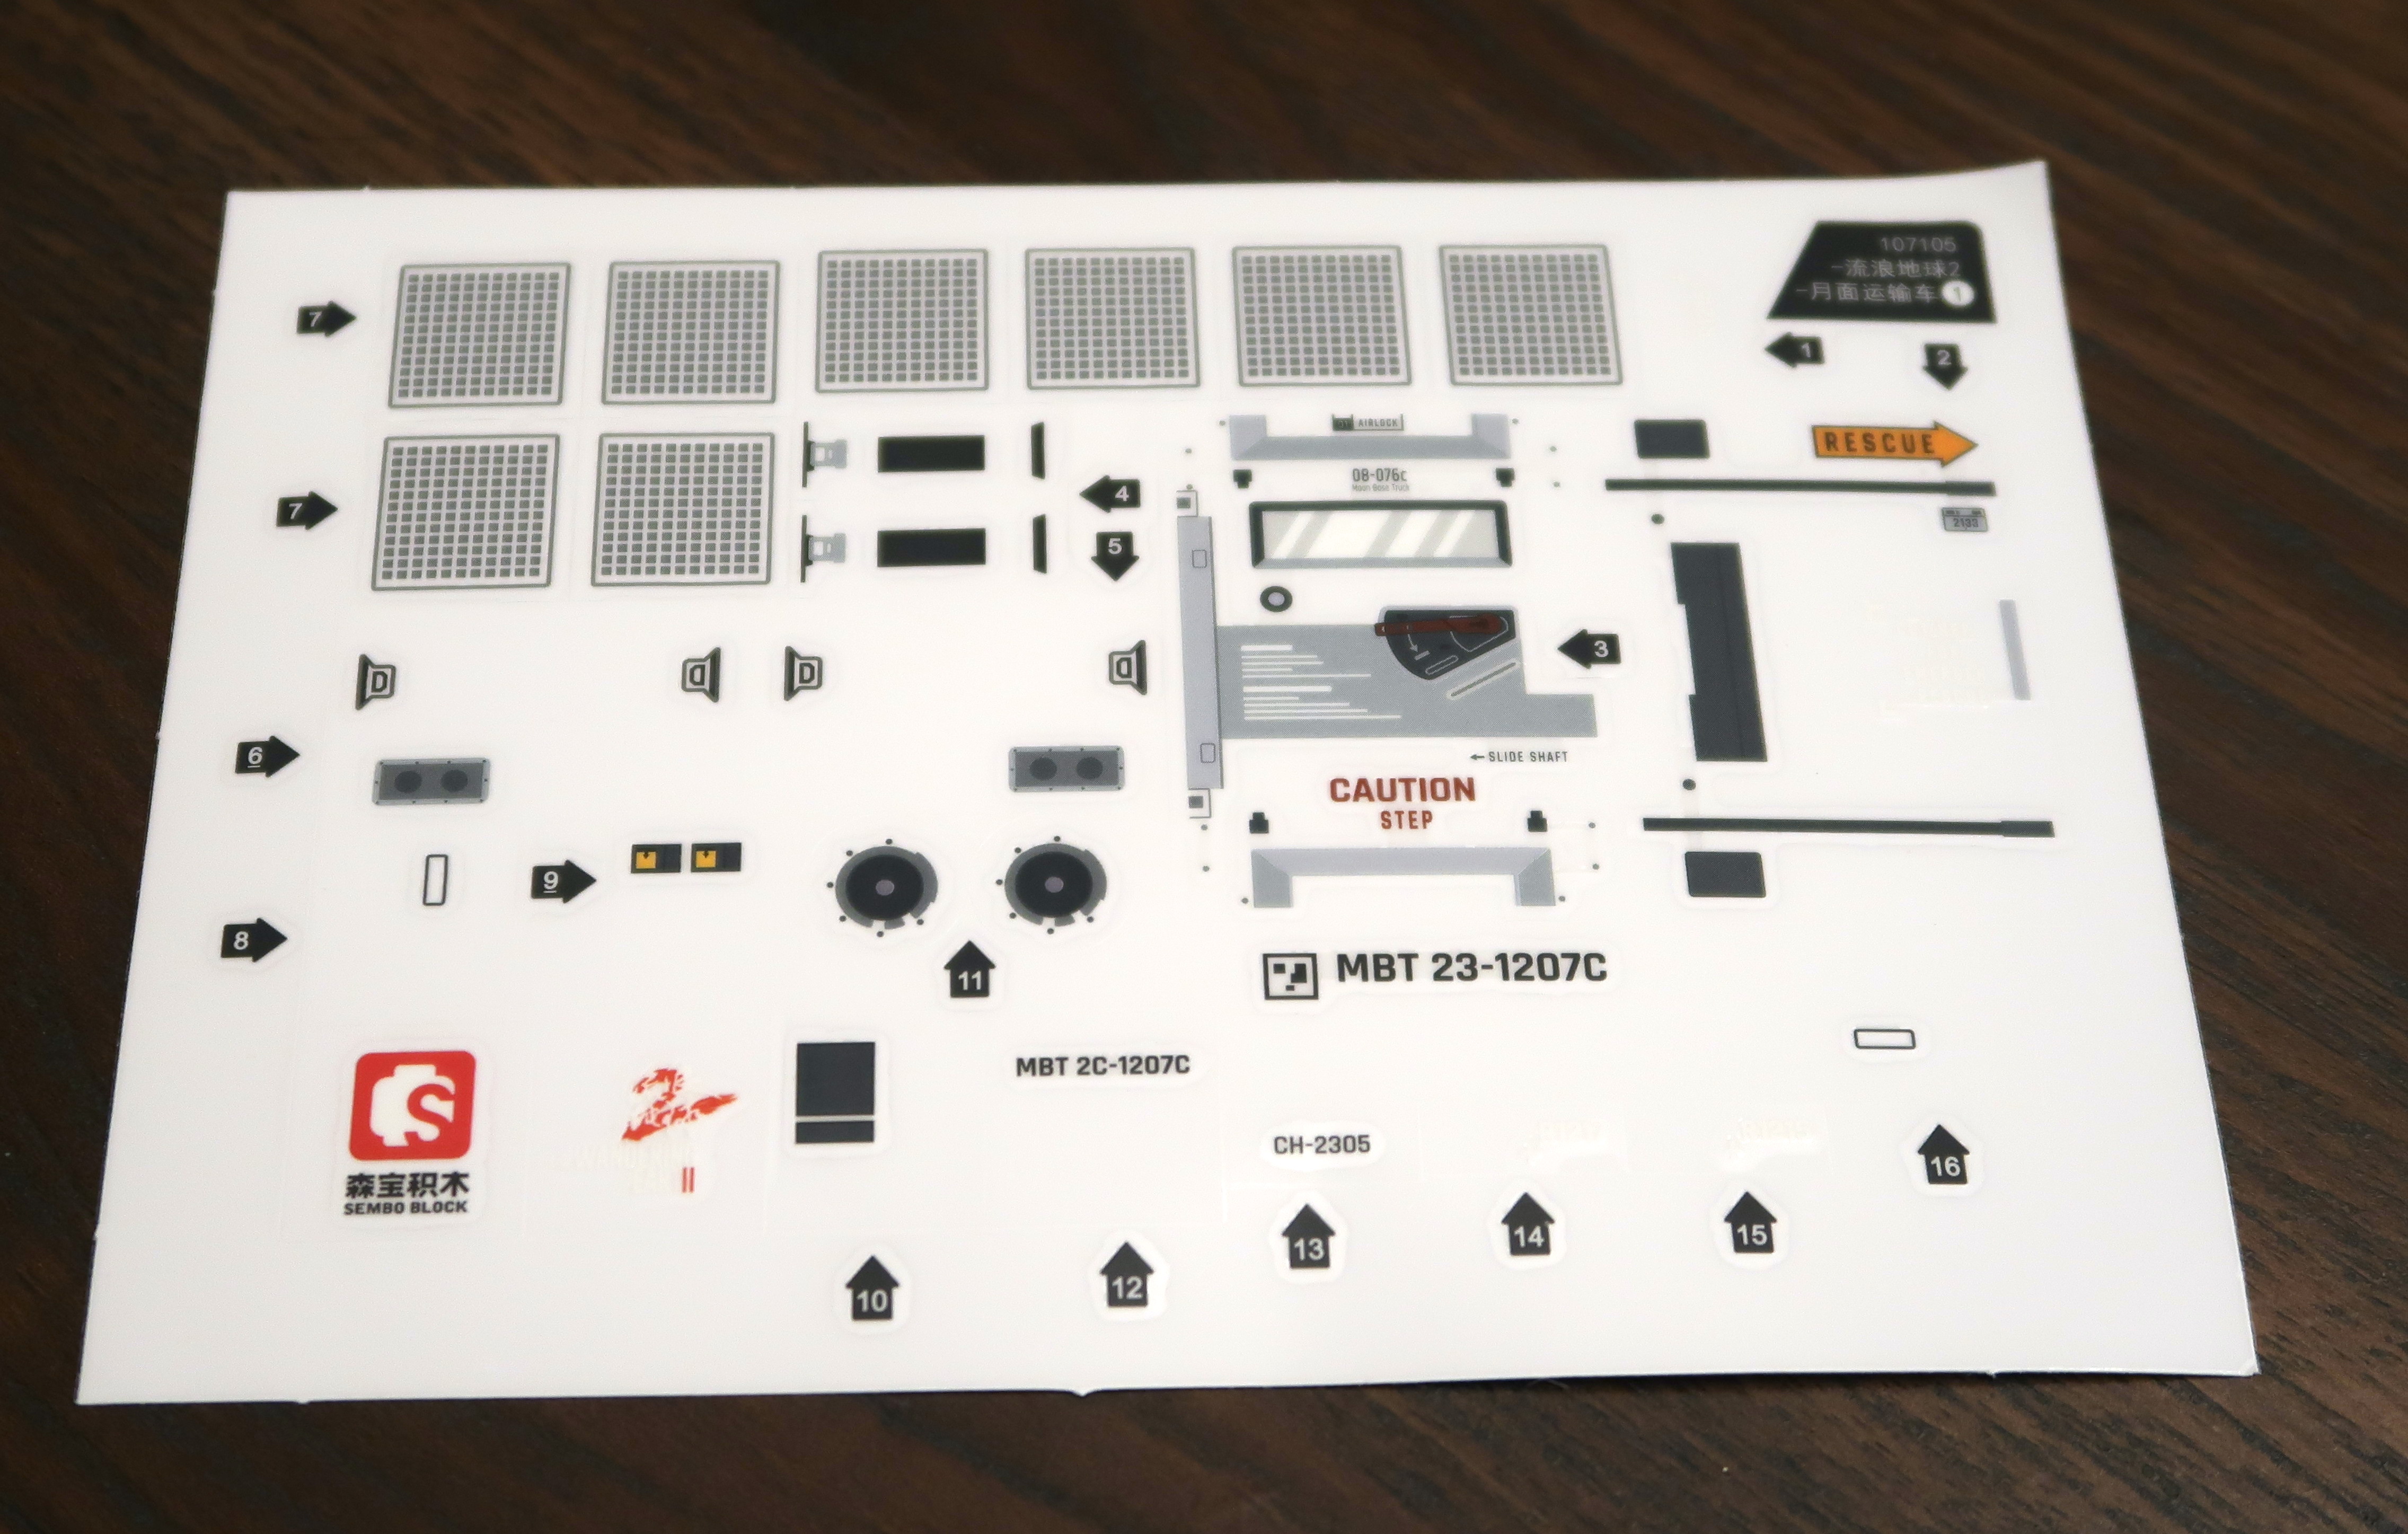
The Moon Base Truck set comes with three sticker sheets. These stickers are transfer style stickers which are very thin and if you are not careful, the stickers are easy to tear.
Once these stickers are stuck onto a surface, they cannot be removed. With my shaky hands, I can't always place the stickers straight, so you might notice that some of the stickers I applied might be crooked.
Each sticker sheet has an extra sticker for the Sembo and Wandering Earth movie. If you have some spare 2x2 tiles, you can put the stickers on them.
The light kit
A small battery box with two blue led lights are included with the set, which get installed in step 5.
The minifigures
The set comes with 5 minifigures who are characters in the movie. Each minifigure comes with it's own instruction sheet and they are not referenced in the main instructions at all. I wonder if Sembo sells the Lunar Truck in some countries without the figures to avoid being confiscated.
The five figures all have unique faces and come with both hair pieces and spacesuit helmets with yellow visors.
The bodies are very detailed front and back. Even the arms are printed.
It's time to build the Wandering Earth 2 Lunar Base Truck!
Step 1
Step 1 builds the chassis of the moon base truck. I call it a skateboard, as I imagine the platform to house Electric batteries inside.
Bag #1 consists of 5 smaller bags.
There are 4 bicycle tires in a separate package.
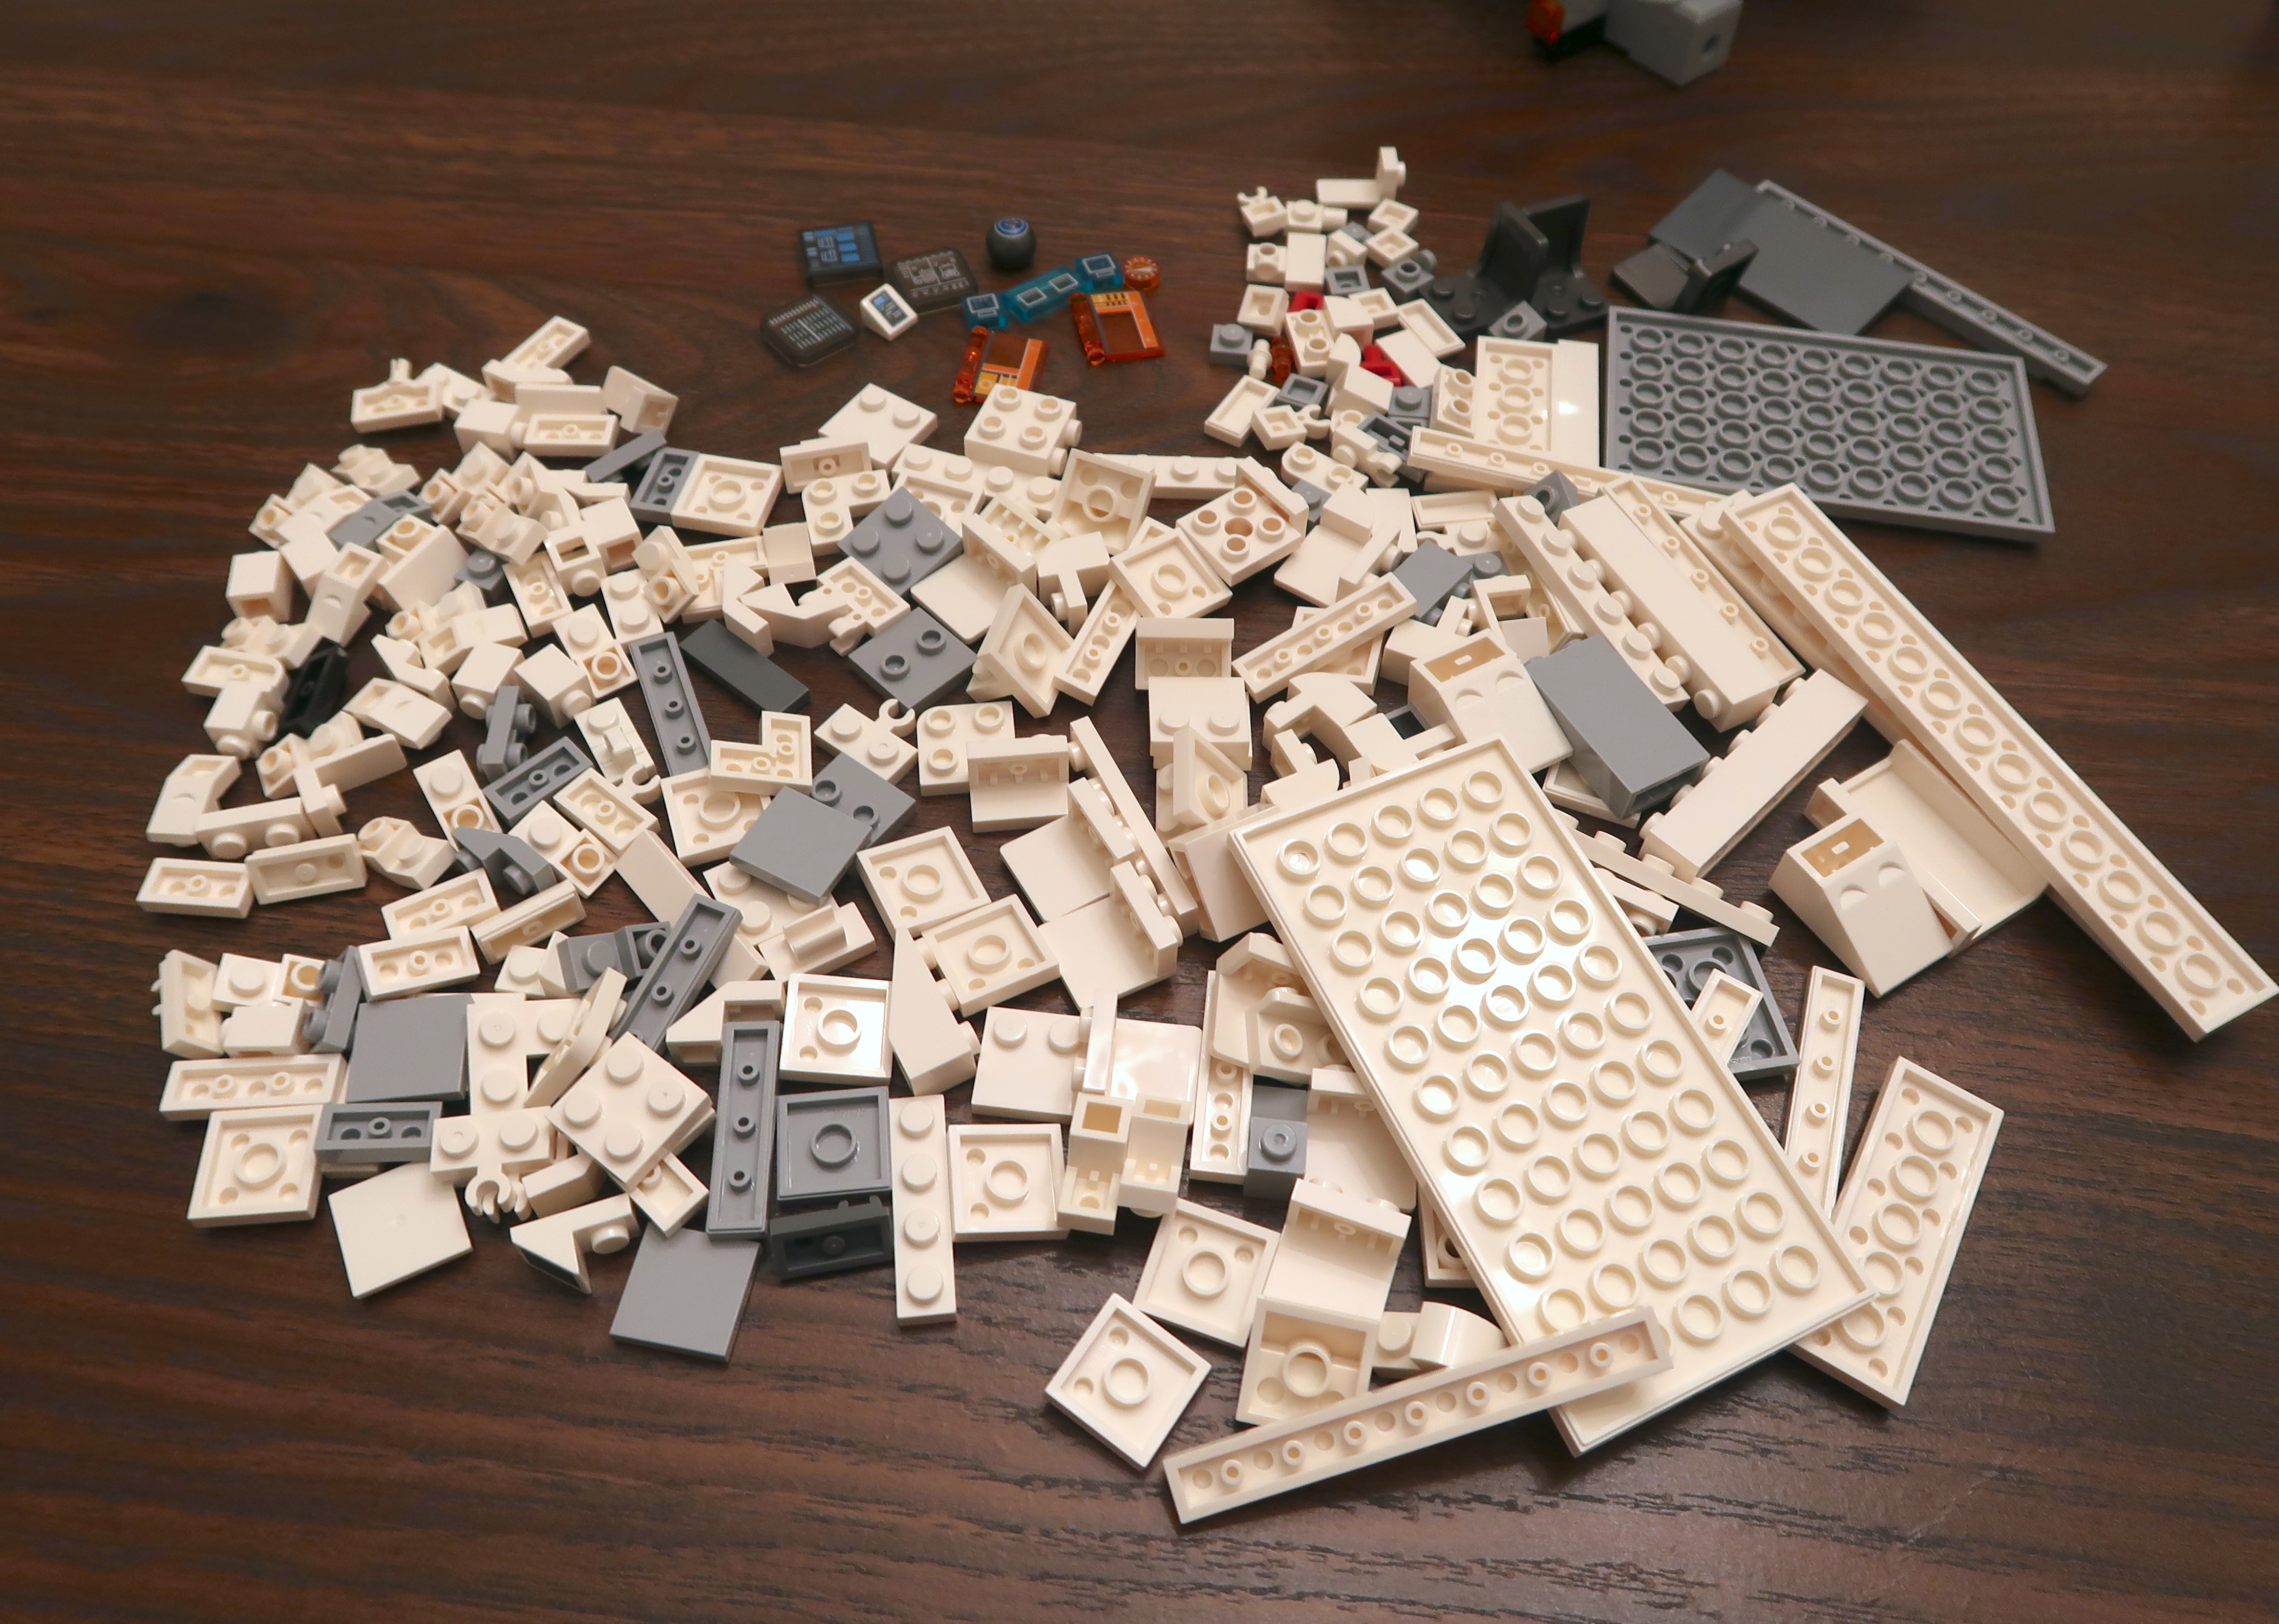
Here's all the parts to build the chassis. An orange brick separator is also provided.
This set contains some unique parts you won't find in a regular Lego set. Check out those grill parts, they look pretty cool.
This step is fairly straightforward and nothing too tricky to build here. Let's move on to step 2.
Step 2
We'll complete the construction of the skateboard chassis and start on the lunar truck body in step 2.
Five more bags of parts with a molded front window housing.
Parts dump for step 2.
The front windscreen has several window inserts on the top, bottom, and side.
Suspension bits added to the chassis. The bicycle tires are wrapped around the two cylinders of the front and rear axles for decorative purposes.
Step 3
This step will add some interior detail to the cab as well as tile the back section of the moon truck.
There are 6 bags of parts for this step.
All of the interior pieces are printed, not stickers, yay!
The rest of the parts to be used in step 3.
A very cool instrument cluster and screen.
The ball steering wheel doesn't clutch to the pin at all, so it falls off whenever I move the truck around. I wonder if I can use something else to attach it? Looks like a medical kit is attached to the wall, next to the driver's seat.
A couple of extra seats on the opposite side of the cab. The floor of the cab is completely smooth, so I might have to replace some of the tile pieces with studded ones so I can place some minifigures. in a standing position.
I placed one of the minifigures in the driver's seat.
Step 4
Looks like this step focuses on the central pillar/pedestal in addition to finishing off the truck bed.

Five bags of parts in step 4.
Here's the rest of the cab built up. The roof will come on later.
We also finish the truck bed by adding the low walls. Looks to be seating for six but there's no studs to attach the minifigures to. I would love to turn this area into a fully enclosed lab in future.
There are two sliding panels on the back of the cab which we will look at in greater detail in the next step. Here we are doing a test fit of the body to the pedestal. I find that the body kind of wobbles and it's not as stable as I like.
Step 5
There are 6 parts bags in this final step.
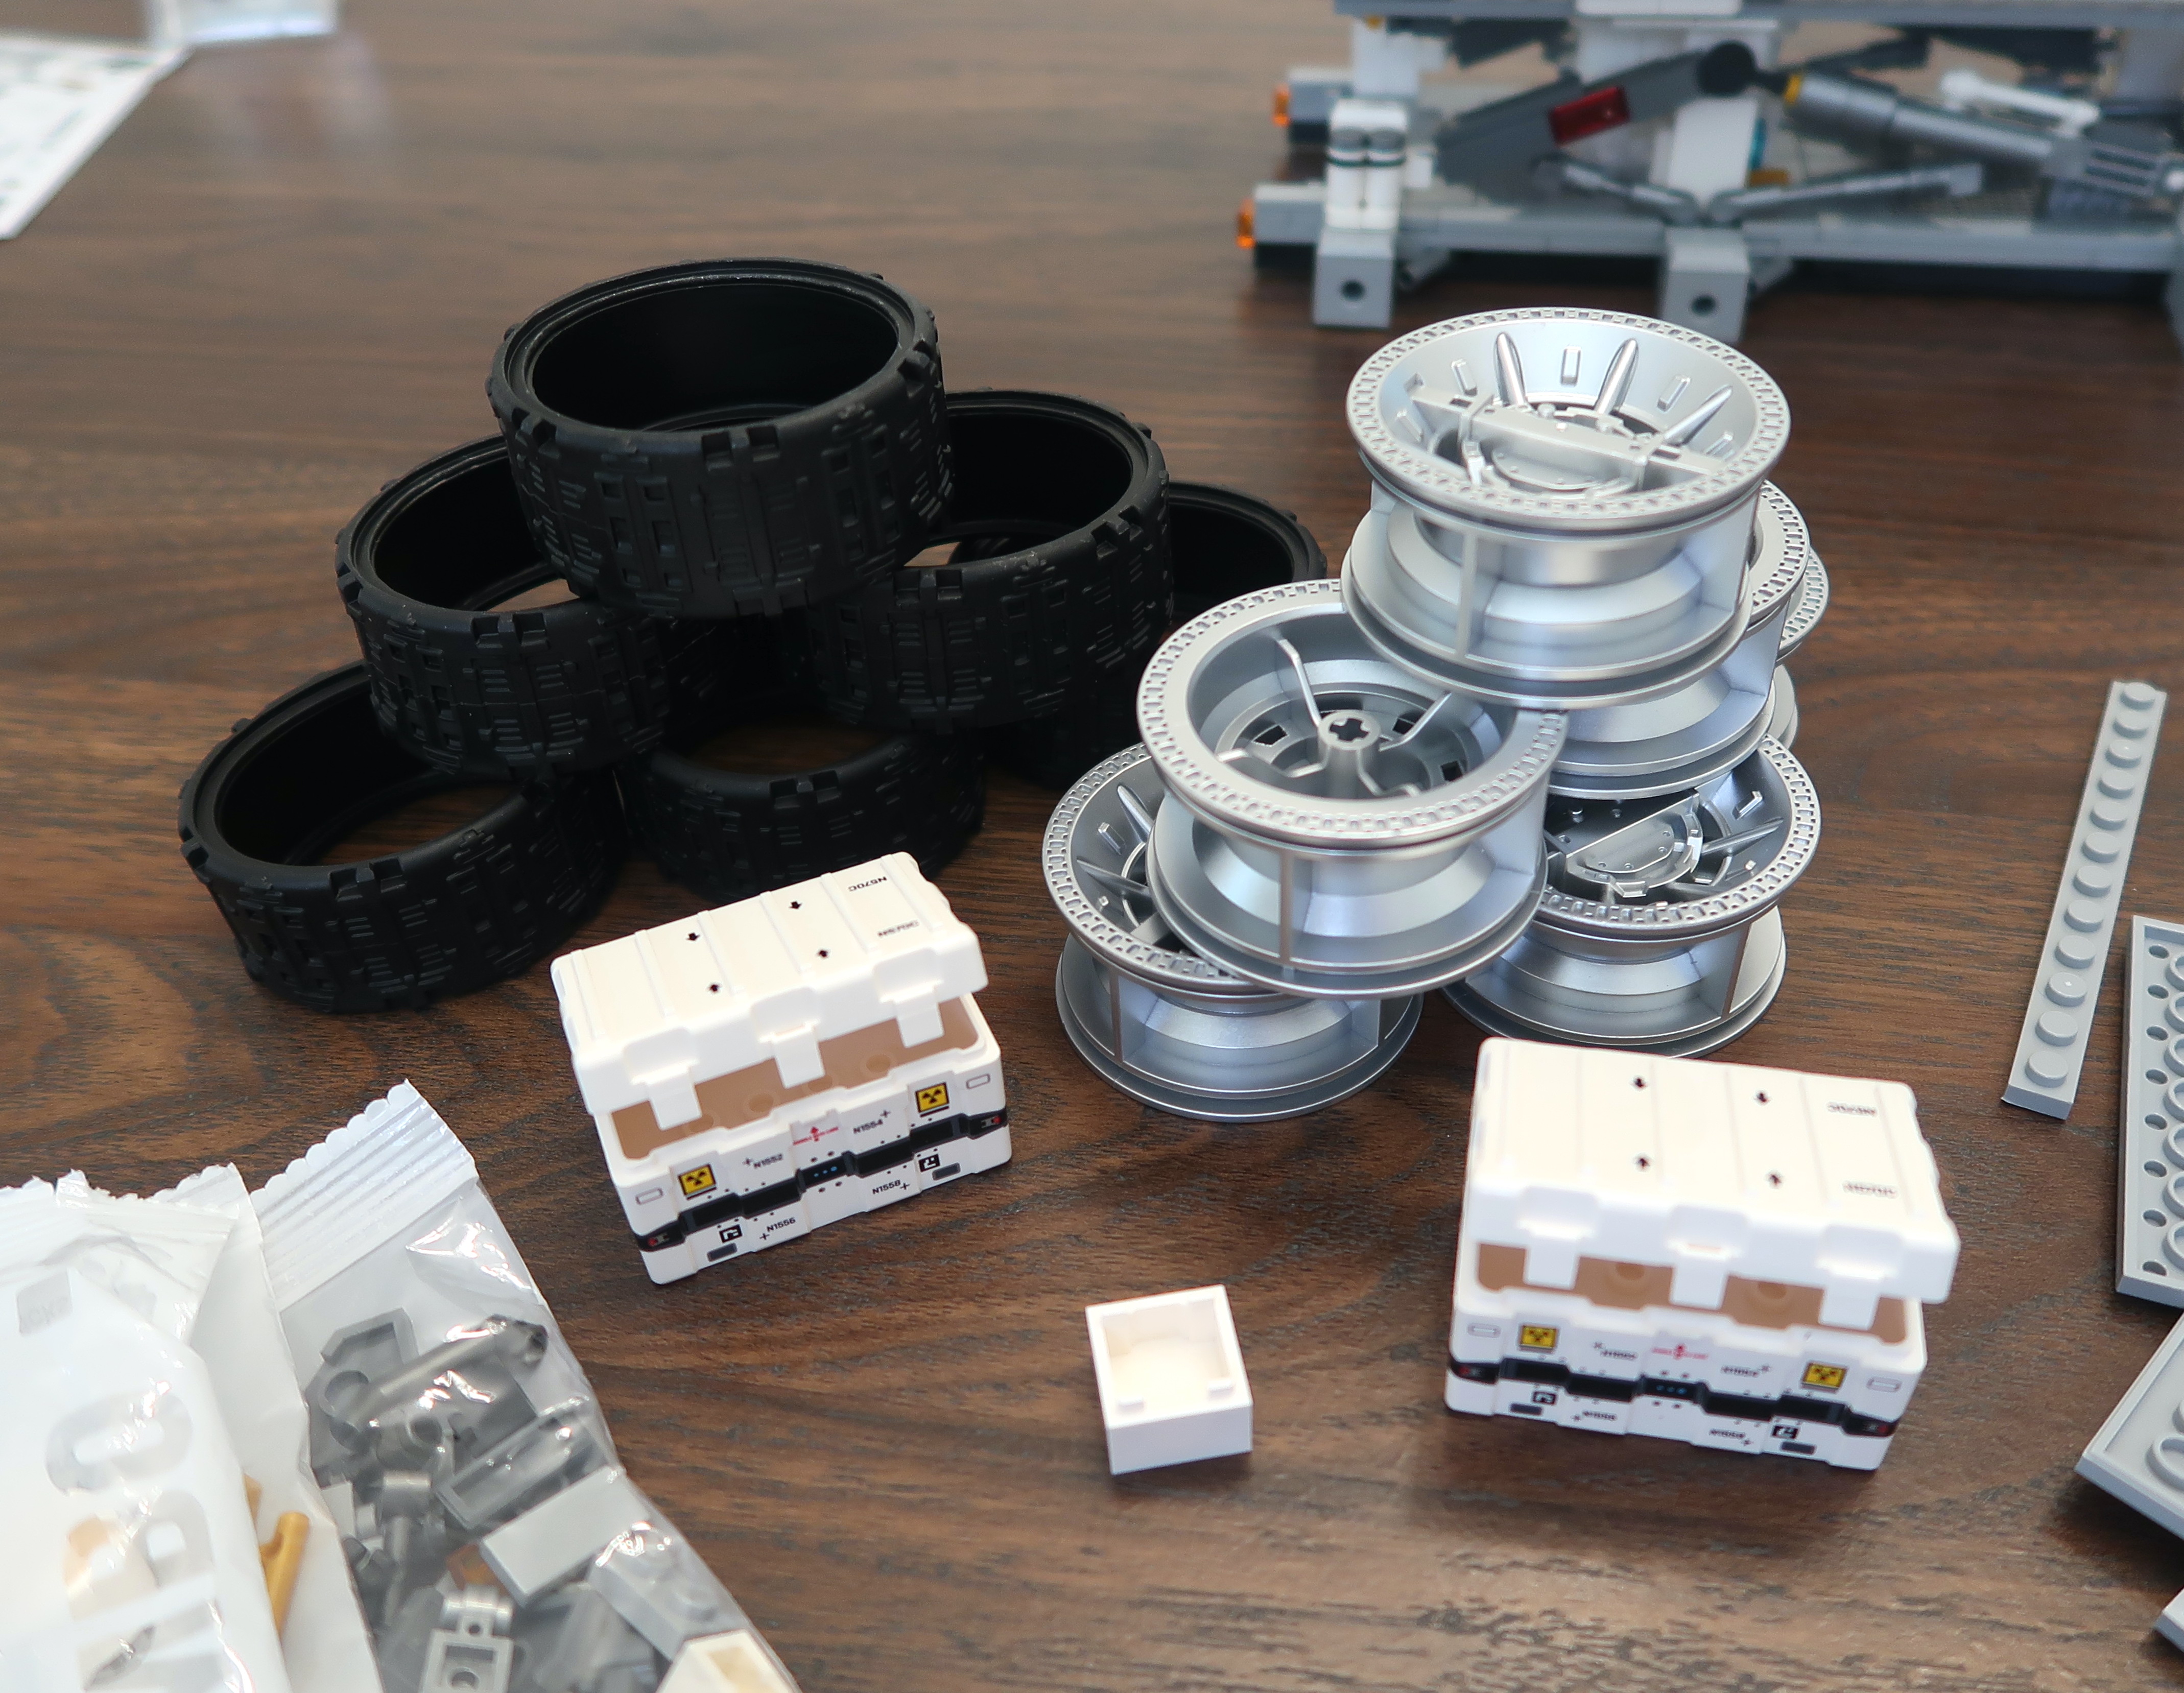
The wheels and rubber tires and uniquely molded storage boxes can be found as well as the light kit. Definitely have not seen these wheels before. I think Sembo did a great job replicating the wheels from the movie version.
The parts dump for step 5.
At this point, the truck is ready to be attached to the chassis and the battery box and lighting have been installed. But I'm not really liking the how it's designed so this is something we will address later.
I finished assembly of the roof panel and it goes right into the opening.
Time to apply some of the stickers! There is a giant sticker that goes over each of the door panels and you only have one chance to get it right. Luckily, I didn't screw it up. I left off any stickers that had to be placed over several bricks. Both of the door panels slide, but I would have preferred that one of the panels was stationary. Since there's no airlock, you'd definitely need to keep your spacesuit on inside the cab whenever the door is opened.
And here is the finished Lunar Truck. There are a few extra steps to install little attachments to the front and side of the truck, as well as the antenna dish. There are stickers for the antenna dish that I didn't apply.
These are supposed to be some of the nuclear bombs which are set off in the movie to blow up the moon.
Here are the last three accessories that are included in the Wandering Earth 2 set. A small container with lid, a laptop computer and a small robot dog called Benben who is also featured in the movie. There is no mention of him in the instruction guide nor how to put him together, but Sembo obviously provided the parts and stickers to build it as an easter egg. I only found out about the robot dog from a Chinese review of the Lunar Truck.
This is a picture I found on the Internet. At first I assembled the robot dog as per the picture above but when I went back and watched the movie, I think that the pictured legs above are upside down?
Final Thoughts
I really enjoyed the build of the Wandering Earth Lunar Truck because I think it looks really unique and there's a lot of play features such as the minifigures, the missile boxes, and the other included accessories. The cabin is easy to access by lifting off the roof and opening the rear sliding doors. The rear bed has plenty of room to carry soldiers or supplies. The blue lighting adds a really special effect although I kind of wish they had included lighting for the cabin interior as well. and the headlights too.
Here are some things that needed improvement.
1. The Stickers
First off the stickers. I hated the stickers because once they are applied, they cannot be removed without tearing them, so it takes a lot of time and steady hands to apply them. I only used them where it was needed such as the sliding doors and the rear solar panels. I think Sembo should use the normal stickers and not these transfer type stickers. Or better yet, use printed parts instead of stickers.
2. The Axles
During the final assembly of attempting to attach the truck body to the chassis, I had difficulty slotting in the pedestal into the base. When I tried to apply downward force to the truck, the middle wheels and axles popped off. Maybe I should have removed the wheels first? At any rate, I discovered that the middle and rear axles needed extra bracing.
I fixed the issue by installing 2x6 plates from my brick stash on the middle and rear axles, top and bottom to strengthen the axles. In the picture above, I've just put them on the middle axle.
3. The Light Battery Box placementAs shown in the instructions, the battery box for the LED lights sits behind the rear solar panels. To activate the lights, one needs to remove the solar panels and access the small switch on the side of the battery box. You'll need tweezers or something because I could fit my finger in to use the switch.
Here's the original location of the battery box.
I decided to rotate the battery box 90 degrees so that the switch is facing the rear making it easily accessible. Since there is free space under the truck bed, I felt it would be better to have the battery box mounted underneath. Due to a lack of studs on the battery box, I had to design and build a housing for the battery box. The picture above was my first attempt.
I ended up making a secondary pedestal for the truck bed as shown above. The battery box is housed inside the pedestal. I ended up killing two birds with one stone, because not only have I addressed the battery box access, I have also eliminated the body wobble by making the truck bed solidly attached to the chassis.
Now turning the lights on and off is easy peasy.
Other changes I made
In the original design, those cool grill pieces were placed on the chassis where you couldn't really fully appreciate them. I think they look way better on the front of the truck now.

And even on the roof.


The Sembo Wandering Earth 2 Lunar Truck.
Here's how the Wandering Earth 2 Moon Truck displayed with the Wandering Earth Cargo Truck. Which one do you prefer? Let me know in the comments!
Summary
Here's a quick recap of the set details.
Brand: Sembo
Set Name and Number: Wandering Earth 2 Moon Base Truck 107105
Piece count: 1339 pieces
Minifigures: 5
Printed parts: Yes
Stickers: Yes
Lighting: Yes
Lego Compatible: Yes
Retails for around $70 CDN.
Where to get it:
AFOBRICK
You can get this and other cool and unique building block sets from
Afobrick.com Use my code itsnotlego to get an extra 5% off your entire purchase.
TEMU
🛍️ SEMBO BLOCK 1339 Pieces Moon Base Truck Building Kit, ABS Plastic White Vehicle Construction Set with Built-in Light Module, Educational Toy for Ages 6+
🎉 Coupon price[CA$64.38]
ALIEXPRESS
Thanks for visiting, see you next time bye!