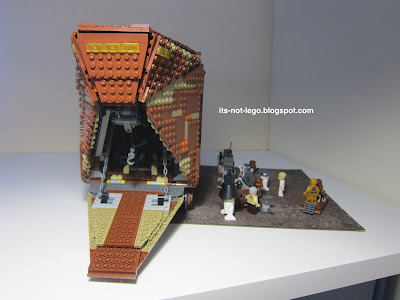
Hi there. Today we are going to review the building of the Lepin UCS Star Wars Sandcawler 05038. As with my other bootleg brick set reviews, I will take pictures every ten steps or so to show you the progress of my construction. I don't bother sorting my bricks, so I just leave them in their plastic bags and try to memorize where I last saw the parts I need. Sometimes, it works and sometimes it doesn't, lol.
Step 10
Here is the bottom of the Sandcrawler after step 10. The first pic above is also step 10. As I'm building it, I can't help but think that it's not as big as I imagined the set would be. So far the bricks look fairly clean and there's not a lot of scuffs or scratches as I encountered on the Lepin Modular sets. Clutch is good and no loose parts yet.
Step 20
Before I continue back to the construction, I want to digress a bit. I've accumulated a fair amount of bricks from Lego and non Lego sets over the years. Where possible I want all of my bricks to be as compatible with Lego as possible. That includes clutch and colour similarity. In the event I find some bricks to be substandard (like MegaBlocks), I keep those bricks separate from the standard ones.
A lot of people would probably just throw out the off colour or poor fitting bricks but I keep them and then look for opportunities to use them without affecting the appearance or clutch of the model I'm building.
In the case of the UCS Sandcrawler, there is the perfect opportunity, here in step 20, to swap out some better Lepin bricks for some crappy Megablocks bricks. There is a subfloor between the brick tiles if you look at the picture above. Bricks are used to provide stability but are never seen again after the plate bricks have been applied. It is here, where I have swapped in some Megabloks for some Lepin bricks.
Step 30
If you couldn't quite figure out which bricks, I have now substituted them with pink bricks in the pic above. Yeah sometimes I get stuck with these off-colour bricks but there's little purpose to them. So I bury them inside a building or inside the floorboards of this Sandcrawler. Another example where I used pink bricks is under the
Lepin Town Hall modular front steps. The bricks that came with the set originally can then be repurposed in another set, or be used in the case of missing pieces. Once I put this Sandcrawler together, it won't be coming apart, so only you and I know what's inside of it. Shh, it's our little secret. I'm curious to know if it's just me or does anyone hide undesirable bricks inside their sets?
Ok, back to our construction process. In step 30 we are putting down the gearing that will help to turn the future Sandcrawler tracks.
Step 40
We've now hit step 40 and page 23 of the manual.
More technic pins and bricks applied.
Another view of the knob and gearing that will steer the Sandcrawlers giant treaded wheels.
This will all be invisible soon.
Lower rear view.
At this point, everything is holding together well and I have had no missing or deformed parts.
I want to mention that the Lepin UCS Sandcrawler manual is 143 pages long and there are 121 steps used to build this iconic Star Wars vehicle. I've decided to split the construction process into three parts so that each blog post will span 40 steps of the build, so the next blog post will cover steps 41 thru 80 with the obligatory pictures of course.
If you missed the preliminary pre-construction blog post of my Lepin Sandcrawler, you can find it
here. See you in a few days!


